Hi, Thanks for visiting my website. My name is Will and if you have questions
or would like to
contribute projects or ideas you can contact me
Transplanting Bonsai
This is a tutorial on how to transplant a bonsai. This is a necessary part of raising bonsai. Every tree should be transplanted every 1-3 years depending on the size and growth of the tree. This particular one is a Japanese pagoda approaching 2 years of age.
So this is the first transplantation of this particular tree.
The basic rules are pretty much the same regardless of the age of the tree.
I also have a video showing this process at the bottom of this page.
Transplanting: Typically you transplant into a new dish that is 1-2 inches larger than the previous dish. This refreshes the soil and gives the tree a little bit more root room. And with this being the first transplantation of this tree we are also switching it from a deep container to the more appropriate shallow container.
Bonsai are grown in shallow containers with the roots spread out in a horizontal manner. This helps to keep the tree small.
I have a couple of different bonsai that I am transplanting so you will see pictures of both.
Some Quick Tips about Soil:
For a young tree like this I prefer to use a regular potting soil rather than a bonsai soil. I still want some good growth with the tree and I want it to keep growing and continue getting thicker. And I don't like to use any kind of fertilizer on this size and age tree. The extra nitrogen will encourage the leaves to grow larger and I don't want larger leaves.
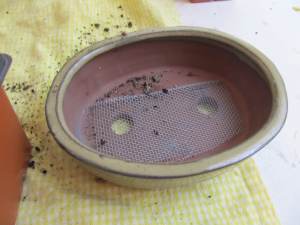
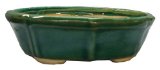
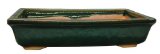
This picture shows one of the dishes. Things to note are that it is a typical shallow bonsai dish. And it has holes in the bottom. You absolutely have to have a dish with at least 1 hole in it. It is important for water to not accumulate around the roots of the tree.
Place a piece of screen over the holes so the soil doesn't fall out.
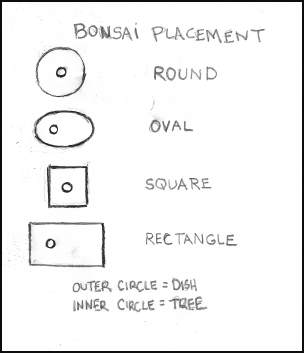
Now let's take a look at how the tree should be planted in the dish.
This is what is traditionally accepted because of the aesthetics of how it will look. You can of course plant the tree any way you like. But as a rule of thumb if the dish is round or square the tree goes right in the center. And if the dish is oval or rectangular you plant the tree offset to one side at about the 1/3rd point.
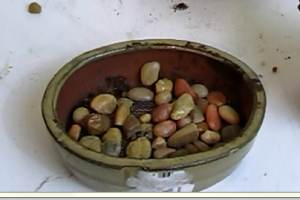
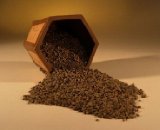
Next put a thin layer of stones or pebbles in the bottom of the dish. This too ensures that the water doesn't stay in the pot and rot the roots of the bonsai.
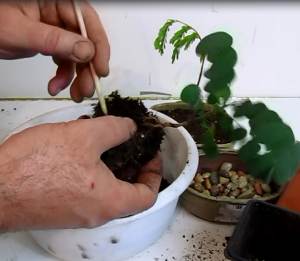
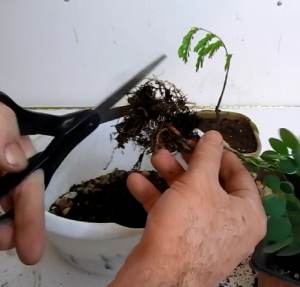
Next, remove the bonsai from its current container and gently remove most of the soil from the root ball. Use some kind of a tool like a chopstick to help remove the soil. No need to be very thorough about it. Just get most of it out. Particularly the solid ball in the center of the root mass.
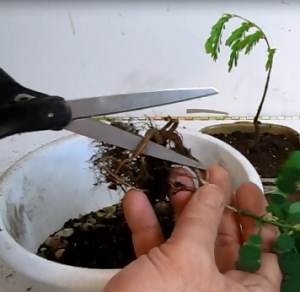
Now trim away a little bit of the roots. Typically for older trees you would trim about 1/3 off. But for a young tree like this I recommend only trimming about 1/4 th. This enables it to continue to grow and help keep it stable after the transplantation.
Next look for the leader root. This is a main root that shoots straight down. Trim that down by half or more. The purpose of this root is to shoot straight down and stabilize the tree in the ground. We don't need this root and we don't want shoots to go straight down. So we trim it to reduce vertical down growth and to stop that root from sapping energy out of the tree.
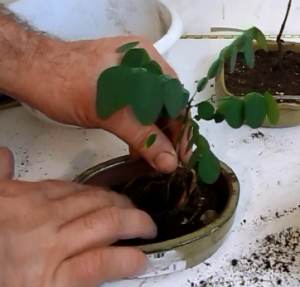
Next place a thin layer of soil in the dish and place the bonsai in the proper position. Use your fingers to spread out the root system horizontally.
Now put more soil in the dish to fill it up and a bit mounded around the tree.
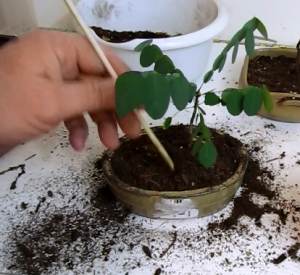
Use your chopstick to dig into the soil removing the air pockets. Because of the root system there will be lots of air pockets. You will see the level of the soil go down as you do this.
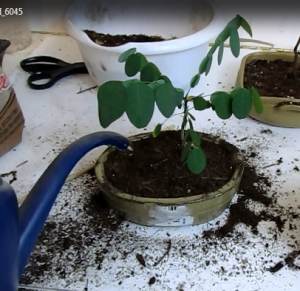
Once that is all done you should water the bonsai thoroughly. Soak it pretty well. Monitor it over the course of the next few days to make sure everything is ok.
Do you like making projects and exploring a variety of hobbies?
Sign up for my free newsletter. I give you regular updates on hobbies and projects you can make. it is totally free and I don't share your email with anybody.