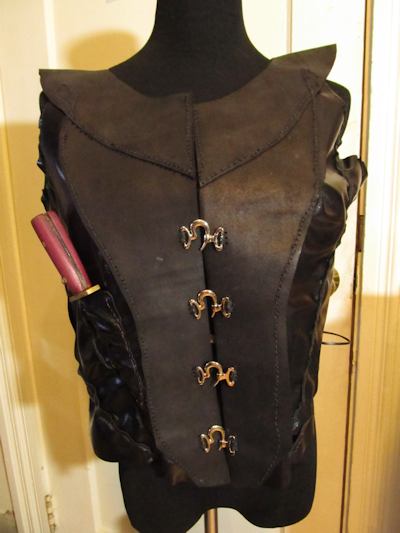
We decided to make a medeival leather rogue vest to get some practice with leather and to play with the idea of crafting our own cosplay accessories. To begin, I found a source image on Google that I really liked. The product was labeled as a "Brigandine Leather Vest" and had a design almost exactly like the prototype vest you can see here.
I will forewarn you that no one here at STC has any previous experience in making clothing or working with leather in the past. So, if you have absolutely no idea what you're about to get yourself into, that is not a problem, because neither did we. Opting out of doing any research on classical vest designs, we were left to piece it together step by step off the top of our heads.
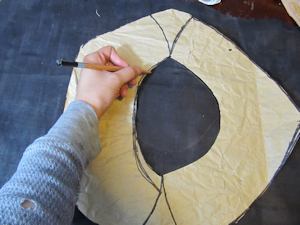 The first thing I did was take a large sheet of newsprint-like packing paper, cut a hole in it large enough for my head to go through, and drape it over my shoulders like a poncho. Using a penicil, I drew very general lines indicating where an appropriate neckline would fall on my body type, and marked off my shoulder width, torso length, and waist/hip width all using the same piece of newsprint paper.
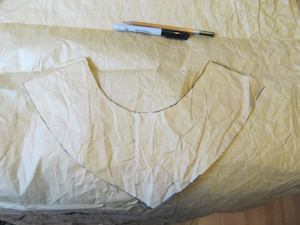
You can make your vest with any design you enjoy, I chose a teardrop neck-line and tried to taper all the pieces of the vest inward toward my waist.
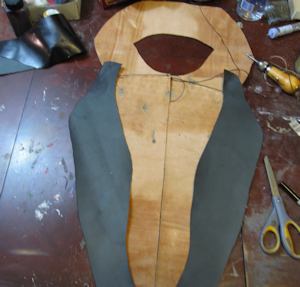
I used a medium-weight leather that's pretty thick for the shoulders and the majority of the front of the vest because the neck/shoulder piece is bearing the weight of the rest of the leather, and the two main strips of durable leather down the front are where the clasps on the vest go.
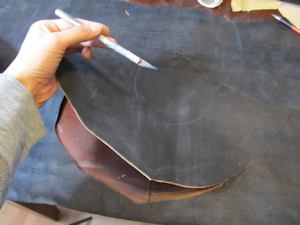
After I had the general shapes of my torso sketched out on the paper, I traced it all onto the kid skin and medium weight leathers (remember: everthing but the neck and two main strips that run directly from the collar bones down to the pelvic area are on kid skin). Kid skin leather is nice to work with because even the slightest pressure onto the leather leaves a mark, so it was as simple as literally using a dull pencil to trace over the lines once more, which set me up for the next step, which is to cut out the pieces of leather with an exacto knife.
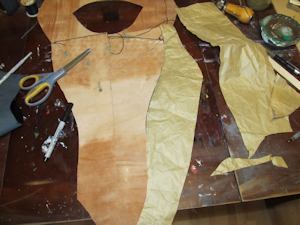
Some tips in doing that to make sure your pieces are symmetrical is to cut out one side (left or right, it doesn't matter) then flip that strip over onto more leather and cut out the inverse of it.
 Make sure you're cutting into the right side of the leather, you don't want one side matte and the other side vinyl! We do have some photos illustrating that.
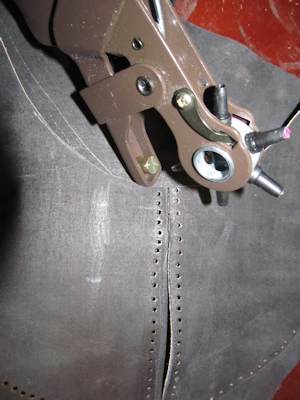 It is important to try to make sure all your pieces line up pretty well in order to assemble them. This part is a lot like a puzzle and it's very easy to do, you can eyeball it out without too much folly. Once I had all my pieces cut out and lined up pretty well, I began to use a leather hole puncher to puncture all of the strips of leather. Trust me, this step is redundant after a time but will cut the effort of sewing with the awl in half. I used the smallest possible hole setting on the tool because I knew I would be stitching it together using a very fine, hemp-based waxed leather twine for the job. This is recommended, and is the most durable of all the twines and cording we tried.
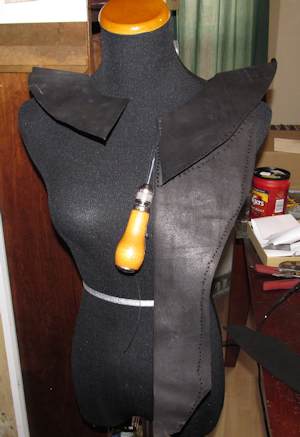 The first step was to attach all the medium-weight leathers together. Hanging my collar piece on my mannequin, I decided to tuck the front lapel pieces underneath my main collar because it was the most aesthetically pleasing. I used a basic lock-stick method with black hemp twine in the awl for this job.
 The lock-stitch method is a very basic and standard leather-working technique, if you're not familiar with it, an explanation can be found HERE.
Once that was finished, I used my utility knife to trim off any excess leather and began to attach the remaining strips of kidskin using the exact same process. There may be some wrinking or "ruffling" of the leather as you go. You can minimize this effect by taking hold of the part you're stitching and pulling on it until the tension of the seam has loosened up.
A good idea is to try the vest on as much as possible. This will give you an indication of how well it's coming together, and show you if you have enough room for your neck and throat to be comfortable with the thick leather hanging off your collar bones, and also indicates if you need more room for your arms/armpits to fit in comfortably to the vest. Remember you can trim down the leather as much as need be during this entire process by using your utility knife at any time; any part of the leather, whether it's a matter of giving yourself larger arm holes, a larger neckline, etc.
 Continue with the tutorial
Damascus steel is challenging to make. But you don't have to make it for a knife. You can buy a blank and make a knife with it. I show you how in this tutorial: Make a Damascus Steel Knife Part 1 (I also have a video for it)


 Make a Damascus Steel Knife -
  How to make a leather knife sheath -