• At this point, you should now have two identical shapes. See video for clarification. Again, the shape looks about half-way between the letter H and the letter A. (That's the best description I can give it.) Now that the glue is dry, use masking tape to wrap it around the area you just glued. This has two reasons: first, you'll be adding additional support to this area of the cardboard; second, you'll cover the unsightly clumps of glue with something a little more pleasant looking. See video for full demonstration.
• These look great, but they're by no means long enough to replicate the video game's design. The good news is we have the remedy! Take a fresh full length paper towel roll and cut it lengthwise- exactly as you did with the first ones.
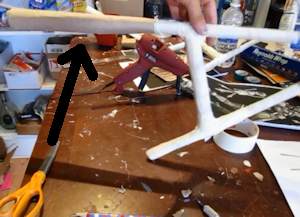
Take your H/A shaped handle and place it in front of you. Choose a side roll to begin working on- left or right- it does not matter which. Whatever you decide, slide the cut open cardboard tube underneath it until you reach the horizontal bar. At this point, begin wrapping that end of the cut cardboard around the taped up tube. Wrap one end as tight as you possibly can, then use masking tape to secure it in place. This will extend the arm of the katar by about another foot. Ideally, you should have the end connecting to the other pieces very narrow, growing slightly wider and more conical as it reaches the end nearest you. Cover this entire piece with masking tape and repeat this process on the remaining three "arms" of the katars. TWO (2) extensions will be needed on each katar since each katar has TWO (2) arms. Again, the video should be very helpful with this step if there is any confusion.
Once you're done, set them aside. These are your handles and they should be looking pretty sweet. It's time to move onto the face plate and blade of these weapons.
Listen, I've been drawing for a long time. I made the designs on the template freehand, in an effort to simplify the design shown from my source image (courtesy of Google.com image searches). If you feel more comfortable creating your own face plate design, I encourage you to! If not, the template will help you out.
Steps 12-15 are assuming you've opted to use our template.
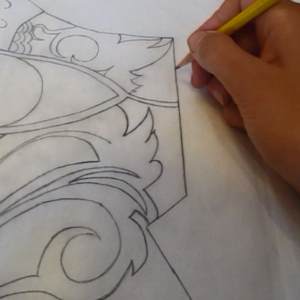
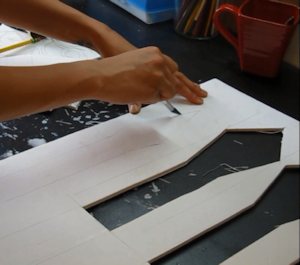
Piece together your template with tape. There are four pieces: top left, bottom left, top right, bottom right. Once that's finished, take a piece of tracing paper and trace the image.
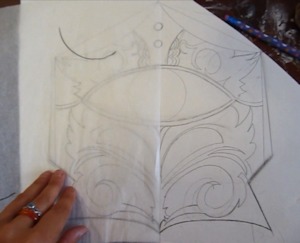
Flip the tracing paper over and retrace it on the back. This is always an important step because it means that when you put the tracing paper down on the foam board and go over it with your pencil, you'll leave a graphite imprint on the foam board (which you WILL need).
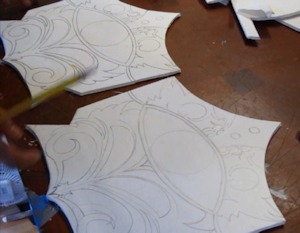
You'll need TWO (2) face plates total. Once you have two of the face plates on your foam board, set aside the tracing paper and use your pencil to darken every single line you see. This is crucial for the painting process.
When finished, cut out the faceplate shapes. Set them aside.
Now, take the templates for the blades and piece them together. There is a thin blade and a larger blade, labeled A and B. Piece them together and trace around the edges on your foam board.
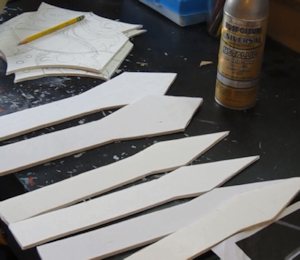
You'll need TWO (2) A pieces and FOUR (4) B pieces total. See video for details. When finished, cut out all the blades with your X-acto knife.
At this point, you should have two completed handles, two cut out faceplates, and six blades (two large, four small). You're doing great so far. Let's keep going.
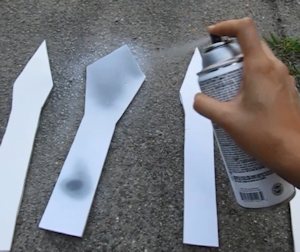
Because you're going to paint your blades with spray paint, you need to go outside. Never use spray paint indoors. Find a place outside where you can paint them. If needed, put some old newspaper down on the ground to protect your sidewalk/porch/patio/etc. Now spray paint all of the blades (front and back) and wait for them to dry. When they're dry, take them in and place them aside.
 Let's continue with this tutorial Let's continue with this tutorial
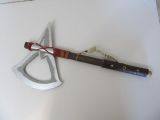
Make the Assassin's Creed Tomahawk
This a great project based off of the new Assassin's Creed. Here I show you how to make the Tomahawk wielded by the main character Connor out of a broom handle and some foam board. Make the Assassin's Creed Tomahawk

Do you like making projects and exploring a variety of hobbies?
Sign up for my free newsletter. I give you regular updates on hobbies and projects you can make. it is totally free and I don't share your email with anybody. |


