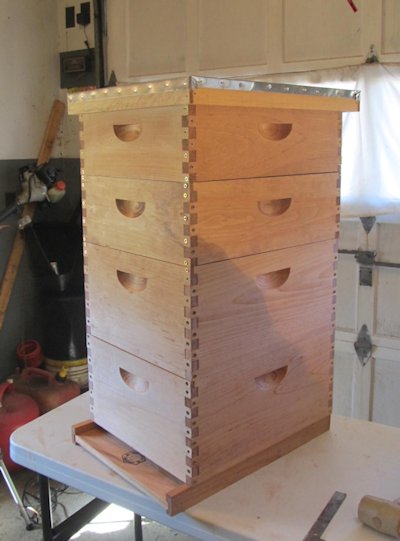
We take two hives through this process. And here is one of them. There is still some more work to do on this hive but this gives you a pretty good idea of what you end up with. A beautiful hive!
This one has been stained with one coat and built. From here we stained it with a second coat to give it a richer look and we sealed it with fiberglass resin.

Would you consider a donation of $1 to support my work? Paypal makes it very easy and safe. Click here to donate - Every little bit helps Will to keep making great tutorials and projects. Thanks!
Overview
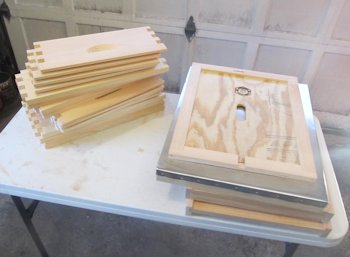
You can purchase beehive parts like this. It is an economical way to have a beehive. And it just takes a little bit of work to get the parts assembled and ready for beekeeping. In this tutorial I will take you through the process of what to do and I will give you some options.
The process I show you has three stages. First we stain all the exterior parts of the wood, second we assemble the hives and third we seal it all. And you have a lot of flexibility with this. You can build it all then stain/seal it. Or you can paint it all then build it. There is really no preferred way to do it. I will show you the way we did it.
Beehives are kept outdoors year round and that means they are exposed to a wide variety of weather conditions including sunlight, rain, heat, cold, possibly snow, hail , insects, etc. And if you were to just put these raw wood pieces out in that weather it wouldn't take long before all those various elements deteriorated and destroyed your hives. After all, they are wood, and mother nature knows how to quickly break down wood.
So, you really need to treat the wood with some kind of treatment. But only treat all the external parts. You want to minimize any contact the bees would have with stains, paints or anything else. Do just the outsides. Not the insides!
Here are some options that you have:
- Prime and Paint the hives with a latex or oil based paint - White is the most commonly used color. And there is a reason for this. It is typically not a good idea to paint your beehive black or a dark color. This is because dark colors like that absorb a lot of sunlight. And this can raise the temperature inside the hive significantly. The bees, in summer, spend a lot of time and hard work maintaining the coolness of their hives.
Priming before painting will add significant protection to the beehive. So, if you can, prime before painting.
- Stain and Seal the hives with some kind of stain then sealant. Stain can add an excellent aesthetic look to your hive. And it does offer some protection against sunlight, insects and rot. But stain typically is not enough. You really should also seal your beehives with some kind of sealant once the stain is fully dry. You can use a polyurethane or fiberglass resin. In this tutorial we use fiberglass resin which is more durable than polyurethane but a little bit more of a process.
Let's Get Started
Remember: Only treat the outer surfaces of the hive parts. We don't want any chemicals, paints, or stains inside the bees home.
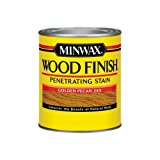
We are using MinWax Golden Pecan Stain. It is an oil based stain. One quart is enough to do two complete hives.
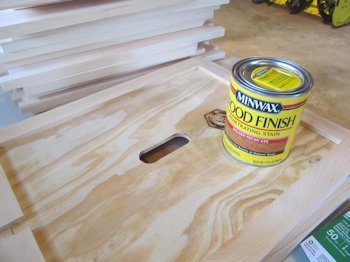
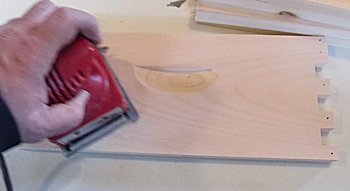
Whenever we stain we should do some light sanding first. This is common practice for staining. It helps the stain absorb into the wood. We used a palm sander with a light grit sand paper. This is just a light sanding. Go over all the external parts that will be stained.
Then Use a Damp Cloth
After the sanding is done you should wipe it all down with a damp cloth to remove the sawdust.
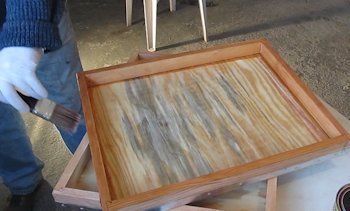
Then go ahead and stain all the external surfaces. Read the instructions that come with the stain. You can have a big affect on how it looks by varying the amount of stain you apply and by wiping it down to remove stain.
Once you are done let it all dry.
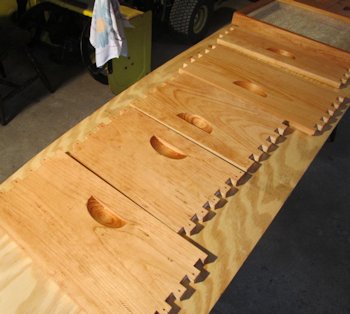
 Okay, let's assemble the parts together Okay, let's assemble the parts together
I have found a whole bunch of free ebooks about beekeeping. They are for kindle of the kindle emulator for PC (which is free). Pretty neat and if you are learning about beekeeping but don't want to spend any money yet these are a great place to get started: Free Beekeeping ebooks.
|

 Bee Stuff


