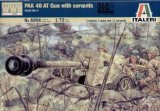
WWII German PaK 40 Anti-Tank Gun w/12 Soldiers 1-72 Italeri
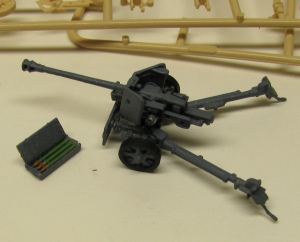
This is the German Anti tank Gun that comes in the kit. There are two of them. This one is painted and ready to go into a diorama.
Some General Color Guidelines for German Soldiers:
- Pants, Tunic and Helmet: Typically A shade of grey. Stone grey works well and looks good.
- Belt and Boots: Usually black but you can vary the belt and paint it brown
- Straps and miscellaneous small items on belt: Typically brown but you can paint the items a dark green and keep the straps brown
- Collar: Green or Black
- Shoulder Boards: red

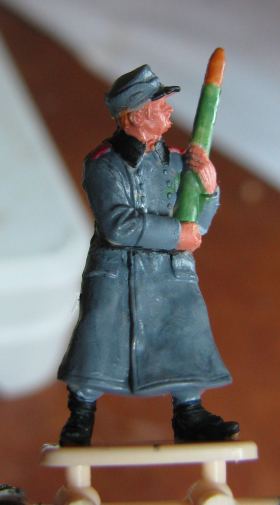
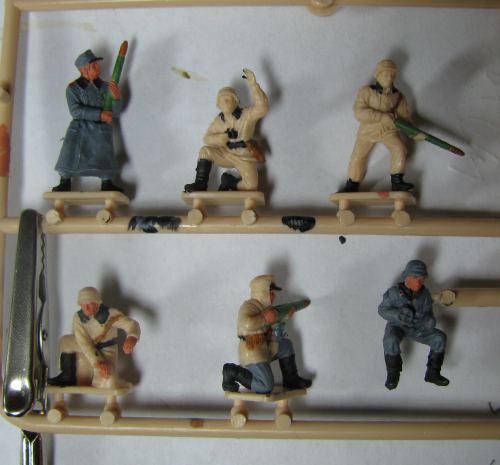
The German Soldiers in the picture above are carrying artillery rounds not rifles!
The Italeri Recommended Colors -Along with this kit of soldiers and anti tank gun Aliteri gives us their recommendations for how to paint the miniatures:
- Cap, helmets, clothing: Feldgrau (field grey)
- Boots: Black
- Face and Hands: Flesh
- Tops of boots: Medium Green
- Artillery Round: Steel
- Tip of Artillery Round: Flat Yellow
The picture below shows six figures in various stages of paint. The process I typically follow is
- Boots and belt
- Straps and accessories
- Hands and face
- All the Grey including helmet and clothing
- Final touch up of all colors
Some Tips:
Just about the most important thing is the brush you use. Get the best brushes you can get and make sure they are very small! The quality of the brush will directly affect the quality of the paint job.
Do not rush and do not apply the paint too thick. If it is too thick it will ruin the finer details in the miniature.
When painting you will get a real good sense for the paint. You will notice that it goes on very wet and quickly starts to get a good tack. At this point where the tack is just right it will spread very evenly and smoothly. Quickly though it will get a bit too tacky and be difficult to spread evenly. So choose small areas to paint and work with the drying and the tack to get the best results.
Finishing up
There are two painting techniques you can use to get the most out of your miniatures:
1. The Washing Technique: Once the paints have dried you take a small amount of black paint, put it on the brush and then dip it in water so it is very wet. You then brush this lightly onto the miniature. The black color will run down into the cracks and folds of the clothing and form dark spots there. Brush it around good so the black isn't on the high spots of the clothing. You only want it to be in the cracks and folds.
2. Dry Brushing Technique: This is the technique of getting a little bit of light colored paint on the brush then wiping most of it off. You then gently brush the surface of the miniature just in the high spots. It will leave trace amounts of the color on the high parts of the fabric that the miniature is wearing. About the dry brushing color: Typically you take the color of the garment and add mix some white with it so it is a shade or two lighter than the actual garment color.
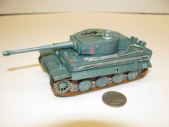
Here is a brief tutorial showing you how to make a 1/72 Scale Tiger Tank Revell Model. This tank is part of my Tank Diorama project: Making a Model Tiger Tank
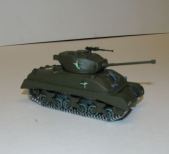
1/72 Scale Sherman Tank - This is a brief tutorial on making this Revell Sherman Tank. This is part of my How to Make a WW2 Tank Diorama Tutorial. The Revell 1/72 Sherman Tank Model
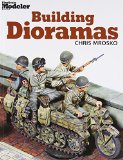
Building Dioramas -
Acclaimed modeler Chris Mrosko explains how to build dioramas that showcase models and create dramatic scenes, as well as offering expert modeling tips. Focusing on a step-by-step, how-to approach, modelers will learn the fundamentals of construction and design, airbrushing and finishing tips, how to cast pieces out of resin, and more. The ideal reference for modelers who want to expand their skills and do more with their models. A variety of step-by-step projects that range from Saving Private Ryan to modern global conflicts. Modelers will learn how to create wedgie dioramas to showcase figures.
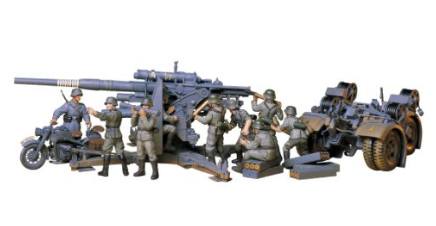
Tamiya Models German 88mm Gun Flak 36.37 Model Kit
This famous weapon is well known for its role in World War II. It did, in fact, have its origins during the first World War, when guns of this caliber were used in an anti aircraft role.
- Zundapp Motorcycle included
- Kit includes nine realistic figures.
- 1/35 Scale Armor
|