
![]()
I have a youtube channel with over 1000 Videos!
![]()
![]()
![]()
Painting Tutorials
- Miniatures Home -
- Miniature Painting
- Another Painting miniatures tutorial
- Video Tutorial How to Paint Miniatures
- Tips and hints for painting miniatures
- New Painting Miniature Tutorial: A Spartan Warrior
- Tips and hints for painting miniatures
- About Paint Brushes
- Miniature Paints and kits on Amazon
Sculplting Miniatures
- How to Sculpt Fantasy Miniatures
- Sculpting Fantasy Miniatures Video Tutorials
- Sculpting miniatures store-
- Sculpting tips
- Sculpt a Dwarf
- Sculpt a Treasure Chest
- Sculpt a miniature Raver and Gegenhound
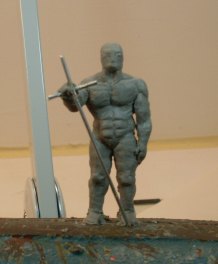
- Sculpt a BattleMage
- Sculpting Supplies
More Tutorials
- Make a Miniature House
- Make Miniature Trees
- Understanding Miniature Scale
- How to Make Foam Terrain for wargaming or dioramas
- How to Cast Miniatures
- Model Railroad and Trains
- Tips on caring for painted miniatures
Supplies
- Diorama and Miniature supply Store
- Ral Partha Miniatures
- Paints for miniatures
- Brushes for Miniature Painting
- Smooth-On for casting miniatures
- Casting rubber molds and plastic miniatures supplies
- Painting Supplies
- Books
- D&D Miniatures
- Reaper Miniatures
- Warhammer Miniatures
- Ronin Miniatures
- NorthStar Models
- 3D Printed Miniatures
- ProCreate Putty
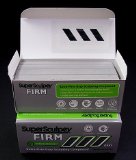
- Super Sculpey Firm
- GW Green Stuff
- Sculpting Clays
- Foam for Terrain
- Reaper Miniature Paint Kits
- Links and info about manufacturers of miniatures
Short Tutorials
- How to Make a miniature ladder
- Make a Miniature Hedge Maze (The Maze of Maddness)
- Make miniature buildings
- Make Miniature Bricks
- How to make barbed wire
- Painting Miniature American Soldiers (1/72 Scale)
- Painting Miniature German Soldiers (1/72 Scale)
Subjects
- Blacksmithing
- Bonsai
- Catapults
- Dioramas
- Fantasy Art School
- Goldfish
- Leathercrafting
- Military Dioramas
- Make Video Games
- Model Rockets
- Nature projects
- Origami
- Paper Making
- Paper Games
- Paper Projects
- RC Airplanes
- Science Projects
- Stained Glass
- Stamp Collecting
- Stop Motion Animation
- Tatebanko
- Terrariums
- Trebuchets

Hi, Thanks for visiting my website. My name is Will and if you have questions
or would like to
contribute projects or ideas you can contact me