Home

I have a youtube channel with over 700 Videos!

Hi, Thanks for visiting my website. My name is Will and if you have questions
or would like to
contribute projects or ideas you can contact me 
Build the Estes Yankee - Part 2
This is part 2 of the tutorial. In this part we assemble the fins to the tube and insert the engine block. Part 1 of this tutorial is here.
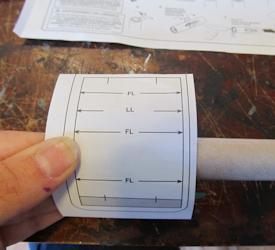
Cut out the tube marking guide and wrap it around one end of the tube.
There are four marking lines on this template, Three are FL, or fin lines, and one is an LL or lug line.
Mark those lines onto the tube.
I also like to write a little LL or FL right on the tube so I know which is which.
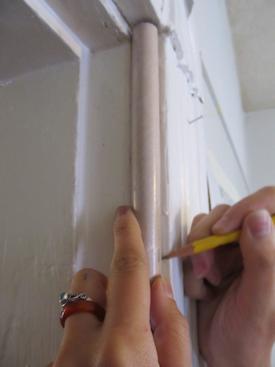
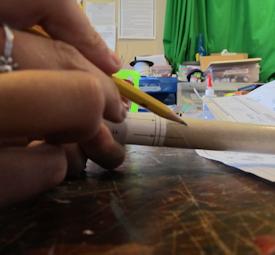
You actually want those lines to extend from the point you drew them all the way down to the bottom of the tube because that's the length of the fins! So, put the tube in a doorway and use the door jamb as a pencil guide to extend those lines all the way down. Do this for all four lines.
Now we will glue the fins to the tube. Do the fins, one at a time so apply glue to one fin line. Let it dry for 1 minute then apply another line of glue right over it.
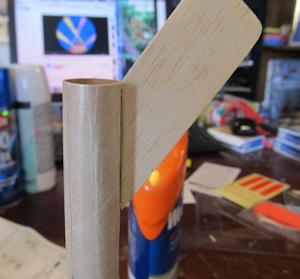
Go ahead and affix the fin to it. Notice which edge of the fin attaches to the tube.
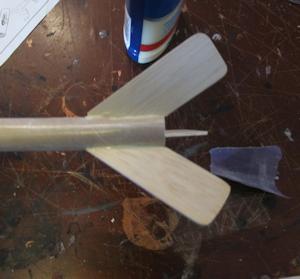
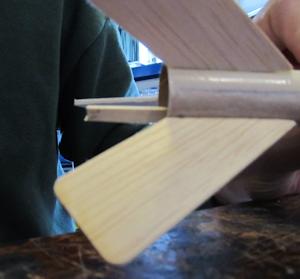
Repeat the glueing process for all three fins. Use a rules and get them nice and straight and equidistant around the tube. The instructions show you a nice even and straight glueing. While the glue is settting you can still move these around a bit.
Once the fins are dry let's go ahead and install the Engine Mount.

Get yourself a little scrap of wood and mark it at two inches from one end.
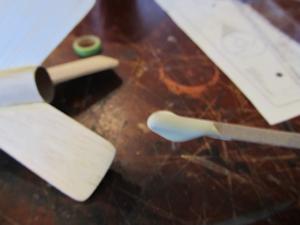
Put some glue on the end of that scrap of wood. on the end that is two inches from your mark.
Then put that scrap of wood, glue end first rigth into the tube and apply a line of glue around the inside of the tube, at the two inch mark.
So now there is glue in there.
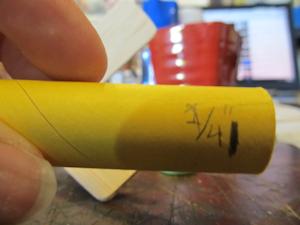
There is a green cardboard ring called the engine block. We need to push that into the tube, to a distance of two inches, right where we put that ring of glue. We get it in there by pushing it with the yellow tube called the spacer. Mark the space at the 1/4 inch from one end.
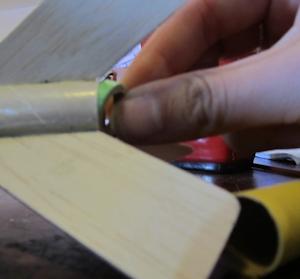
So, insert that engine block into the tube.
Then push in the spacer mark to the line you drew. This pushes the green engine block to the two inch mark, right on the glue. Once you push to that point quickly pull that yellow spacer back out. We don't want it to stay in there or get stuck on any glue.
 Let's finish off this rocket

Do you like making projects and exploring a variety of hobbies?
Sign up for my free newsletter. I give you regular updates on hobbies and projects you can make. it is totally free and I don't share your email with anybody.