I have a companion video to this lesson here
I also have a companion article to this one: A terrarium as a learning tool for children- This article gives you some great ideas on how to use a terrarium to teach a child about eco systems, stewardship and the environment.
The Two Basic Types of Terrariums
There are two basic types of terrariums and you can tailor the type you make to the age and skill level of the child. The first type of terrarium is an open dish type. This is simply an arrangement of plants in an open container. It can be a dish, bowl or just about any type of container that will hold at least a quart of soil. This type is the easiest to make and the easiest to care for.
The second type of terrarium is the closed style. It is completely enclosed in a jar, glass, or container. This type is much more attractive and fascinating but it is also more challenging to make and to maintain. This type of terrarium is also very well suited for explaining how an eco system works because it is a closed eco system.
The Perfect Compromise for a Container
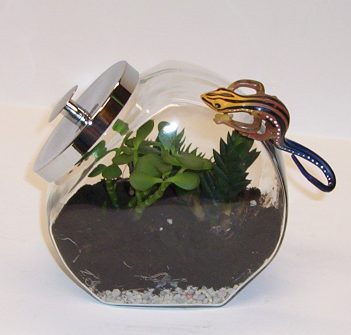
 A perfect compromise of closed and open terrarium is one that is made inside a large cookie jar. This is the type of glass cookie jar that has a large metal cover with a knob on it. The cover is usually offset at an angle to the side. They usually hold about a gallon to a gallon and a half of liquid. A perfect compromise of closed and open terrarium is one that is made inside a large cookie jar. This is the type of glass cookie jar that has a large metal cover with a knob on it. The cover is usually offset at an angle to the side. They usually hold about a gallon to a gallon and a half of liquid.
This container is perfect because the very large mouth makes it easy to put plants and other materials into it. And the easily removable metal lid makes it easy for a child to reach in and prune or water the plants. And if the terrarium has been over watered the child can just leave the cover off for a couple of days. This will evaporate a lot of the excess water.
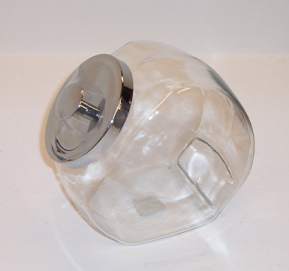
If you do not have one of these glass cookie jars here are some guidelines for choosing an alternate container. Choose a large container that is glass or plastic (preferably clear plastic if the project is for younger children) and insure it has a very large mouth opening so little hands can reach easily into it. Then finally, choose something with an easily removable lid. This will allow you to cover it for a closed system but also to remove it if it is over watered.
This mason jar is very suitable as a terrarium. It is pretty large, has a very large opening and it is made of plastic which is really nice. But it looks like glass! This would make a great first terrarium for a child. I found this one and the cookie jar at WalMart.
If you are looking for containers I have created a page with a variety of glass and plastic jars from amazon.com Terrarium Jars for Kids Terrariums
Plant Selection
You have a lot of options when it comes to selecting plants. If you want plants that will be very hardy and very durable you should consider using succulents or cacti. They generally have a very high tolerance for sunlight and do not need a lot of watering. (You can let the soil dry out before watering it again). They also generally require very little pruning or maintenance. So they are a good choice for younger children - just avoid any cactus with dangerous or harmful spikes and thorns.
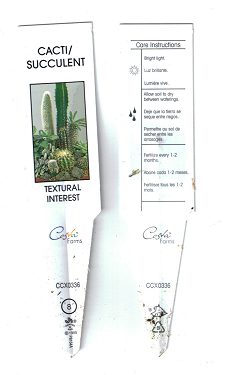
<---Save the care tags that come with your plants.
The picture at the left shows the front and back of a tag I got with a cactus I purchased for my terrarium. This tag often has all the informaton you need to care for your plant. You should tape it to the outside of the terrarium jar or even stick it right inside with the plants. This way you will always know the care instructions.
For older children you can use almost any small type of plant that can be bought in a home improvement store or nursery. Select plants that are labeled as hardy, and grow to less than six inches in height. Keep all the information tags that come with them so you always have a reference for sunlight and watering.
The third alternative to plants (and the one I like the best) is to go for a hike and dig some up. This adds a wonderful dimension of discovery to the terrarium. Select small plants in a wide variety of shapes and sizes and choose them all from the same area. If they are all growing in a relatively small area you increase the chances that they will thrive in the little eco system you create in a jar or bottle.
Final Thoughts about Plant selection
I recommend you purchase or find an odd number of plants. An odd number of plants generally makes for a more pleasing arrangement than an even number. It has a more artistic look to it. I also recommend you choose plants in a variety of shapes, sizes and colors; if the plants are different heights and colors the terrarium will be much more interesting to look at. Finally, if you are purchasing plants, be sure they all have the same basic requirements as far as watering and sunlight is concerned. Being all in the same container they will all have the same amount of light and water so if they all have the same requirements you can treat the arrangement as one entity and not have to try to treat each plant differently.
Making the Terrarium
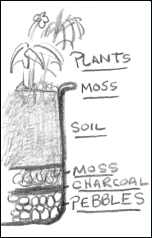
Here is the process for making the actual terrarium. You can vary from this process and I will point this out. The drawing at left shows the arrangement layers in the dish.
- Put a layer of pebbles in the bottom of the container. Make it about one inch thick. This will allow for good drainage.
- Put a layer of activated charcoal right on top of the pebbles approximately one half inch thick. This will filter the water. (This step is totally optional)
- Put a layer of Sphagnum moss on top of the charcoal. Sphagnum moss is a dried and wiry material and what this does is act like a barrier so the soil does not slip down into the rocks at the bottom. (This is optional but recommended if you want a cleaner and sharper looking terrarium)
- Put a layer of soil on the top of all of this. The layer should be at least two or three inches thick but you can vary this according to the size of your container.
- Poke small holes into the soil and transplant your plants into the container.
- Place some miniature colored stones or figurines in the container for an interesting look.
- Water it a moderate amount and cover it. Now just monitor it over the next few days. If it needs more water then add. If it is too wet then keep the cover off so it can evaporate.
A Thought about the Plant arrangement
Before you actually transplant the plants into your terrarium you should arrange them on a table. Move all the pots near each other then move them around to find an arrangement that is pleasing to the eye. Once you find an arrangement you like you then just transfer that to the container.
Learning Lesson for kids: Terrariums as an ecosystem
A terrarium is a miniature ecosystem which is a complex system of relationships between organisms and resources of different types. The predominant organisms in your terrarium ecosystem are plants and the micro-organisms in the soil. The major resources are water, sunlight, and soil. These all work together to form a miniature little system that can sustain itself for long periods of time. If you have a good balance of plants, soil, nutrients, and water in your terrarium you will be able to seal it up and watch it grow and thrive for very long periods of time - sometimes even years.
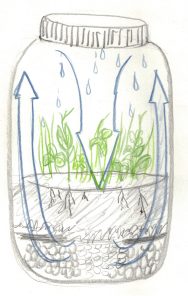 The ecosystem inside your container is very similar to that in the real world. There is water accumulated in the soil and in the pebbles and sunlight will cause this water to evaporate and form droplets along the sides and top of the container. These drops will grow larger and then fall back into the soil. This is a circular process that will continue as long as there is water and sunlight and this rhythm will bring a constant supply of moisture and nutrients to your plants. And if you have put activated charcoal in your terrarium it acts as a filter. As the water passes through the charcoal all the impurities are trapped so the water is more pure for the next cycle. In the real world the same thing happens when it rains. Water is evaporated up to the clouds then released back down in the form of rain. It is a continuous cycle just like inside your container. The ecosystem inside your container is very similar to that in the real world. There is water accumulated in the soil and in the pebbles and sunlight will cause this water to evaporate and form droplets along the sides and top of the container. These drops will grow larger and then fall back into the soil. This is a circular process that will continue as long as there is water and sunlight and this rhythm will bring a constant supply of moisture and nutrients to your plants. And if you have put activated charcoal in your terrarium it acts as a filter. As the water passes through the charcoal all the impurities are trapped so the water is more pure for the next cycle. In the real world the same thing happens when it rains. Water is evaporated up to the clouds then released back down in the form of rain. It is a continuous cycle just like inside your container.
Caring for your terrarium
A terrarium needs to be watched carefully for the first week. This is to insure it is getting the right amount of light and water. If you purchased your plants you should look at the tags that came with them and follow the watering and lighting instructions. If you found your plants outdoors you should try to simulate the environment they were found in. Were they in an open field with lots of sunlight? If so then give them lots of sunlight. Were they in a forested area with only moderate light? Then keep them in a window that only gets moderate amounts of light. Finally, if you found the plants yourself, were they in rich and moist soil or dry soil? Simulate this when watering.
Watering
For the first week you should watch your plants very carefully. Are water droplets forming on the glass? If so, this is great! But if the soil seems soggy then you might have over watered so you should take the cover off for a couple of days and let it dry out a bit. If the soil is dry and very few droplets are forming you should add a little bit of water. But if you are using cactus and other desert plants it will be ok to let the soil get a bit dry. After about a week with the plants looking pretty good you can be confident that the cover can stay on it for long periods of time. And if sunlight only comes into the terrarium from one particular side (like in a window) you should rotate the terrarium every couple of days to ensure the plants don't all grow at an angle pointing toward the window. Rotating the terrarium will force the plants to grow straight up.
Pruning and Trimming
Over the course of time the plants in the container will grow and you can reach in there and trim them gently with a small pair of safety scissors. This will keep it attractive looking and will keep the balance of the ecosystem.
A terrarium is a wonderful project for kids to make and it is a living system that will bring a child much enjoyment both in the making of one and the long term caring for one. It is a great opportunity for children to learn about plants and eco systems and it's a great project because it doesn't take too much effort or care to maintain. It is a closed system that will thrive with very little care.
Dunecraft Makes some nice theme based terrariums for kids and they are available on amazon.com I have a selection of the Dunecraft Terrariums here
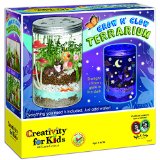 Creativity for Kids Grow 'n Glow Terrarium Creativity for Kids Grow 'n Glow Terrarium
- 1 Plastic TERRARIUM JAR, 5" x 3.25" (12.7 x 8.25cm). This mason-style jar has star- shaped air vents in the lid and a wide mouth for easy assembly.
- A Plant MISTER for keeping your terrarium plants watered
- 2 RESIN FIGURES, a bunny and toadstools, 15 Garden-inspired STICKERS
- 45 Glow-in-the-Dark STICKERS, to light up your terrarium at night!
- for ages 6 to 96
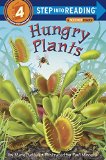
Hungry Plants
This book offers readers a bug's-eye view into the strange and fascinating world of carnivorous plants. From the "jaws" of the Venus flytrap to the pretty sundew plant whose delicate tentacles entrap its prey, the unique anatomy and behaviors of meat-eating plants are detailed with clear, engaging text and art.
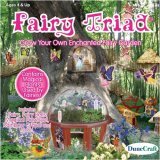
 Fairy Triad Dome Terrarium - Grow your own enchanted fairy garden. This charming terrarium contains magical plants for fairies and those who believe in them! Fairy Triad Dome Terrarium - Grow your own enchanted fairy garden. This charming terrarium contains magical plants for fairies and those who believe in them!
Garden contains four color seed packets: red and blue lobelia, clover, evening star and thyme; plus a bag of fairy planting mixture, bag of fairy dust, fairy, pinwheel, two fairy bells and string, four fairy plant stakes, rainbow fairy gravel, sprouting and growing terrarium, perlite drainage pellets, and growing and care instructions.
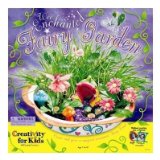 
Faber-Castell Creativity For Kids Enchanted Fairy Garden - With a little creative magic you can grow your own enchanted fairy world. This garden set includes a flower-shaped gardening dish, enchanted flower house, tiny gemstone treasures, flowers, butterflies, paint with brush along with soil and seeds that grow like magic. Finish off your garden with a friendly fairy, a sparkling garden path and teeny tiny toadstools.
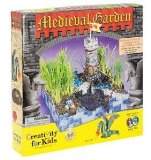 
Discovery Crafts Medieval Garden - Create an indoor garden---with a medieval twist. This all-inclusive kit includes a resin dragon statue and castle tower kids can paint themselves; then they add the soil and water to let the wheat-grass and basil grow near the mighty beast. But don't forget the dragon eggs! Creativity for Kids. Ages: 7+
|