Weapons and armor made by web visitors
|
|
Have you made one of my projects? If yes then send me a picture! I would love to post it right here on this page!!!
Just send a picture of the project though. I like to keep it simple, no faces, people or children! Sorry!
And... I get a whole lot of email so nothing to worry about if you don't hear back from me for a couple of days. It takes me a bit of time to catch up. But I love these pics and will get back to you for sure! Want to browse through the pictures of projects made by web visitors? Here are the other pages:
Page 2 - Page 3 - Page 4 - Page 5 - Page 6 - Page 7 - Page 8
- Page 9 - Page 10 - Page 11 -Page 12 - Page 13 - Page 14 - Page 15 - Page 16 - Page 17 - Page 18 - Page 19 - Plague Masks
|

ABOUT THE PLAGUE MASKS! - I Did a plague mask tutorial for Halloween and the response was so great that I had to create a separate page for all of the pics I got! If you made a plague mask and sent it to me the pic and all the other pics are right here: Plague Masks!!
Earn a Certificate of Contribution!

If you make one of my projects email me a picture! I will email you a certificate of completion from stormthecastle.com You can print it up and hang it on the wall.
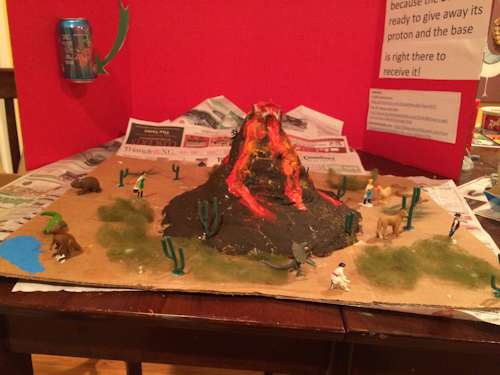
Here is a Volcano made by Hazel following my dough volcano tutorial. It came out great and I love that it is placed in a diorama! My thanks to Hazel for sharing the picture with us!!
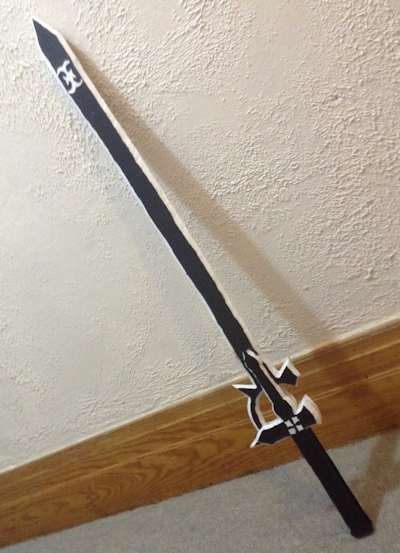
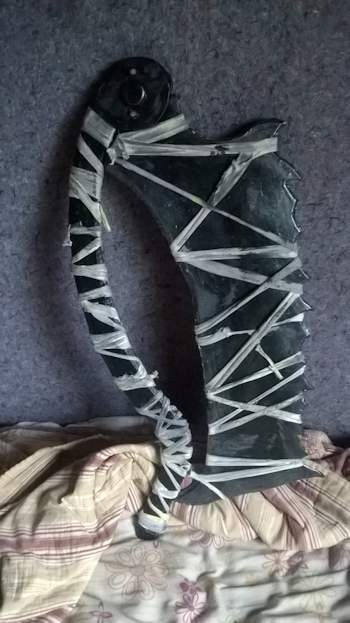
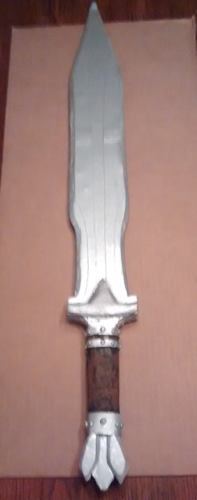
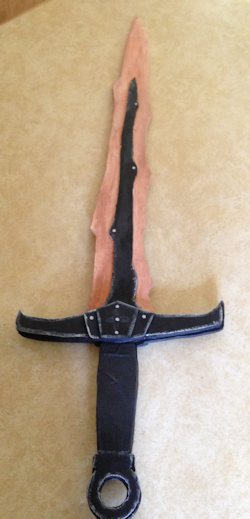
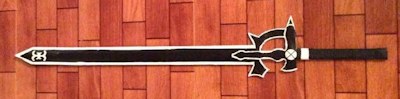
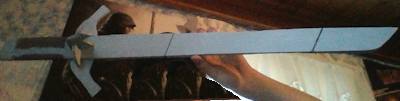
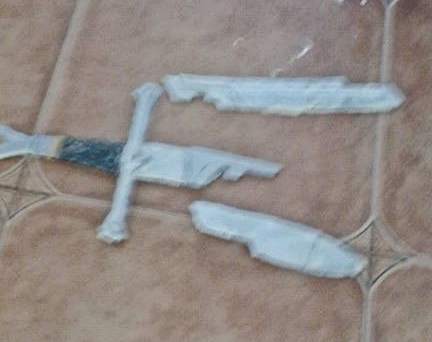
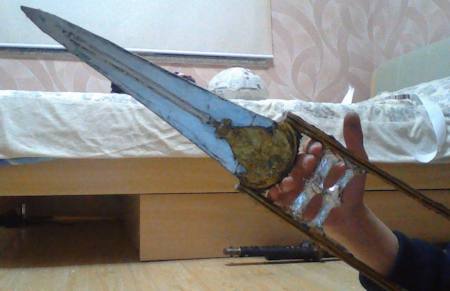
Here is the Elucidator made by Emiliano! Wow, it came out great! My thanks to him for sharing the picture with us.
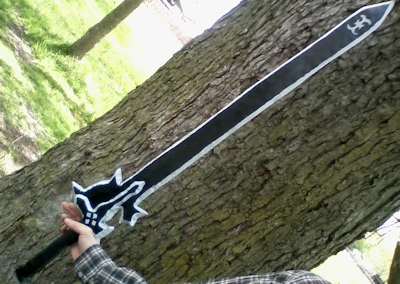
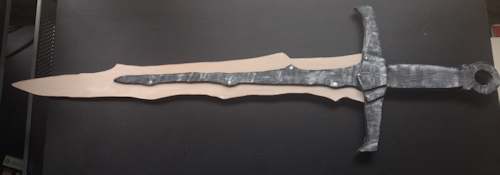
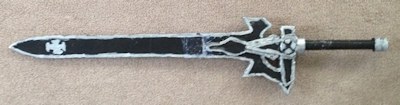
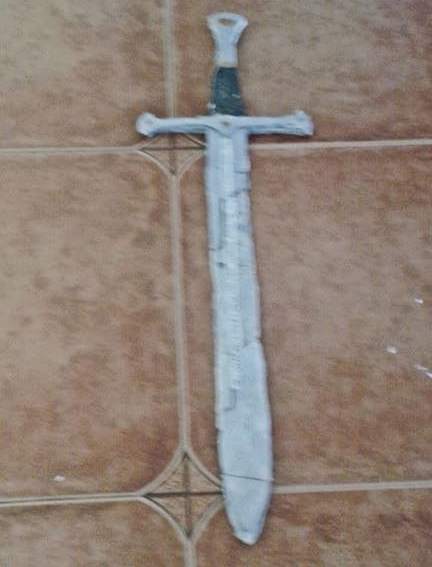
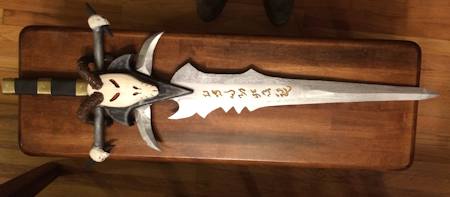
Here is the Elucidator made by Billy. I like it a lot!! He did a nice job and my thanks to him for sharing the picture with us. He used our template but changed the materials. He tells us about it:
Using your template from stormthecastle.com.
The sword was made using layered EVA foam (fatigue mats from Wal-Mart), a fiberglass rod core (Electric Fence Post from Farm Supply), Plastidip (Black), Acrylic paint (Silver/Grey/Glitter), Cloth tape grip, and Krylon Crystal-Clear.
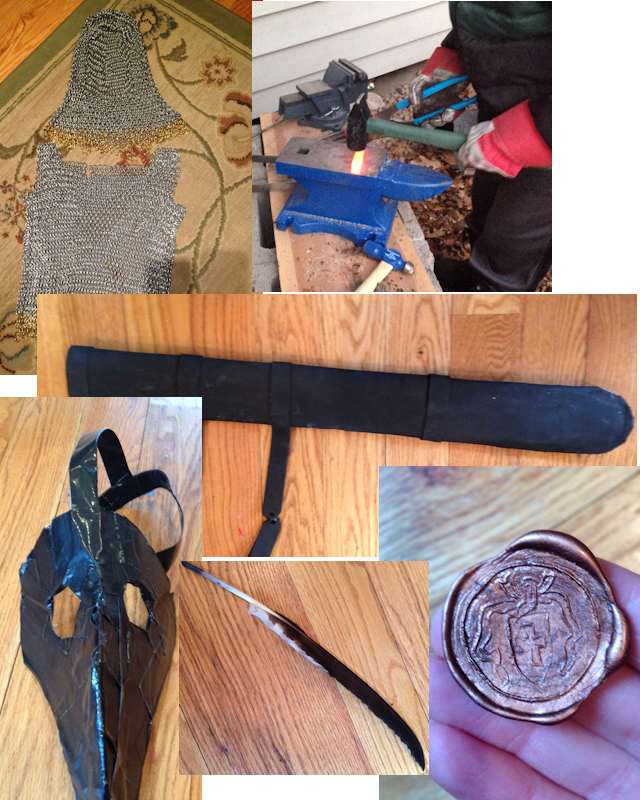
Graham has been following my youtube channel for a while and he has made a whole lot of my projects from weapons to armor, blacksmithing, chainmail, feather quill a coin and more! Wow! My thanks to Graham for sharing these projects with us!
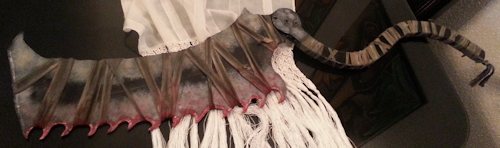
Here is a saw cleaver made by Jesse! It came out fantastic. My thanks go to him for sharing the pic with us!
Here is the Bloodborne Saw Cleaver made by Ahmed. It looks great! I love the bright colors. My thanks to Ahmed for sharing the picture with us!
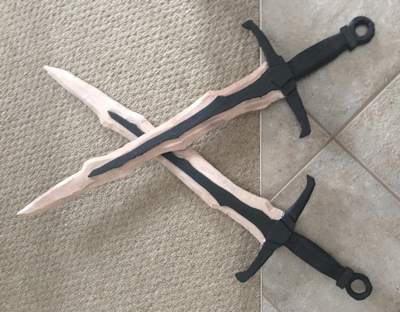
Stevee has made both Elucidator and Dark Repulser. Wow! They came out great and my thanks to Stevee for sharing the pic with us!
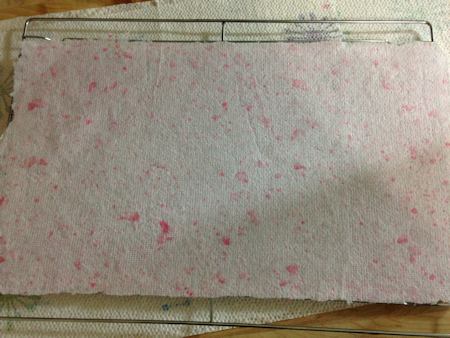
Here is some home made paper by Raymond! It looks fantastic and I love the color scheme. If you want to make paper you should check out my tutorials here.
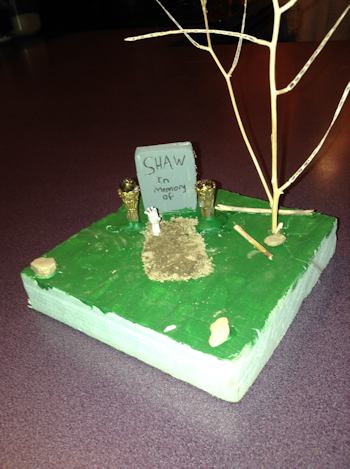
Here is a gravestone diorama made by Brayden. It came out great and I love dioramas! My thanks to Brayden for sharing the picture with us. (If you want to make a diorama my tutorials are here)
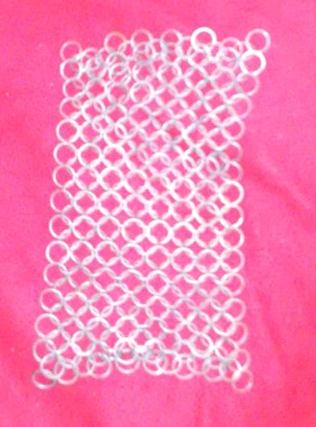
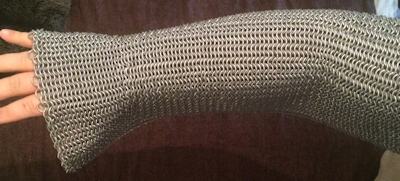
Here is some chainmail made by Devin. It is coming along great! And this is a lot of work! My thanks to Devin for sharing the picture with us.
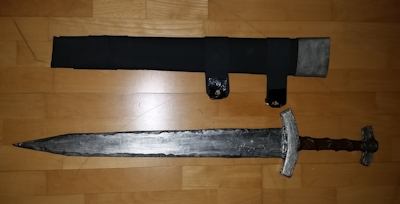
Here is the Skyrim Iron Sword and the sheath made by Francisco. They came out amazing and my thanks to Francisco for sharing the pic with us!!!
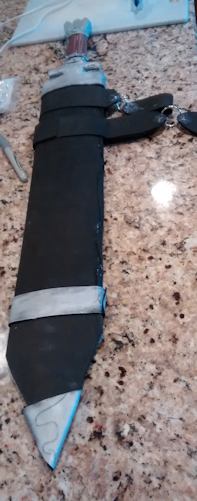
Here is a sword and a sheath made by Adam. He used our sheath tutorial to make the sheath and he used our generic sword making video to make an Imperial sword from skyrim! It all came out great and my thanks to him for sharing the pictures with us.
For the past couple weeks I have been working on the imperial sword from skyrim using your generic sword video. Later I created a sheath to go with it. The blade is two boards thick, the handle and pommel are four, and the guard is six. The fuller and band details are card stock. I suck at beveling so I used sand paper to give it an edge. The handle was originally dry brushed brow to look leathery, but then I found wood grain duck tape and used that. I saved my templates in the case that you may want me to scan them and send them to you. Heck, you could make a tutorial on it as long as I get some credit. The sheath is the basic design you showcased in your tutorial.
Here is An Elucidator made by David. It is coming along great. He has learned a lot and is making another one. My thanks to him for sharing the picture with us!
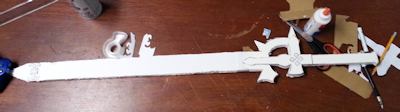
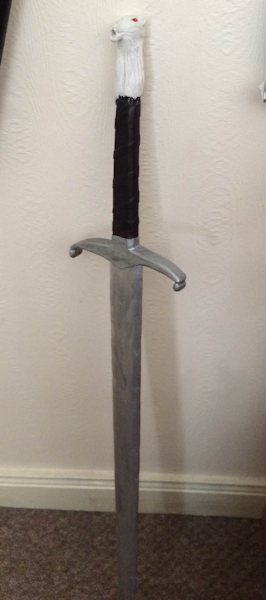
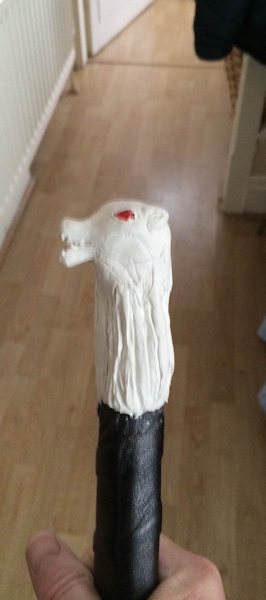
Here is Longclaw made by Paul. He made it out of wood and clay and it came out spectacular! My thanks to him for sharing the pics with us and if you want to make longclaw the tutorial is here: Make Longclaw. He also tells us a little bit about how he made it:
When I researched online I discovered a picture of the character of Jon Snow holding it I noticed that it was not the HBO authorised replica in fact there were a couple of versions of it. I chose to try and emulate the characters pictured one. No fuller and a gentler curve to the quillan (handguard). Pommel is made of white air dry clay (to be finished off when fully set). Anyway, hope you like my efforts.
Here is the Bloodborne Saw Cleaver made by Bernard! It came out spectacular. My thanks to him for sharing the pic with us and if you want to make this project the tutorial is here: Make the Bloodborne Saw Cleaver.
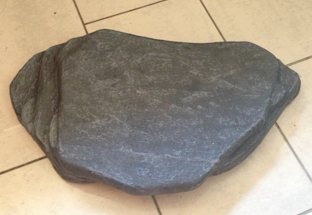
Here is the fake boulder project made by Sabina! I love this project and it came out spectacular!! My thanks to Sabina for sharing the pics with us. Want to make a fake boulder? My tutorial is here

Here is a dragonbone sword made by Raul. It came out terrific! Nice work! My thanks to Raul for sharing the picture with us.
Here is the Dragonbone sword made by Megan. It came out fantastic! My thanks to her for sharing the picture with us!!
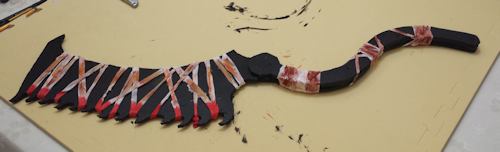
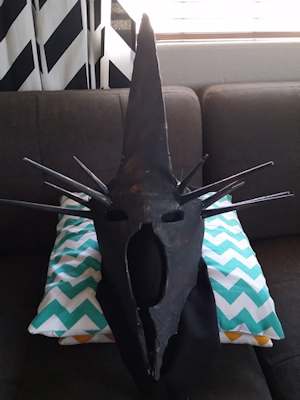
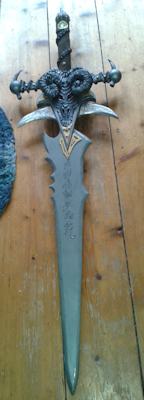
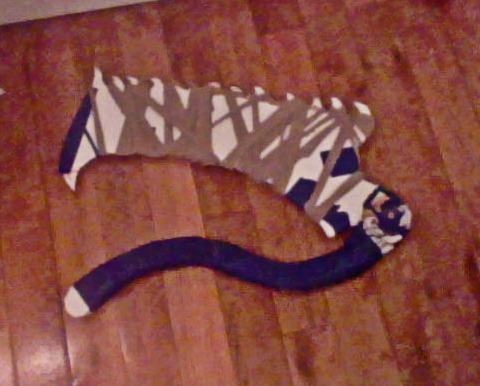
Tristin has made two projects and they look great! They are the Witch King helmet and the Daedric Axe. My thanks to Tristin for sharing the pictures with us!!
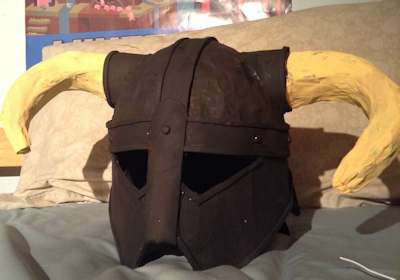
Here is the Iron Helmet from Skyrim made by Isaiah. Wow! Spectacular job. It looks fantastic and my thanks to Isaiah for sharing the picture with us.
Here is some chainmail made by Linus. It came out great and my thanks to him for sharing the picture with us! He used Iron wire coated with copper and the black look of it is terrific!
Kalle and Ute have made Frostmourne and they did a lot of upgrading and improving to it! Wow. This is spectacular! My thanks to them for sharing the pictures with us!
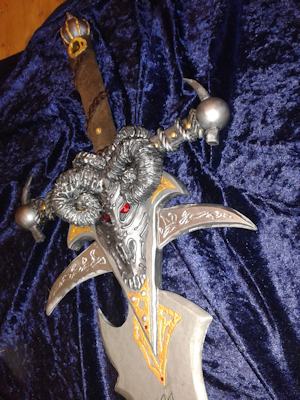
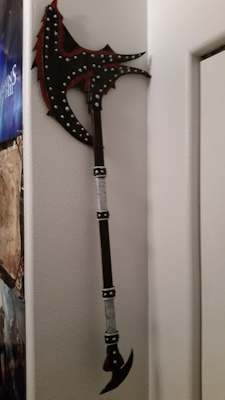
Here is the Daedric War Axe made by Josh. It came out terrific and Josh also made Daedric Armor to go with it! Wow! My thanks to him for sharing the picture with us.

Here is the Saw Cleaver made by Andre. It looks terrific and it really works, opens and closes! My thanks go to Andre for sharing the pic with us!
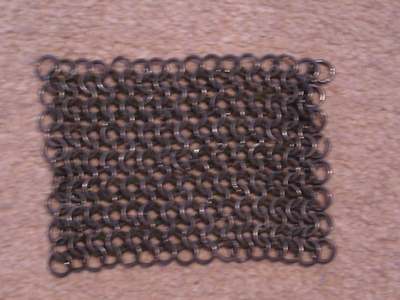
Here is some chainmail made by Brendan. It is 6 in 1 and it is coming along spectacular. He will be making a full hauberk and estimates it will take 20,000 rings. He tells us a little about this:
There are 6494 rings in this piece.
The rings are 2 mm diameter wire (12 gauge).
I used a mandrel with a 10mm outer diameter so the rings have a 10mm inner diameter.
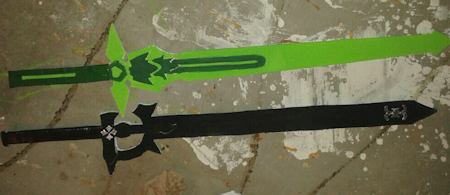
Here is Elucidator made by Max! I really like it. He did a nice job with it!! My thanks to him for sharing the picture with us.
Here is Elucidator made by Eshwarjot! It came out fantastic! And my thanks to Eshwarjot for sharing the pic with us.
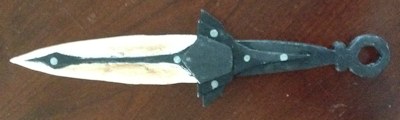
Here is another great project made by Isaiah. It is the dragonbone dagger and it came out fantastic! My thanks to Isaiah for sharing the pic with us!!
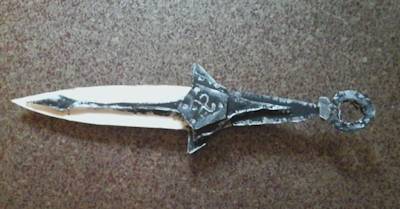
Here is the Daedric Dagger and Corvos Blade made by Carl. They came out great! And my thanks to him for sharing the pictures with us!
Here are two DragonBone Swords made by Isaiah. Wow! They look spectacular. My thanks to him for sharing the picture with us!
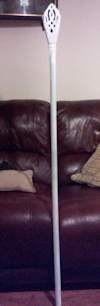
Here is the Gandalf the White Staff made by Jack. It came out terrific and my thanks to Jack for sharing the picture with us!
Here is Anduril and Narsil made by Matthew. It came out great and my thanks to him for sharing the picture with us!
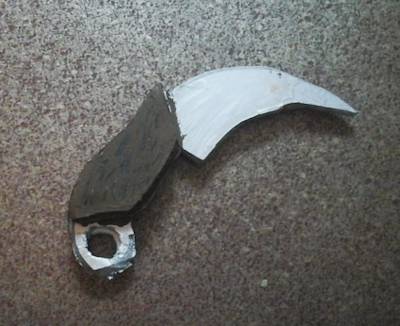
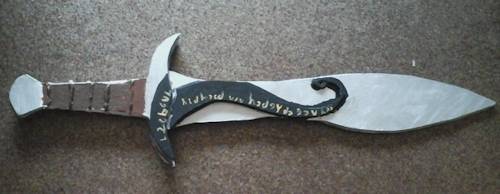
Here are three of my projects made by Matiss. He has done a lot of my projects and they are coming out great! My thanks to him for sharing the pics with us! These projects are the karambit, the dragonbone dagger and Sting.
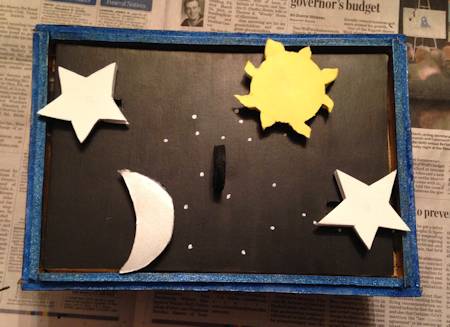
Here is the Wizards Puzzle Box made by Meaghan. It came out absolutely amazing. And she added a special touch! The white dots are stars in the shape of the constellations Gemini! I love it! She made this puzzle box as a gift for her sister. I think that is quite wonderful. A thoughtful and creative gift! My thanks to Meaghan for sharing the pic with us!
Here are two Frostmourne made by Jonathon! Wow, nice work and twice as muc work!! He is a big fan of Warcraft and now he has made something awesome from the game! My thanks to him for sharing the pic with us!

Here is the Indian Katar made by Jihal. It came out amazing and I love the colors! My thanks to Jihal for sharing the pic with us.
Here is Frostmourne made by Charles. It came out fantastic. He achieved a really good look. Very professional! My thanks to him for sharing the pic with us! He used my template and made it out of wood!
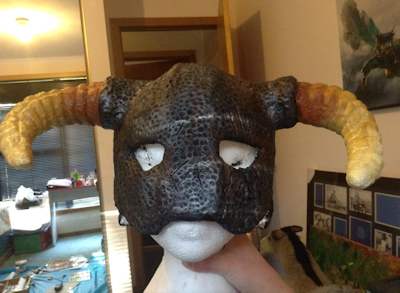
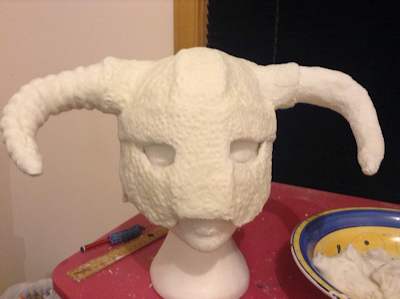
Here is the skyrim Iron Helmet made by Ffion. It is absolutely amazing. The best Iron helmet I have seen. My thanks to Ffion for sharing the pic with us. I have also included a pic of the progress.
She tells us how she achieved this amazing look:
I did it the exact way as the tutorial in the beginning and then used plaster cloth to harden it, then I realised that I really wanted to add some texture and scratches so that's when I made some air drying clay to use, I applied the clay on the whole helmet and made some scratches with my nail, pencil and a ruler (for thicker scratches), then I used the end of the pencil to put kind of a dotted and battered texture over the whole helmet apart from the horns.
For the horns I embedded the lines and made them more 3d like if you know what I mean lol, I then painted the whole helmet black and the horns white, I then dry brushed on the silver and made a rusty colour for detail. When the White paint on the horns dried I put some brown for the base and faded it to yellow making it lighter and lighter.
MORE PROJECTS MADE BY WEB VISITORS
Page 2 - Page 3 - Page 4 - Page 5 - Page 6 - Page 7 - Page 8 - Page 9 - Page 10 - Page 11 - Page 12 - Page 13 - Page 14 - Page 15 - Page 16 - Page 17 - Page 18 - Page 19 - Page 20

Do you like making projects and exploring a variety of hobbies?
Sign up for my free newsletter. I give you regular updates on hobbies and projects you can make. it is totally free and I don't share your email with anybody.