 |
 |
 |
 |
 |
Storm The Castle.com
|
| Return
to Home Page |
|
|
Creative
photo effects: The Invisible Man
|
|
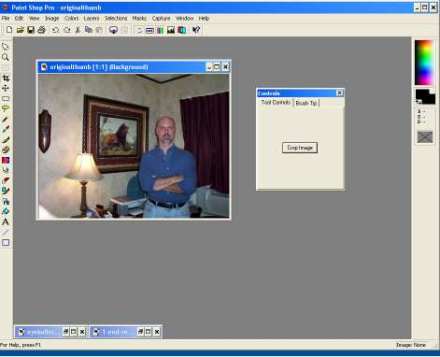
pen up your paint program (In this tutorial I am using
Paint Shop Pro Version 5). Then open up the photo you are going to be
working on. The photo on the right shows the Paint Shop Pro workspace
open with the photo ready to be worked on.
|
 |
| |
|
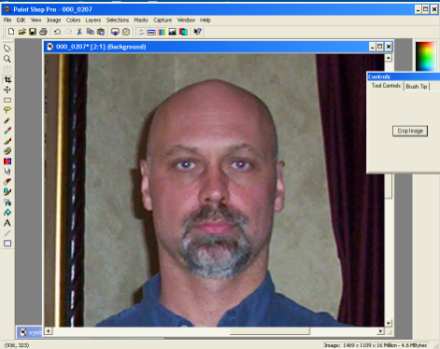
| Then zoom in on the area you are going to be working on.
Here we show a zoom in of the face and head of the handsome devil we are
going to make invisible. |
 |
| |
|
| Now from your tool palette select the clone brush. What
this does is assign two brushes to work at the same time. If you are using
different software you may have to search for this tool. Use the help
function to find it. It is a common tool so is often found as a button
on your tool bar. |
 |
| |
|
|
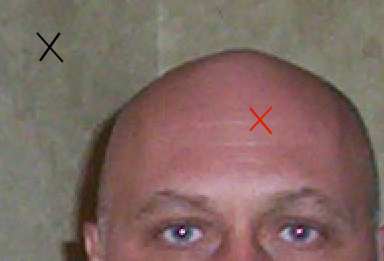
Here is how the clone brush works: You right click on an area of your
photo that you want to use as a pattern and color for brushing over
something. In the photo below I right clicked where the black x is.
Then you go to the area you want to paint over (this is the area marked
with the red X) and click and drag with your left mouse button..This
paints the pattern from where the black x is onto your new area. So
you are filling in the new area with a pattern from an old area.
|
 |
| |
|
| It is as easy as that! Carefully paint over the whole head
leaving the eyes intact if thats what you desire. There are two points
to be careful of here: the collar and the vertical line that is created
in the corner of the room right behind the head. On the next page of the
tutorial I will show you how to handle these trouble spots |
 |
| |
|
 continue
with tutorial continue
with tutorial |
|
| |
|
| |
|
| |
|

