|
|||||||||||
|
|
Download and run the Milkshape Software
Okay, you have a basic understanding of what modeling is and you have a grasp of some of the fundamental concepts like the skeleton and the triangles. Now lets get the Milkshape program and start familiarizing ourselves with it.
Download MilkshapeMilkshape 3d is the product of a company called chUmbaLum sOft and it is not a free program. You have to pay to register it but it does have a 30 day trial period so you can give it a good try and see if you like it before you decide to register it. The homepage is here: Milkshape 3d On this page, in the left hand column you see a link called "Download" go to that page and download the latest version of the software. As of the writing of this tutorial the latest version is: 1.8.4 It is a reasonably small file (about 5Meg) so unless you are on dial up it should only take you a few seconds. After you have it downloaded unzip it and run it. To run it you should have a desktop icon that looks like this:
If you don't have this icon on your desktop you can run the program by using start > all programs > Milkshape3d 1.8.4> milkshape3d
Familiarizing yourself with the workspace Getting Familiar with the workspace Now that you have Milkshape 3d open lets take a look at some of the features of the workspace. There may seem like a lot of crazy stuff but in no time you will be real good at using this program.
The Milkshape 3d Workspace It looks a lot like the workspaces you have been using in either Genesis 3d or Reality Factory.
The Biggest Feature of the workspace is the four large boxes that take up most of the space. Three of them have grey backgrounds with black lines and the fourth one is mostly blue. And they show your model from three different views. The top left square is the front view, the top right square is the side view, the bottom left square is the top view; And the blue square is the skinned view. About the skinned view: The three grey view show the structure of your model and the skinned view gives you a view of how it will actually look in the game.
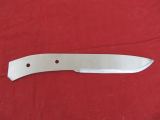
Knifemaking Tutorial How to make a real knife using the stock removal method. This is part of my blacksmithing series of tutorials. Knifemaking
|
||||||||||
Copyright©2001-2016 Kalif Publishing - Contact, copyright and Disclaimer - Let's Make Something T - Storm the Castle T Publishing
|
|||||||||||