.
This is the medieval section of StormTheCastle.com
- Knights
- Castles
- Games
- Weapons/Armor
- Articles
- Medieval Names
- Medieval Words
- Medieval Terms
- Medieval Jobs
- Medieval Maps
- The Armory
Wills Books
How to Make Cardboard Weapons - Swords and a Reaper Scythe
Here is a tutorial on how to make swords out of cardboard.
These swords make good prop swords or weapons to go along with halloween costumes.
In this tutorial I make four different swords and I show you some nice little tips so you can go ahead and make any of them or branch out and create your own prop cardboard sword. This tutorial also includes a video. The swords are not made to be used as practice swords. They are just for looks but they are pretty durable and should hold up well under normal carrying around and showing people - they are even ok for some swinging around. Just be careful!
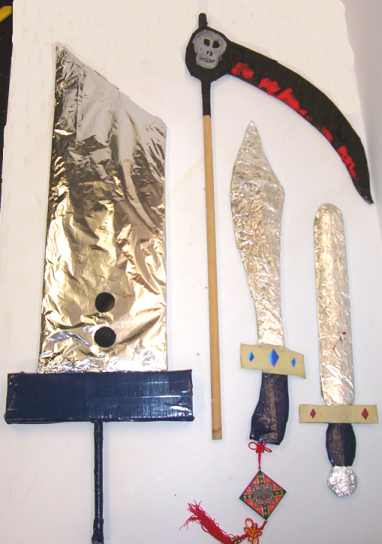
The Four Cardboard Swords I make in this tutorial (From left to right):
- Buster Cloud Sword
- A Grim reapers Scythe or Sickle
- Wushu Sword - much like a curved Pirate Cutlass
- Typical Medieval Knights Sword
Materials
You can do a lot of improvising with a project like this and find materials that you have around the house. Here are some suggestions based on what I used.

- Corrugated Cardboard box
- Masking Tape or Duct Tape (duct tape is best but masking tape will work)
- Clear Box tape for packages (optional)
- Cellophane Tape
- Aluminum Foil
- Scissors and knife for cutting cardboard
- Glue Stick (Optional - for securing down the aluminum foil and for decorations)
- A Variety of thin sticks or tubes, you will use one of these in the center of your cardboard sword, It will give it strength.
In the center of your sword you will put some kind of a stick or tube for strength and you can use any number of things including a broom stick, 1/2" dowel, a wooden yard stick, stiff plastic tube from a broom or other object. The dowel can be square or round.
Some Safety Considerations
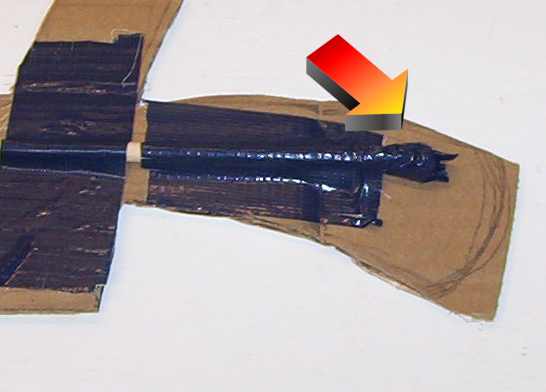
These cardboard swords are reasonably durable but they are not meant to be used in practice. You should never point the sword at anyone or put it near someones face. In the center of the sword you will put a stick or tube and you should tape up both ends of this tube to make it rounder and safer. The image below shows the end of the stick with a nice round ball of tape at the end. This will make it safer if it should break through the cardboard. Do this on both ends of the bar or dowel.
The swords are all made pretty much the same except for the reaper scythe and I will explain a bit about that. Here is what you do. You cut out an outline of your sword in the shape that you want. Follow one of my sword shapes or make up your own.
The important thing to know is that you make two cut outs and you cut the length of the sword going in the same direction as the corrugations in the cardboard. If you take a close look at the cardboard you will see it is composed of long lines. Cut so these lines run the length of the sword. This is the strongest way to do it.
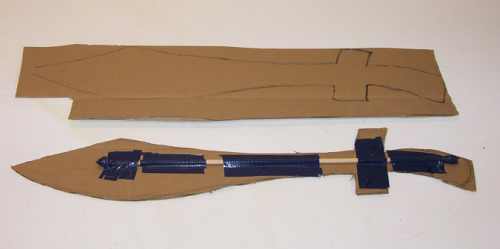
Tape your bar, wooden dowel or plastic rod in the center of the sword as shown in the picture above. Make sure a lot of it is in the handle (for strength). And tape it down real well. You don't want it slipping when you swing it around. Use duct tape if you have it!!
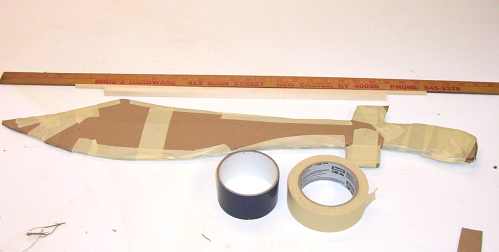
Once ou have the rod or dowel securely taped to one half of the sword put the second half on top and tape the two halves together. If you are going to paint your sword then stick with masking tape (duct tape does not take paint well. If you are going to wrap it in aluminum foil then either tape will work fine.
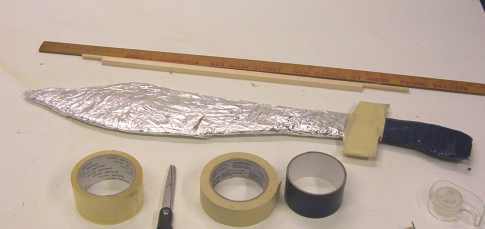
Now wrap the sword blade in aluminum foil. This will be fine and you have to take your time about it. And make sure the shiny side is showing. Aluminum foil can be a bit sensitive to tearing so if you want to seal it in place for good durability then after you put the foil on wrap the whole blade with clear packing tape - the kind of tape that is used to seal boxes for mailing. Cost you about a dollar if you dont' have any.
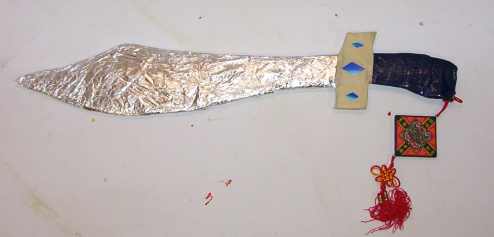
Now add the details to the sword and you are done! I wrapped the handle in blue duct tape and cut out some nice blue designs in the shape of diamonds then used glue stick to attach them to the hilt of the sword. I found the neat decorative add on in a dollar store.

For the Buster sword the hilt is a box I made out of cardboard then wrapped with blue duct tape.
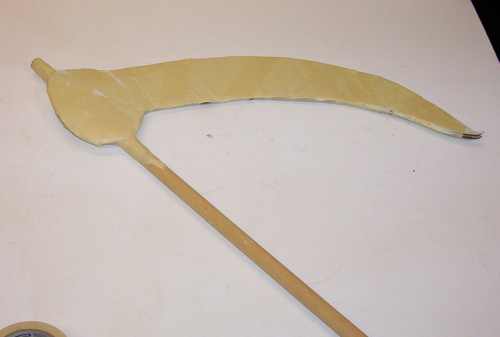
The Scythe is simply two pieces of cardboard taped to a dowel or pole. There is no need to run some kind of a stick or pole down the length of the blade. It will be strong enough, just tape it completely then paint it.
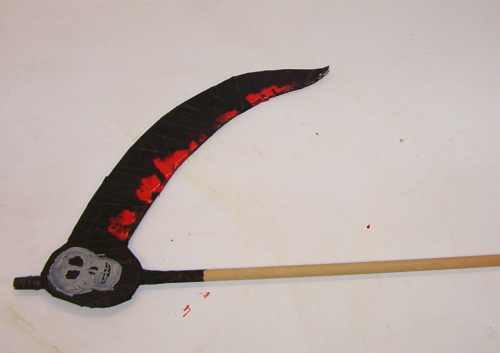
The picture above is my scythe painted, complete with blood and a skull ! It's perfect for a grim reaper halloween costume.
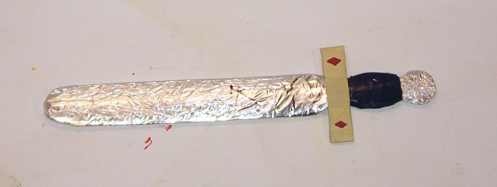
The Traditional cardboard sword is done the same way as the other swords. Cut out two copies of the sword shape, add a rod or pole in between then tape the two halves together. Add the foil then decorate.
ust make sure you don't put a sharp end on it. A rounded tip is much safer. This is a nice sword and a few stick on jewels makes a difference. It is comfortable and easy to swing at about 30 inches in length.
Some Medieval Items on Amazon for you
These are affiliate links, Will makes a small percentage of the sale
I have picked some best sellers for you
King Arthur Medeival short sword dagger - Medieval Chainmail Coif - DaVinci's Battalion


