![]()
I have a youtube channel with over 700 Videos!

Hi, Thanks for visiting my website. My name is Will and if you have questions
or would like to
contribute projects or ideas you can contact me 
![]()
I have a youtube channel with over 700 Videos!
Hi, Thanks for visiting my website. My name is Will and if you have questions
or would like to
contribute projects or ideas you can contact me
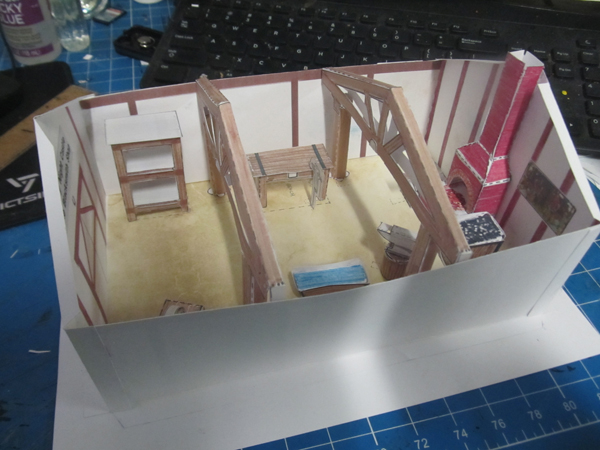
This is a continuation of my tutorial on making a scene box or small room out of paper. In this part we go more in-depth and look at the beam structure for the Blacksmith shop. Part 1 of this tutorial is here |
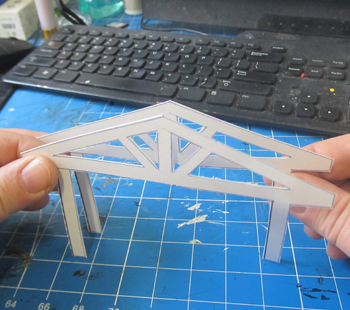
The beam structure for the blacksmith shop is a good example putting together pieces to form a larger and more interesting piece. But, once it is figured out it really isn't that difficult. This will give you some creative ideas on how you can design and build your own paper projects. First let's take a look at the beams as placed in the project. The add interesting depth to the project. Takes it to a new level.
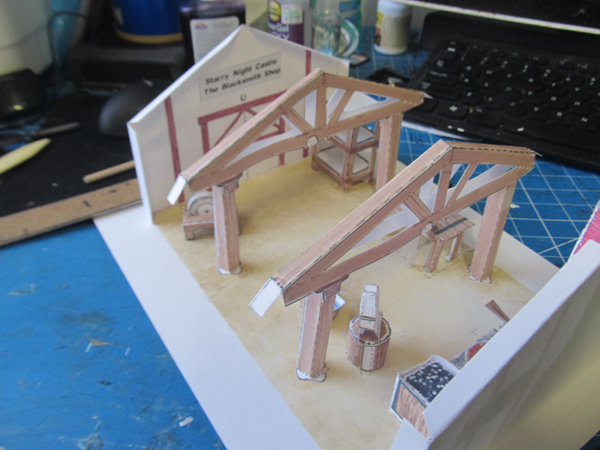
And here without the walls in place.
And the beams offer a lot of interesting views of the project.
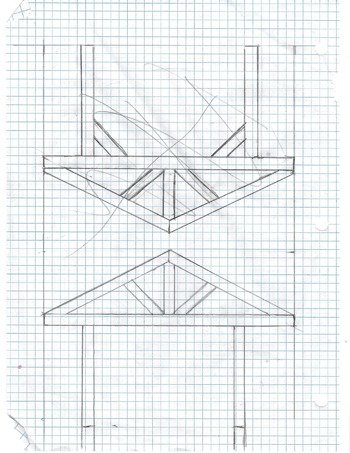
I started by researching beam structure in barns. What do they look like? How are they build. And I did a few drawings to the scale that I wanted. Our blacksmith shop is six inches wide and it is four inches high to the top point. So I drew it all out to this size requirement.
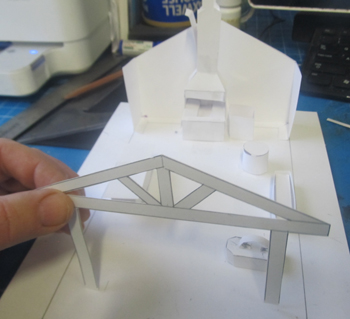
Then I made a mockup on a single sheet of card stock. So I could further see how it looked and how it would fit in the shop.
Once I got it all to where it was what I wanted I next had to figure out how to make it three dimensional. How do I add some thickness to all those beams?
In effect it is two sheets, each identical spaced 1/4 inch apart like this:
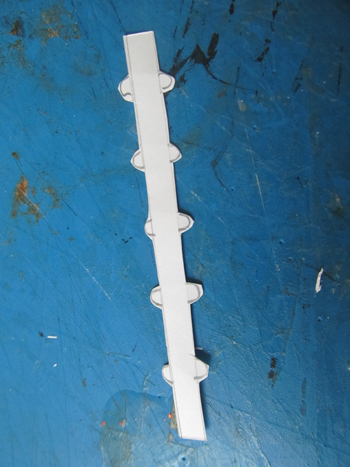
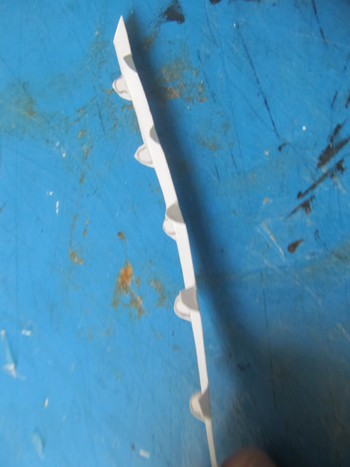
So we just need the paper that goes from one piece to the other. And we can create a series of 1/4 inch strips like this.
Fold those tabs and you can see how it is connector between the two beam units.
In this next picture I have already glued our tabbed strip to one of the beam units. And you can see how now it can be glued to the other beam unit.
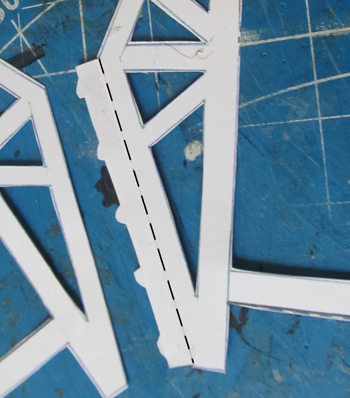
This also shows us something else. We can make it easier by re-drawing the beam to add that strip with tabs right on it. We just put a dashed line for a fold line.
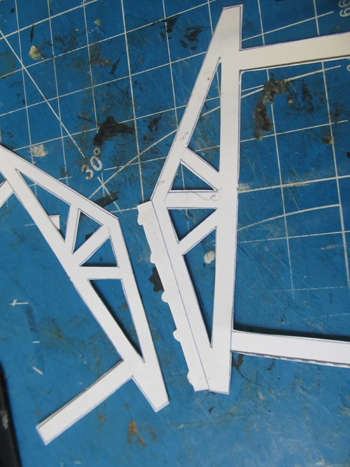
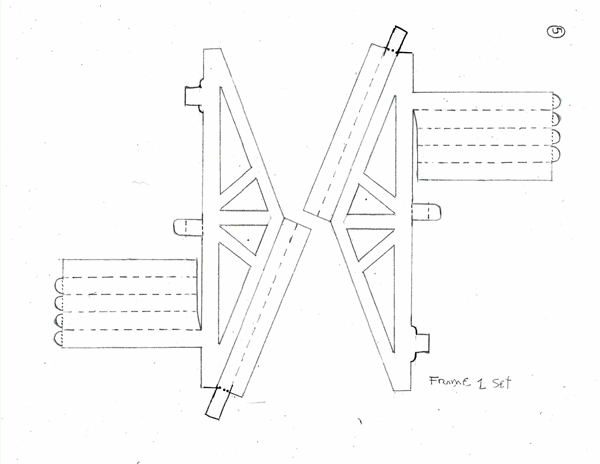
We can continue this process with more of the surfaces. And one really nice thing about this particular piece is that it is mirrored left to right. It is the same on both left and right so we can make the pieces identical and have them share the work. This next image shows the two halves of the beam. They are identical. And they are glued together to make up the completed beam.
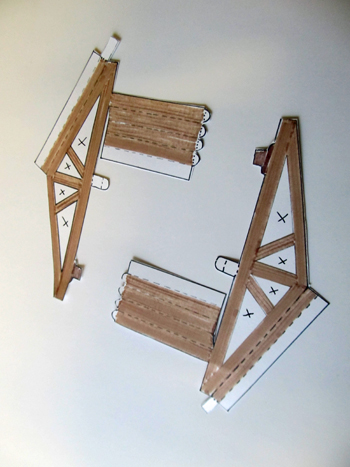
In this next picture each beam half has been folded and creased including the upright beams which have been folded and glued. Now we can glue the two halves together to make a complete beam.
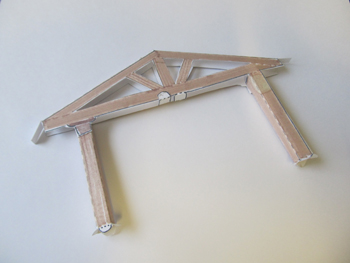
The completed beam.
|