
| |
Mead Stuff
- Mead Home
- Bee Home Page
- About Extractors
- How to get the honey
- About Honey
- The Maxant Company
- Beekeeping Books
- Bees and Honey
- Beekeeping Videos
- Finding The Queen
- Splitting the Hive
- Count Mites in the hive
- Open the hive in Spring
- The Parts of a Beehive
- How to set up a hive
- What is a Nuc?
- Tools and Equipment
- Beekeeping terms
- Starter Kits
- Free ebooks
More Medieval Stuff
- My Medieval Blog
- Medieval Website
- Medieval Projects
- Medieval Castles
- My Blacksmithing site
- Mead Making
Bee Stuff 
|
Follow Us |
Sign up for our newletter!
All Materials, unless otherwise stated are Copyright© 2001-2013
Kalif Publishing and StormtheCastle.com check out my
copyright page for information about how to use any work on this site Here is an advertiser guide to this website and the subjects and projects I cover .
How to Set Up a Beehive continued
| Ok, lets continue on with how to set up a beehive. If you came directly to this page you can start the tutorial on page 1 right here: How to set up a beehive part 1 |
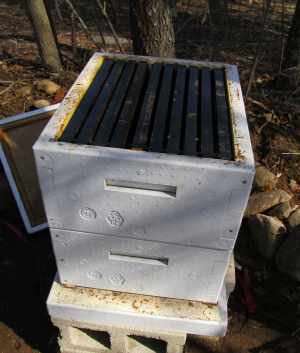
Now set another deep on top of that previous deep just as shown here and install ten frames in it. This is called the upper deep or the food chamber.
This is where the bees will store a lot of their food.
These two deep frames you have installed now pretty much make up a complete beehive! Let's just top it off correctly.
Now set the inner cover on top of it.
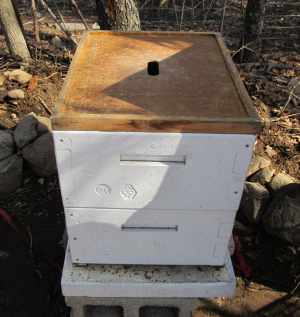
Set the outer cover on top of that.
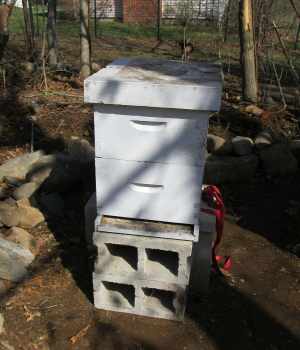
I don't have a picture to show it but now you should put a large stone on top of the whole thing to keep it all secured and safe. It will protect things and hold things down in strong winds. I use a belt strap. It is the red thing sticking out the side.
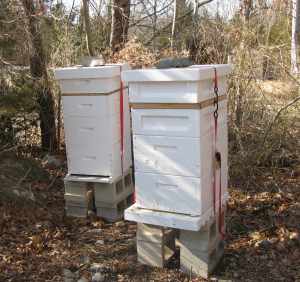 That's pretty much it. Your hive is complete and ready for the queen and the bees. But you might be thinking that beehives are larger than that aren't they? Well yes, normally they are. And you can see in this picture that the hives are larger -having more than two supers. This happens over the course of the growing season. The beehives get more active and need more room so you add more shallow and deep supers so they have more room to make more honey!
But for now you just start out with the two deep supers.
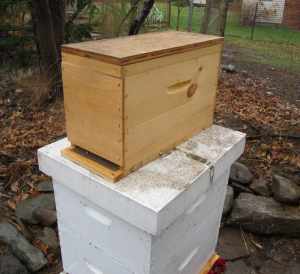 This is where the real fun starts! The picture shows a nuc of bees that have been delived! This is a box with five frames in it. It is a mini hive ready to be moved into our hive. This is a lot of fun. It is all about bringing your bees to their new home. I will be doing a tutorial on this.
On the day I received the Nucs it was raining and it is best not to install the bees on a rainy day. So, I set them on top of their respective hives for the night.
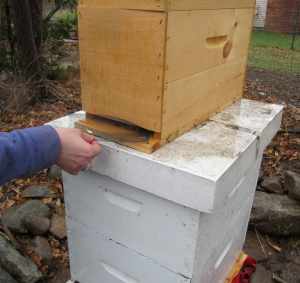
We removed the screens from the Nuc so the bees could get out as they wanted and get used to their new environment. They wouldn't be wanting to get out today in the rain but in the morning they would.
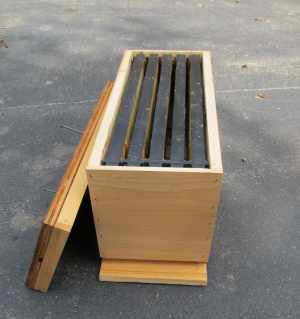
Here is a look inside one of the nucs. There are five frames and they will be full of bees, brood and honey. This picture shows them empty.
Note that some companies will sell nucs with three frames. Typically 5 is the number though. Just ask when you are ordering your bees.
![]() Ok, lets open up those nucs and install the bees in their new homes!
Ok, lets open up those nucs and install the bees in their new homes!
