Often times, if a trebuchet is not working too well people look at the pouch that holds the projectile. And while this is always a good thing to do the problem I most often see has something to do with the arm of the trebuchet.
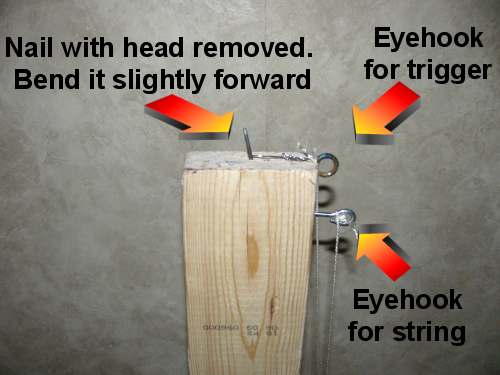
Firtst let's take a look at the very end of the Trebuchet arm. The picture below shows the end of the swing arm on the tennis ball trebuchet project
There is a nail at the very end of this arm. You hook one end of the string that connects to the pouch onto this nail. This nail is critical because the string has to easily come right off it midway through the swing. If this nail is bent too far forward the string will release, and the pouch will open too late and your projectile will hit the ground near the treb. If the angle of this nail is too far backward the string will come off and the pouch will open too soon. You could potentially launch backward or straight up.
So, the most important thing you can pay attention to is the angle of this nail. Typically it should be bent slightly forward. Test the treb and adjust the nail and test again. Bend the nail just a slight bit and test!
This takes a little time but it is worth the effort and you will get maximum performance from your trebuchet.
Another Thing about the Trebuchet Arm
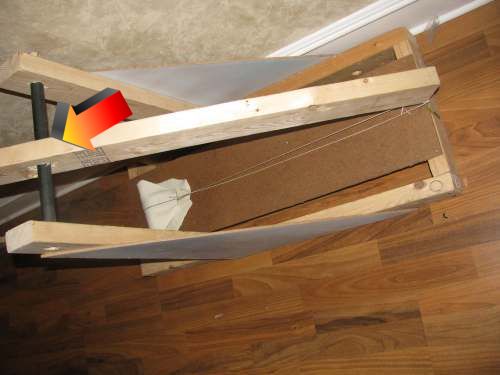
A Trebuchet is all about transferring energy. You transfer gravity to the propulsion of a projectile. And this transfer of energy is subject to a lot of factors. One of the most important factors is to transfer as much available energy as you can without eating up too much energy in the trebuchet itself. And there is one point that this happens, It is the pivot. This pivot can absorb (and waste) a lot of energy which won't get transferred to your projectile.
So, do your best to make this pivot point as smooth as possible. If it sticks or is hard to move you should work on it. In the picture below I use a broom stick that goes through a hole. This is an ok way to do it and it works reasonably well but if you want better performance you should try a better set up.
If you can, use bushings or bearings to get an ultra smooth rotation with almost no loss of energy. And I do have a nice idea where you can use the central hub of an old bicycle. You can check out my bicycle wheel trebuchet to see how you can do this. In that tutorial you don't have to use the whole bicycle like I do. You can just check out how I use the hub from one of the wheels to make a smooth pivot point. The Bicycle Wheel Trebuchet
 The Miniature Trebuchet by Timberkits The Miniature Trebuchet by Timberkits
The trebuchet was the ultimate artillery weapon of the medieval period and early renaissance. A large and unwieldy weapon, it was typically built on-site during battle, and tuned to lob great weights - such as the carcasses of rotting horses and pots of burning pitch, over the castle walls and onto its inhabitants. Precision carved by computer controlled machinery for guaranteed fit and accurate joinery. The detailed instructions include loads of photos of each step of the construction process, tuning tips and safety notes. Included in the kit are four wooden projectiles, all the necessary components for the sling, trigger, and counterweight bucket as well as all the parts for the kit. The only thing you'll need to supply are 88 pennies for counterweight and a few simple tools - Scissors, a ruler, a utility knife, wood glue and a few rubber bands to hold the pieces together while the glue dries. Manufactured by RLT Industries
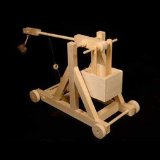 
The Miniature Trebuchet - The trebuchet was the ultimate artillery weapon of the medieval period and early renaissance. A large and unwieldy weapon, it was typically built on-site during battle, and tuned to lob great weights - such as the carcasses of rotting horses and pots of burning pitch, over the castle walls and onto its inhabitants. This is our newest and smallest trebuchet design in a long line of catapult kits. Designed by master trebuchet expert Ron Toms, this machine is ideal for the student on a budget or as a wonderful display piece for any desktop or bookshelf of any history enthusiast. Precision carved by computer controlled machinery for guaranteed fit and accurate joinery. The detailed instructions include loads of photos of each step of the construction process, tuning tips and safety notes. Included in the kit are four wooden projectiles, all the necessary components for the sling, trigger, and counterweight bucket as well as all the parts for the kit. The only thing you'll need to supply are 64 pennies for counterweight and a few simple tools - Scissors, a ruler, a utility knife, wood glue and a few rubber bands to hold the pieces together while the glue dries. Tools required: Scissors, Glue, Ruler, rubber bands and a utility knife. Sandpaper is optional. Additional Counterweight Required: 64 pennies. Range: About 10 feet.
|


