
Home

I have a youtube channel with over 1000 Videos!


Wills Pinterest !

Hi, Thanks for visiting my website. My name is Will and if you have questions
or would like to
contribute projects or ideas you can contact me 
How To Build A Trebuchet - Part 2
Assemble the Base and main frame of the Trebuchet Assemble the Base and the main frame of the Trebuchet.
Here you add some crosspieces to the sides you already built. This easily transforms your pieces into something that actually looks like a trebuchet. If you use glue in this portion you can set it aside to dry while you are working on the swing arm.
|
|
| |
|
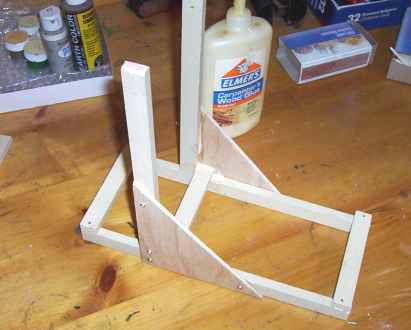
| Take the two side pieces you just made and stand them up with the triangle pieces on the outside. Then glue and nail or screw the five inch cross pieces onto them (all three of them). It will look like the picture at the right. |
 |
| |
|
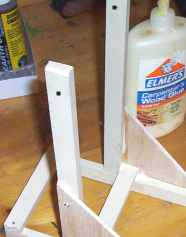
| Look at your new structure. You can see at the very top of the uprights, in this picture there are black dots. Each upright will need a hole drilled in it at this dot. They are one inch from the top. You don't know yet what size hole to drill.. You will be inserting a metal piece across here and through these holes. When you find the metal piece you want then you drill the holes about the same size. |
 |
| |
|
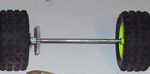
| Find a piece of metal bar that is at least five inches long. It has to be fairly strong to support the counterweight and the swinging action. Suggestions: A coat hanger might be ok, but some coathangers are too weak, make sure you have a very sturdy one. Or use the metal handle from a pail. You can even cut the blade off a long screwdriver and use that. Look around for something. |
Do not insert the metal bar yet. You still have to make the swinging arm of the trebuchet. |
| Need a metal bar for your trebuchet? The axle from a toy car is perfect for this. Dig through the toybox and see if you can find something like this. |
 |
Let's Make the Swinging arm of the Trebuchet |
 The Miniature Trebuchet by Timberkits
The trebuchet was the ultimate artillery weapon of the medieval period and early renaissance. A large and unwieldy weapon, it was typically built on-site during battle, and tuned to lob great weights - such as the carcasses of rotting horses and pots of burning pitch, over the castle walls and onto its inhabitants. Precision carved by computer controlled machinery for guaranteed fit and accurate joinery. The detailed instructions include loads of photos of each step of the construction process, tuning tips and safety notes. Included in the kit are four wooden projectiles, all the necessary components for the sling, trigger, and counterweight bucket as well as all the parts for the kit. The only thing you'll need to supply are 88 pennies for counterweight and a few simple tools - Scissors, a ruler, a utility knife, wood glue and a few rubber bands to hold the pieces together while the glue dries. Manufactured by RLT Industries
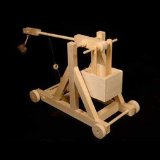

The Miniature Trebuchet - The trebuchet was the ultimate artillery weapon of the medieval period and early renaissance. A large and unwieldy weapon, it was typically built on-site during battle, and tuned to lob great weights - such as the carcasses of rotting horses and pots of burning pitch, over the castle walls and onto its inhabitants. This is our newest and smallest trebuchet design in a long line of catapult kits. Designed by master trebuchet expert Ron Toms, this machine is ideal for the student on a budget or as a wonderful display piece for any desktop or bookshelf of any history enthusiast. Precision carved by computer controlled machinery for guaranteed fit and accurate joinery. The detailed instructions include loads of photos of each step of the construction process, tuning tips and safety notes. Included in the kit are four wooden projectiles, all the necessary components for the sling, trigger, and counterweight bucket as well as all the parts for the kit. The only thing you'll need to supply are 64 pennies for counterweight and a few simple tools - Scissors, a ruler, a utility knife, wood glue and a few rubber bands to hold the pieces together while the glue dries. Tools required: Scissors, Glue, Ruler, rubber bands and a utility knife. Sandpaper is optional. Additional Counterweight Required: 64 pennies. Range: About 10 feet.
Want to build a bigger, better, more powerful or fancier Siege Engine? There are some great books available to you. These books, available at Amazon.com will help take your catapult or Trebuchet building to new heights! Pun intended!
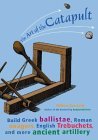
 The Art of the Catapult: Build Greek Ballistae, Roman Onagers, English Trebuchets, and More Ancient Artillery - Nice book that shows you how to build ten different catapult projects, moderate wood working and pvc piping kind of stuff. Good book with complete instructions and materials lists.
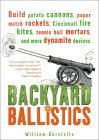
 Backyard Ballistics: Build Potato Cannons, Paper Match Rockets, Cincinnati Fire Kites, Tennis Ball Mortars, and More Dynamite Devices Want to get a little more creative? This book is off the hook!