The room and the whole set was pretty easy to make and I used a whole lot of common materials that you can easily get. The important thing to think about is the improvising of the materials to come up with something that looks good.

I began the whole project by carefully measuring the size of the actual room I was duplicating in miniature then I created a 1/6 size floor plan on a sheet of poster board. You can see the floorplan on the posterboard in the picture.
1/6 size is a pretty good size to work with and I recommend you go with this if you can. It is small enough to work on comfortable yet it is large enough so you can get some pretty good detail. A lot of animation is in this scale and you can buy props, dolls, miniatures and armatures in this size.
1/6 scale means a six foot tall person would be 1 foot tall in the animation.
Once I had the floor plan I started working on the walls and the props that go into the room You can see here that I used pieces of balsa wood to make the table and I carved foam to make the refrigerator.

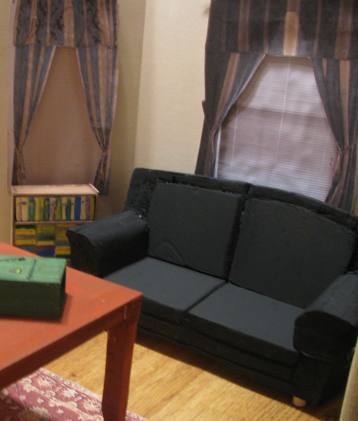
The room is starting to take shape. You can see a little bit of the couch that I carved out of foam. And you can see the balsa wood bookshelf.
For the walls I simply used sheets of foamboard that you can buy in any office supply or crafts store.
The floor is a bit interesting in that I had remodeled the room a while back and laid in a new floor. I had a few scrap pieces of the wood so I used those as the floor in the set. This way it perfectly matched the actual room.
You should use some kind of a solid wood for the base of your whole project to give it shape and keep it strong. And if you are going to use nuts and bolts to secure the miniatures down then you should build this floor up on a short platform so you can reach under there.
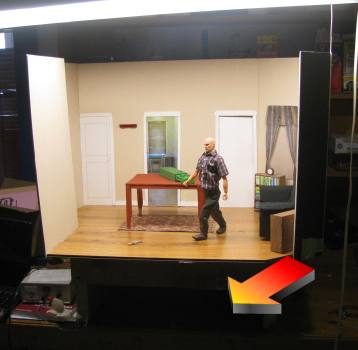
This picture is a bit dark because of the lighting but the arrow shows how the whole set is set up on wood so it is raised. This way I can reach under the floor of the set and insert the bolts up and secure them to the feet of the figure.
Being Creative with set building (And making good use of your printer)
Here is a great little technique for making your animation set look realistic without spending any money.
A lot of this set isn't real! What I mean is that much of the stuff is actually printed out and pasted onto the floor or walls. The persian rug is a good example of this. I found a picture of a rug that looks a lot like the one in the actual room then I printed it out to the right size and glued it down to a piece of cloth. Voila, we have a red persian rug in the set under the table.
And to make the curtains on the walls I took pictures of the real curtains then printed them out to the right scale and used them in the miniature set.
I actually did this in two stages. I took the curtains down and took a picture of the mini blinds, printed that out and glued it right to the wall of the set.
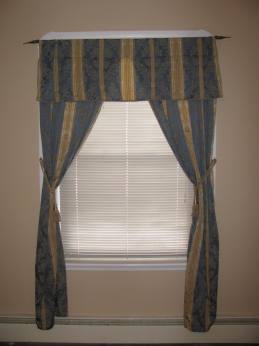
Then I took the picture you see here on the left. I then cut out the curtains and glued them to a little length of balsa wood and stuck them to the wall right over the mini blinds. This way the curtains stuck out from the wall about 1/4 inch. This made them look more realistic.
This picture here gives you a good luck and the completed curtains and mini blinds.
And Finally I used a little bit of trick of the eye camera work to make the look into the kitchenette.
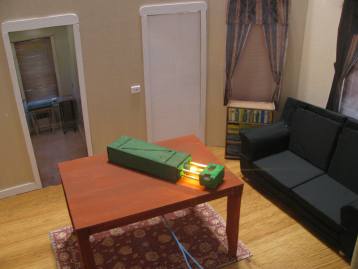
Take a look at this picture. You see two doorways. The doorway on the left looks into the kitchenette right? Actually it is just a picture but it looks pretty real. I took a picture of the doorway and kitchenette, printed it to the right scale then glued it right to the wall of the set. Then I used balsa wood to make the white doorframe around it. Voila! It looks like we are looking into the other room. But it is just a printed picture of the other room.
A Few more notes about how I made the miniature stuff in this room:
The white trim around the doors and the walls are strips of balsa wood. and so is the light switch on the wall. The books in the bookshelf are just big blocks of foam that I painted. No need to do individual books. And the dragonslayer unit is all made out of foam, balsa wood and toothpicks. The light really works and that is just a christmas tree light.
 Okay, Now let's take a quick look at doing the animation Okay, Now let's take a quick look at doing the animation
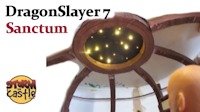
DragonSlayer 7 Sanctum
This is a stop motion animation that completes the story of the dragonslayer. DragonSlayer 7 Sanctum
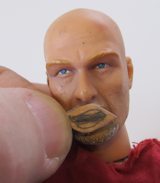
How to make talking figures in stop motion animation
Ever wonder how they make the mouths move in an animation? I have the tutorial right here. Now you can make animations that talk! How to make talking mouths in stop motion animation

Do you like making projects and exploring a variety of hobbies?
Sign up for my free newsletter. I give you regular updates on hobbies and projects you can make. it is totally free and I don't share your email with anybody.
|