Hi, Thanks for visiting my website. My name is Will and if you have questions
or would like to
contribute projects or ideas you can contact me
Stop Motion Animation with Pipe Cleaners
Stop Motion animation doesn't have to be hard. And you really don't need a lot of materials to get started with it. This tutorial is about doing stop motion animation with just a few basic materials and some pipe cleaners. Simplicity can be a big appeal when it comes to Stop Motion Animation and all you need is a little time and a small idea or a little story. This is a web based tutorial but I also have a video that shows you how I made this pipe cleaner animation and at the end of the video is the one minute short animation that I made.
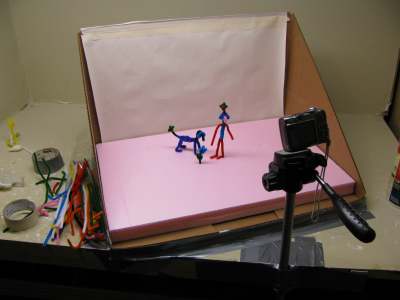
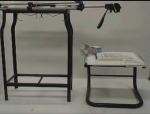
Here is a picture of the little studio that I built to make my animation. It is simply a big cardboard box that I cut out. I taped a white background up in the back and I can paint this. I recommend you do this. Make yourself a nice little stop motion animation studio and put a paper background on it. I recommend you simply tape the background in place. This way when you do a different animation you can make a new background.
The pink base in this studio is a product called Foamular. It is a type of foam very much like styrofoam. If you can get some kind of foam for the base or ground of the studio. But if you don't have some kind of foam the cardboard itself might work just fine. Or you could put a couple of flat layers of cardboard right in there. I will show you why this base is important in this kind of animation.
Okay let me Give you some Tips on How to make your little studio
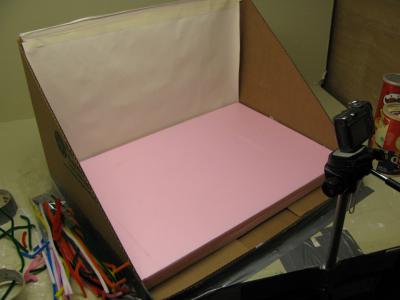
This picture shows a little studio set up. I will point out a few different things about this studio that is important. All I did was cut a cardboard box. You can cut a box in the same way or you can make something out of cardboard. There are a couple of important things to think about when making this studio box. First it should be big enough to cover the whole range of the camera. This way nothing outside the box shows up in the animation. Second it has to be reasonably strong so it doesn't bend or move around while you are doing things on it. Third it should have a background and a base.
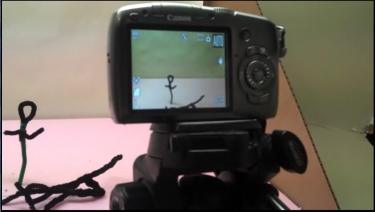
About setting up the camera. The most important thing you have to do when setting up your little studio is to set the camera in an absolutely firm location. You have to minimize the motion of the camera as you take the series of pictures. In the picture at left you see that I have the camera on a tripod which is great. But this isn't enough. I have also taped the tripod to the table and taped the legs to the ground. This insures the camera moves very little. If you don't have a tripod you can still make something that will keep your camera as still as possible and I have a little tutorial on making a wooden jig for this. But you can tape the camera to a solid object and that will work pretty good.
As you are setting up your camera and your studio you should turn it on and take a look through it. Does everything fit within the frame of the picture? You should not be able to see any of the box or anything off or behind the box. This would ruin the suspension of reality in the animation. So, move the camera, and or the studio and get the picture looking just right before you tape or secure everything down. The best thing you can do is to take a few pictures then upload them to your computer and take a real good look at them.
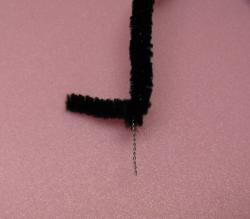
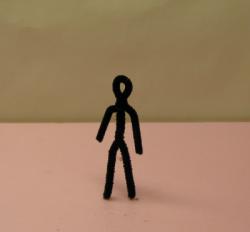
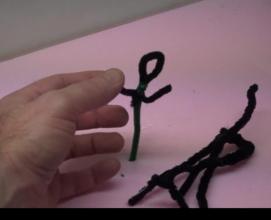
Once your studio and camera are ready you can start to create the characters that will be in your animation. And the nice thing about using foam as a base along with pipe cleaners is that you can strip away the bottom inch of the pipe cleaners and stick them right into the foam. This allows you to stand up objects and move them around easily. The picture at left shows the bottom of a pipe cleaner that has been stripped away.
This picture shows the pipe cleaner figure standing up in the studio. The stripped away bottoms of the pipe cleaner legs makes this real easy.
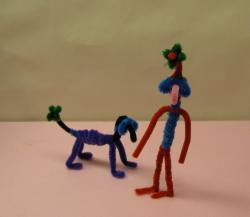
Be creative with the characters and shapes you create with the pipe cleaners.
Once you have your characters and you have thought up a little story you can start doing your animation. You simply start with the first pose and take a picture. Then move the characters just a little bit and take another picture. That's pretty much the whole process. For the little animation I did along with this tutorial it took somewhere around 270 pictures, a few pipe cleaners and a little bit of cardboard (for the tree). If you are looking for tutorials on how to do the computer work for the animation I have an easy tutorial on that. Just check the left sidebar of this webpage for the tutorials.
.
This is a screenshot of the animation I made. You can watch my tutorial and the 1 minute animation in the video below.
Each pipe cleaner measures approximately 6 inches long
ZEN the name you know & can trust for all your cleaning needs
Clean & repair old antique tube radios, T.V.'s, Ham Radios/Receivers
Such as Philco, RCA, Admiral, Zenith, Hallicrafters, Sears, Brewster, Crosley, Firestone, plus hundreds more!
Arts & crafts projects for many pre-school, kindergarten, elementary & JR. And high school teachers
More Stop Motion Animation Projects
Stop Motion Animation with Play doh
All it takes is a cheap digital camera and a computer with Windows XP and you can make your own animations! You are only limited by your creativity. I have animations that I made and a tutorial that shows you how to make your own animations. Stop Motion Animation
Creative Stop Motion Animation
I teach you 9 creative techniques for doing stop motion animation drawings. And I have an animation that shows the techniques: Stop Motion Animation Tutorial
Do you like making projects and exploring a variety of hobbies? Sign up for my free newsletter. I give you regular updates on hobbies and projects you can make. it is totally free and I don't share your email with anybody.