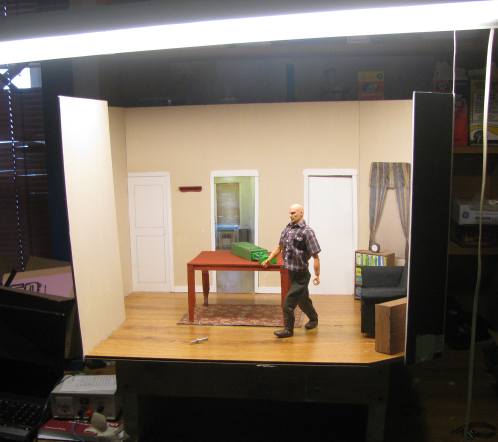
Here is a look at the miniature set for the animation.
It is all in 1/6th scale and it looks pretty good. I will show you some of the tricks, techniques and materials I used to make this project.
There are two important things to note about the project in the picture.
First, I have a two bulb fluorescent light hanging directly over the set. The lighting in a stop motion animation is very important. It needs to be very bright because when you put all the single pictures into a movie the pictures will darken quite a bit.
I took a series of test pictures with this lighting so I could stitch them together in an animation and see if the lighting was good.
Second, The whole structure is built on top of a base that stands it off the table. This is so I can reach under the set. Reaching under the set is necessary so I could secure the feet of the miniature down to the floor. I will show you more about this.
Tips and Rules of Thumb when making a miniature set like this
- Be sure the lighting is sufficient and even. Test it by doing a quick animation
- Build the set up on a platform so you can reach under the floor
- Measure everything you are copying and get the scale right! Everything here is 1/6 scale and that includes the floor plan, height of walls and doorways and the size of the furniture.
- Use a hot glue gun to glue everything down! Everything that doesn't move like the furnture. This is because while you are moving your miniature you don't want to bump something like the table or sofa and have it move! this would ruin the shot. Nothing worse than seeing a couch move by itself in the actual animation.
About securing the animated figure to the floor
This is a very important point when it comes to making a stop motion animation. You almost always need some way to hold the figure in an upright position and in exactly the same spot. One way you can do this is to actually use some glue or some kind of a putty to hold it down by it's feet. But, what many professional animators do is to bolt the figure right down to the set.
The armature I use has threaded nuts in the feet. This makes it easy to bolt the figure down to the set.
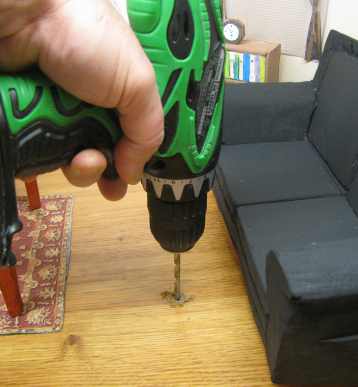
I drilled holes in the set. This is a series of holes so I can move the figure around the set. These holes often cannot be seen in the actual animation. But you can plug and cover them if they are not being used or you can even edit them out of the series of pictures with a paint program.
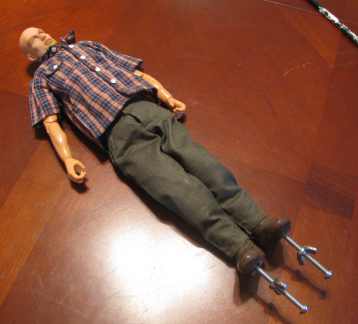
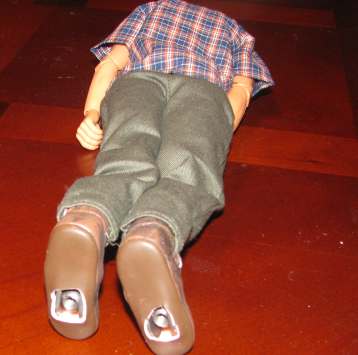
Here is the miniature figure with the bolts and wingnuts attached to the feet. You slide the bolt up through the set and thread it into the nut into the foot.
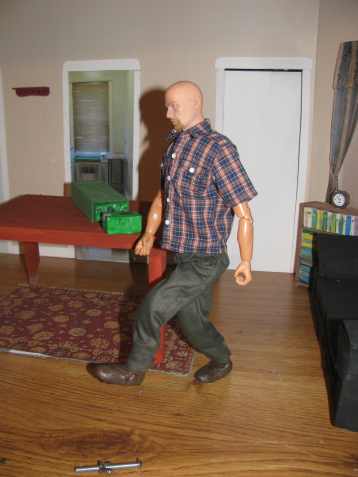
This picture has the right foot of the figure bolted down to the floor of the set and the figure is in mid step. Once the left foot is down I will bolt that down and then unbolt the right foot so it can be moved. It is a tedious process but it will make a big difference in how the animation looks. It will give it a very nice smoothness.
 Okay, Let's take a look at how I made the Room and the furniture Okay, Let's take a look at how I made the Room and the furniture
Stop Motion: Craft Skills for Model Animation, Second Edition (Focal Press Visual Effects and Animation)
I have this book and it is terrific. I highly recommend it. You get a nice look and understanding of the basic skills of making a stop motion animation.

Do you like making projects and exploring a variety of hobbies?
Sign up for my free newsletter. I give you regular updates on hobbies and projects you can make. it is totally free and I don't share your email with anybody.
|