Okay, let's take a look at some of the various parts of this trebuchet so you can get a sense for how it is built.
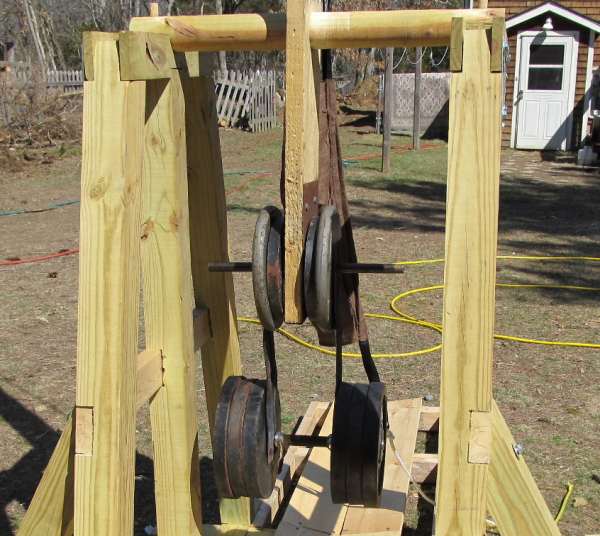
This picture shows the counterweight system. It is composed of two 3/4 inch steel shafts as the holders for the sets of weights. One of these shafts goes right through the swing arm and the second shaft is suspended from it by two plates of steel.
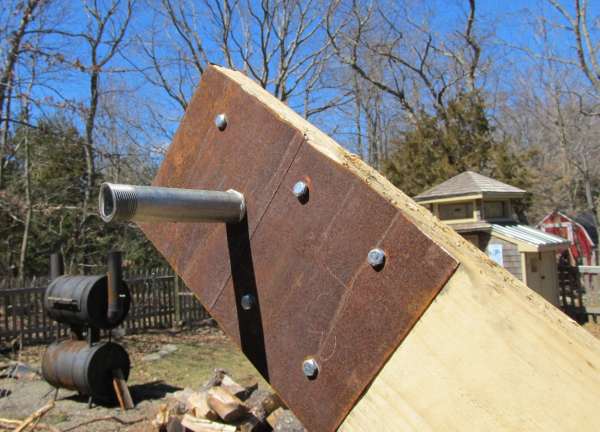
And the following picture shows the swing arm. Notice how the end of the swing arm is reinforced by a sheet of steel. This steel covers both sides and is firmly screwed in place. It has a 3/4 inch hole drilled in it and the pivoting pipe is 3/4 plumbers pipe.
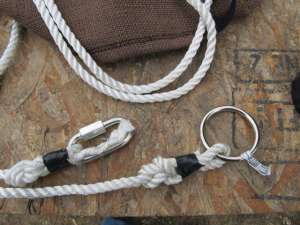 The Pouch and the sling are made up of two six foot lengths of rope connected to the pouch and the ends of the ropes have the rings as shown. The D ring connects securely to the swing arm while the circular ring slides off the pin (opening the pouch) at the end of the swing arm. The Pouch and the sling are made up of two six foot lengths of rope connected to the pouch and the ends of the ropes have the rings as shown. The D ring connects securely to the swing arm while the circular ring slides off the pin (opening the pouch) at the end of the swing arm.
And here is a great tip from a web visitor (Chris). He has made a big trebuchet and he finds that the best string length is 2/3rds of the length of the swing arm. So, you should make your string that length.
You can also see pics of Chris' Trebuchet right here.
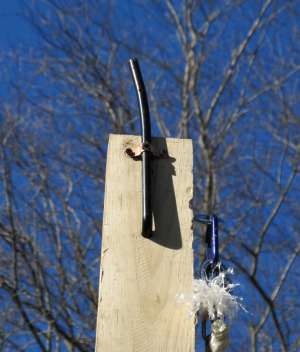
This picture shows the release pin mounted to the very end of the trebuchet. It extends about 8 inches beyond the end of the arm and it is bent slightly forward toward the direction of throw. The size and angle of this pin will have a big impact on the angle and length of projectile throw. Bending it more foward will release later in the swing.
The ring from the sling pouch loosely slides onto this pin when you load the trebuchet. And as the arm swings that ring is freely thrown off the pin opening the pouch and freeing the projectile.
You can also see the D ring from the pouch firmly connected to an eyebolt.
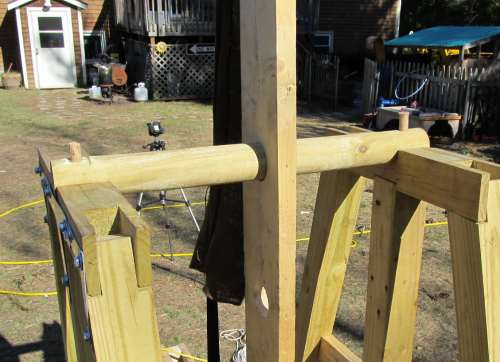
The following picture shows the pivoting axle. The swing arm should freely spin on this. We turned down a 4x4 square of wood so it is about 3 inches round. It sits in half holes cut in the tops of the trebuchet legs and it is affixed by wooden pegs.
 Let's continue on with the building of this trebuchet Let's continue on with the building of this trebuchet
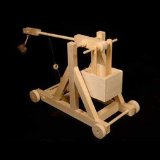 
The Miniature Trebuchet - The trebuchet was the ultimate artillery weapon of the medieval period and early renaissance. A large and unwieldy weapon, it was typically built on-site during battle, and tuned to lob great weights - such as the carcasses of rotting horses and pots of burning pitch, over the castle walls and onto its inhabitants. This is our newest and smallest trebuchet design in a long line of catapult kits. Designed by master trebuchet expert Ron Toms, this machine is ideal for the student on a budget or as a wonderful display piece for any desktop or bookshelf of any history enthusiast. Precision carved by computer controlled machinery for guaranteed fit and accurate joinery. The detailed instructions include loads of photos of each step of the construction process, tuning tips and safety notes. Included in the kit are four wooden projectiles, all the necessary components for the sling, trigger, and counterweight bucket as well as all the parts for the kit. The only thing you'll need to supply are 64 pennies for counterweight and a few simple tools - Scissors, a ruler, a utility knife, wood glue and a few rubber bands to hold the pieces together while the glue dries. Tools required: Scissors, Glue, Ruler, rubber bands and a utility knife. Sandpaper is optional. Additional Counterweight Required: 64 pennies. Range: About 10 feet. - The trebuchet was the ultimate artillery weapon of the medieval period and early renaissance. A large and unwieldy weapon, it was typically built on-site during battle, and tuned to lob great weights - such as the carcasses of rotting horses and pots of burning pitch, over the castle walls and onto its inhabitants. This is our newest and smallest trebuchet design in a long line of catapult kits. Designed by master trebuchet expert Ron Toms, this machine is ideal for the student on a budget or as a wonderful display piece for any desktop or bookshelf of any history enthusiast. Precision carved by computer controlled machinery for guaranteed fit and accurate joinery. The detailed instructions include loads of photos of each step of the construction process, tuning tips and safety notes. Included in the kit are four wooden projectiles, all the necessary components for the sling, trigger, and counterweight bucket as well as all the parts for the kit. The only thing you'll need to supply are 64 pennies for counterweight and a few simple tools - Scissors, a ruler, a utility knife, wood glue and a few rubber bands to hold the pieces together while the glue dries. Tools required: Scissors, Glue, Ruler, rubber bands and a utility knife. Sandpaper is optional. Additional Counterweight Required: 64 pennies. Range: About 10 feet.
|
![]()


