Hi, Thanks for visiting my website. My name is Will and if you have questions
or would like to
contribute projects or ideas you can contact me
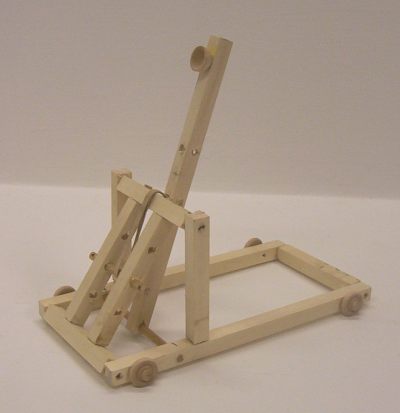
The Goblin - an adjustable catapult
(This catapult is adjustable so you can accurately hit distances)
This is the Goblin catapult. And it is a small table top sized catapult that is ten inches in length. But it is a bit unique in that it allows you to adjust the throwing distance pretty easily. One of the difficult things about a catapult is that it can be difficult to get an accurate throw to different distances. This little catapult solves that issue by using a series of holes that you can set a pin or dowel through. So, you get a variety of different strengths from the rubber band. And you can further adjust this distance of throw by using different sized rubber bands.
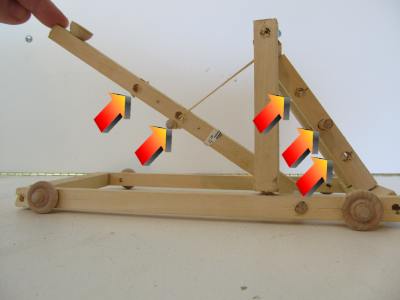
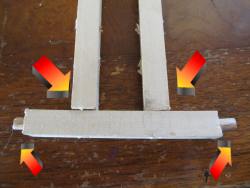
Let's take a look at how this catapult is adjustable. The picture below shows the five holes that I have in this catapult. You simply put a wooden pin in a selected hole to hold the rubber band at a different location. see how this will stretch the rubber band to different tensions? That is how we get the adjustability of this catapult. And I have five holes (2 in the throw arm and 3 in the structure but you could put more holes to get more adjustability. And, remember that using different rubber bands will also get you even more flexibility and adjustment.
Some Design Improvements
Mortise and tenon construction for strength yet easy to build
Rubber Band powered and you can use more than one for super launching
Multiple setting with the moving of a simple dowel. This gives you a lot of different launch distances
It's on wheels, just for fun.
This project is still being worked on and it will be a while before I have them ready for production and sales so bookmark this page and check back in the future if you want to get a goblin for yourself.
See this catapult in action and learn more about it
Let's Build this catapult
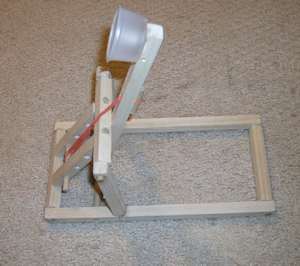
Can you build this goblin catapult? You sure can! Here is a picture of one that was built by Abhinav. My thanks go to him for sending in this picture!!
Some Building Notes before we get started
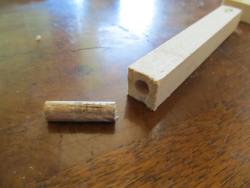
I use mortise and tenon joints for this catapult and I will show you what these are but you don't necessarily have to do this. You can use screws or possibly nails or you could even use a glue gun to glue it all together. I have built small catapults like this with a gluegun and my multipult is a good example of this. But, if you want the strongest catapult you can get, which means the potential for the longest shots, then the mortise and tenon set up is your best choice.
So let's take a look at what a mortise and tenon is and how we make one. It is reallly quite simple. It is just a way to strongly secure two pieces of wood together and you can do it without glue or with glue. I recommend you use glue, it is easier and you don't have to worry about the dowel and hole being perfectly sized.
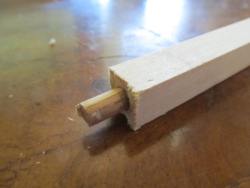
You have a little piece of round dowel and you drill a hole in your piece of wood that is the same size.
Insert that dowel into the hole so it is about half way. And I recommend you glue it by putting a drop of glue into the hole first.
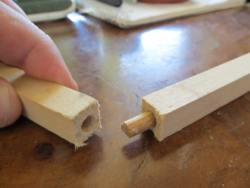
Now you drill a hole in another piece of wood. Put a drop or two of glue in that new hole.
And then just push that right onto the dowel. Voila!
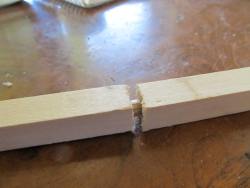
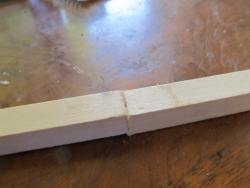
Push them together tight and you have a nice strong joint.
And the examples above show attaching two pieces end to end but you can use this technique anywhere. This pic shows mortise and tenons connecting ends of pieces to the middle of another piece. And you can see two tenons sticking out ready for attachement to yet more pieces.
So let's build this catapult
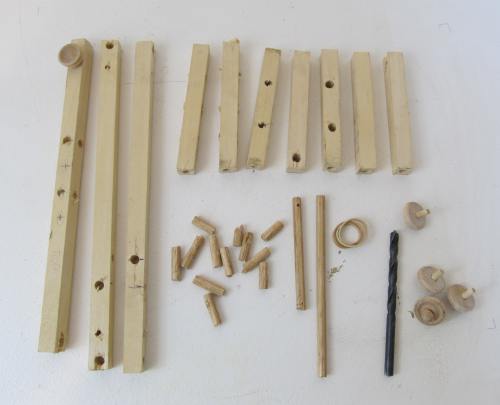
Here is what you will need in terms of wood and a few other things.
The wood is all 1/2" square and the dowels are all 1/4" round. You can use pine or any other kind of wood except for balsa wood which is too weak. You can buy this wood very easily at home improvement stores, harware stores and most hobby stores.
1/4" drill bit
Rubber band ( for the final catapult)
Glue - optional but good
Wheels - you can see I have four little wheels and axles for the catapult and this is totally optional. I found these in a hobby store. You can improvise wheels or make the project without them! It will be perfectly fine. Just take into consideration whether you will drill holes for the wheels or not.
On the far left piece of wood you see a little wooden bowl. This is to hold the projectile. I also found this in a hobby store. You can make a simple cup out of paper or cardboard.
Lengths of wood: from left to right
1 piece 9 1/2" inches this is the swing arm
2 pieces 10 inches - these are the base sides of the catapult
2 pieces 4 1/4 inches long. these are part of the adjustment assembly
5 pieces 4 inches long - various pieces
12 pieces of the dowel that are about 1 inch long - length not critical
1 piece of dowel 3 1/4 inches long this holds the rubber band
1 piece of dowel 5 inches long - this is the pivot axle for the swing arm
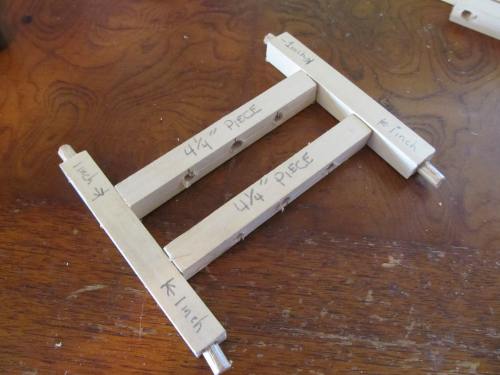
Okay, lets build the rubber band adjustment plateau first. It's important that you build this first. Otherwise you won't be able to assemble the catapult! Build it just as shown. It is all mortise and tenon. Be sure to use the two pieces that are 4 1/4 inches in length for the center two pieces. They are about an inch in from the ends of the horizontal pieces. (not critical)
Drill three holes through these 4 1/4 inch pieces either before or after you assemble it. The placement is not critical. These holes will be for a dowel that you hold the rubber band with. These are the adjustment settings. When you want to change the tension you move the dowel and rubber band from hole to hole. If this is unclear it will be cleared up when its built.
Don't forget to put the four tenons in the ends as shown.
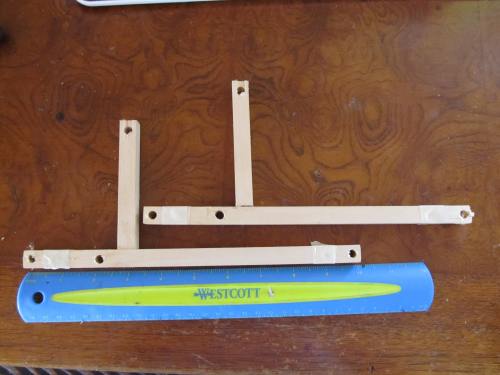
Now build the two sides of the catapult. Put the vertical pieces three inches from the left end. Here are the locations of the holes to drill. In each of the two uprights drill a hole 1/4 inch from the end. In each horizontal piece drill a hole (measuring from the left) at 1/4 inch, 2 1/4 inch and 9 3/4 inch. Be sure to make two of these sides!