
![]()
I have a youtube channel with over 1000 Videos!
![]()
![]()
![]()

Tutorials
- Diorama Making Home
- What is a diorama?
- History of Dioramas
- How to Make a diorama - step-by step tutorial
- Diorama Books
- Diorama Ideas
- Diorama Examples
- Diorama Making supplies & Tools
- Printable diorama box
- Diorama Making Videos
- Diorama words, terms and definitions
- Waterfalls and water in dioramas
- Dioramas For kids to Make
- Diorama Trees
- Dioramas with Special Effects
- Dioramas in Movies and Television
Will's Big Dioramas
- Storm The Castle Diorama
- The Wall Diorama
- The Medieval Village
- The 300 Diorama - Battle of Thermopylae
Fast Tutorials
- Make your own terrain and textures
- Pencil shavings into terrain textures
- Use Plexiglas to make bodies of water
- How to make bricks
- Make Water Effects
- How to make a waterfall
- How to make snow for your diorama
- Terrain making with foamcoat
- Diorama Making for the artist
- Creative terrain shell making
- How to make Miniature Trees
- How to Make rubber rock and wall molds
- Using foam to make a diorama
- How to make good looking rubble using cork
- Creative Shoebox Diorama Ideas for School
- How to make mud in a diorama
Types of Dioramas
- Easy Dioramas
- Paper Dioramas (Tatebanko)
- How to make a Paper Mache Diorama
- Make a shoebox diorama
- Shadowbox dioramas
- Polymer Clay Diorama Fantasy Dioramas
- Make a Triarama
- Military Dioramas
- Fairy Tale Dioramas
- Bonkei-tray landscapes
- Maquettes
- Action Figure Dioramas
- Room Boxes
- Travel Dioramas
Diorama Themes
Time Periods
More
- Diorama Images
- Dioramas Made by Luis
- Dioramas Made by Charles
- Dioramas Made by Joseph
- Dioramas made by Marshall
- Action Figure Dioramas by Stephen
Tools/Supplies
- Woodland Scenics Terrain Materials
- Woodland Scenics Turf and terrain Materials on Amazon
- Diorama Making Books
- Diorama Kits
- Scene-A-Rama diorama Kits
- Diorama Foam
- Diorama Accessories
- Check out the Diorama and Miniature store
- More Diorama Stuff Here
More Stuff

Hi, Thanks for visiting my website. My name is Will and if you have questions
or would like to
contribute projects or ideas you can contact me 
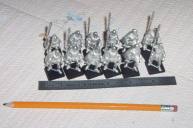
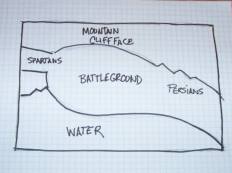
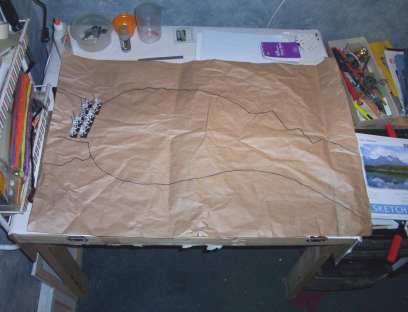 Now I have taken that sketch and laid it out on a larger piece of paper. This is the template for the diorama. It gives me a really great idea of the actual size and look of the final product. Notice how I put the spartan warriors right on it. You need to always check things as you work to make sure the diorama will look right. This is actually not the first big sheet I did. I ended up doing several of them. I would draw it out on a big sheet and look at it then make changes. Then I would go back and work on some more smaller drawings and do another large sheet. Eventually I got it all exactly the way I wanted it and this is the final design. This design is three feet wide and two feet deep. It's going to look great and hopefully it will be quite dramatic.