I am going to use Realistic water from Woodland scenics because it is easy, mess free, and smell free. There is no mixing with this.
This is the water product that I use to make the surface water of the pond and the river. It is pretty nice stuff and very easy to use. You just pour it in and let it dry. No mixing required. But, you can only pour it to about 1/4 inch thick. Then let it dry and pour another layer. You can speed up the drying process with a fan.
But this stuff does take some time to use. You can only pour it in 1.4 inch thick layers then you have to let it dry and pour another layer until your desired thickness is achieved. This is ok by me. And you can use a fan to greatly accelerate the drying time.
Prepping the diorama
The Realistic water is a liquid so you have to examine your diorama and plug up any cracks or holes with some kind of glue. A plain white glue or a glue gun works well for this.
And if the water is going to go right to the edge of the diorama, like it does in this one, then you have to build some kind of border that will hold the water securely in place while it dries.
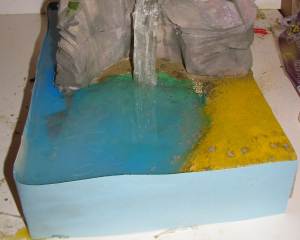
In this picture you can see the blue card stock border that I have glued all the way around. Do something like this to your diorama if you need to. Glue gun works well for this because it is fast. Once it has dried you should inspect it carefully and seal up any of the edges with glue or hot glue so the realistic water won't leak out.
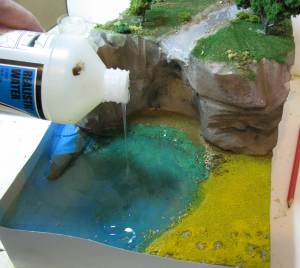
Make sure your diorama is on a level surface and pour in the water.
Use a fan to let it dry. At this point you could embed small objects in the water if you want to. Rocks, fish, small items, even miniature figures.
Once it has dried you can pour another layer. And another as needed. Once you get it to the right height we can start adding the various other water effects.
Making Ripples, Large waves and other effects
on the surface of the water
These products are called glazing mediums or sometimes gloss gels. They are typically used by acrylic artists to add body to their paint. You can paint this stuff on and it will hold a nice 3 dimensional shape. So you can apply it as ripples and waves and crests and all kinds of waterfall like shapes and when it hardens you are all set. Just make sure that you get a type that dries transparent. or clear.
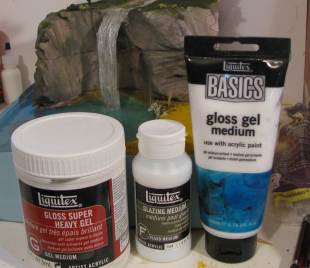
Here are three that I use. they are all made by liquitex. From left to right are Gloss super heavy gel, Glazing medium and gloss gel medium. The mediums will give you a certain amount of bulk and if you want to really build up the shape of the waves and water effects you can go with something like the heavy gel; it is thicker.
The heavy stuff is really terrific and you can get some good looking shapes, waves, crests and more out of it. But it will take several days to completely dry. The outer shell of your shapes will dry quick enough and you will be able to handle it in a day but for it to totally solidify and clarify to crystal clear will take a few days.
You can also use a product called "Water effects" This is made by the diorama company called woodland scenics and it dries clear and works very well:
  Water Effects, 8 fl oz Water Effects, 8 fl oz
- A heavy-bodies, moldable product that will hold it's shape
- Use to create pond ripples, waterfalls or rapidly moving water
- Dries clear in about 24 hours
- 8 fluid ounces

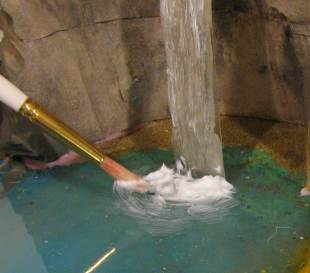
You can use paintbrushes, small trowels, popsicle sticks or just about any small tool or object to apply the glazing medium of gel and mold it into the shape and form you like. In the picture below I created some nice waves. In this picture they are almost dry so are still a little opaque.
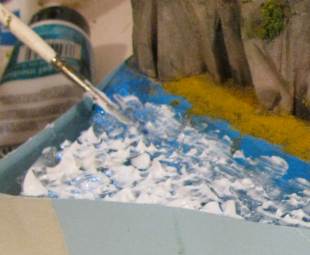
You can use lots of the gel to create series of waves. You dab a brush into the gel then pull it up. This lifts the gel up into a pointy wave shape. Once it has dried clear you can paint white caps on the top.
One of the best techniques you can use is to lay out the gel around the base of the waterfall in concentric rings. The further away from the waterfall the smaller the waves. This is like a rippling effect. It will look really nice and once it dries you can accent it with small amounts of white to create frothing and bubbling.
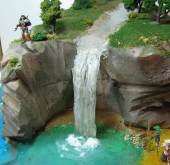
A Waterfall in a diorama
Actually pretty easy to make a great looking waterfall if you know the right tools and techniques. I have it right here: Make a waterfall in a diorama
SUPPLIES
|