Cork is an excellent material to use because it has great texture, is easy to work with, easy to paint and inexpensive. Once you have the cork all painted up you will never know that it is cork. This tutorial shows you how to use cork and some other materials to make a nice scene with plenty of rubble. I also give you links to the materials and tools that I use in the process. And, there is a video included so you can watch my progress and see how I make my diorama rubble.
This tutorial comes with a companion video that you can watch. It is located here: How to use cork in a diorama to make realistic rubble
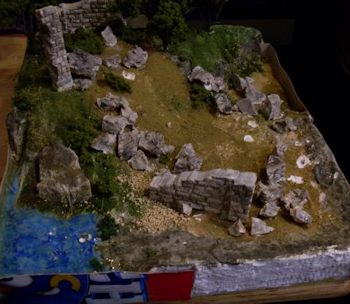
First let's take a look at the finished diorama
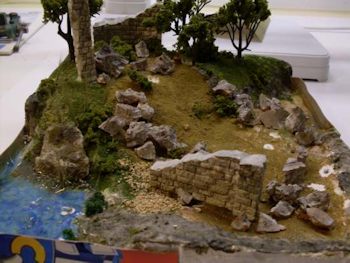
It seems like quite a bit going on here but basically most of the rubble is just cork. I have added a few extra touches and I will explain these to you. I will also give you suggestions on what materials you can improvise to make more rubble and more variety in your rubble.
Some quick notes about design and layout of rubble in your diorama
Rubble doesn't just fall from space! It is the accumulated effect and display of destruction and the effect of long periods of time. You can see in the diorama above that the rubble seems to have a couple of characteristics. The first characteristic is that it is strewn down hill. Over time rubble will make its way down inclines or, when a building or structure is destroyed the rubble will do a certain amount of rolling down hill before it settles in its final location. Second you can see in the foreground there is the remnant of a wall. I have placed rubble near this to give the effect that the wall has been destroyed and the rubble around it shows that. So when you are making rubble you want to think about how real rubble actually occurs. Wow, did I say "rubble" enough in those last two paragraphs or what?
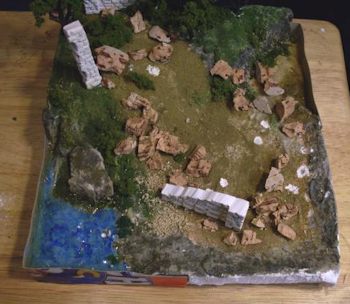
The cork has been torn into pieces and placed on the diorama. Fiddle with the layout then glue it all in place. Once the glue dries it is ready for painting.
First let's take a look at Cork. There are lots of different types of cork and most of them are composites of cork material that has been ground up and glued together. This type of composite cork is not the best for dioramas. It doesn't make the random and ragged shapes that we are looking for. You can use this if its all you have but it isn't optimal.
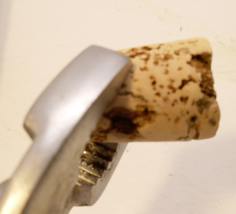
The best cork you can use is natural cork that has been cut into bottle cork shapes. The picture at left shows a good example of this. See how it has lots of indentations and ridges? This gives us great variety in our rubble. You can order the same exact bag of corks that I ordered and used for this tutorial. It's available on amazon.com
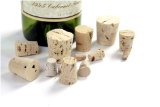
Cork Assortment - 14 Pieces at Amazon.com
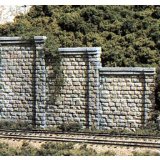 
N Retaining Wall, Cut Stone (6) About the Wall fragments I have in this diorama. These are prefabricated and plaster. Made by a company called Woodland Scenics. You can also buy these from amazon.com. You can also buy one set then cast them in rubber yourself and make as many as you want. I have a tutorial on this process here: How to make rubber rock and wall molds I just cut them down to make broken down shapes as you can see in the diorama.
The Steps to Making the rubble for a diorama
Using Pliers break up the cork into a variety of different shapes and sizes then start laying them out on your diorama. Experiment with the placement until you get something that looks right.
Glue each piece down to the diorama and let the glue dry.
Painting the Cork Rubble
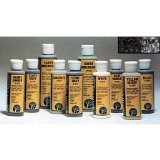
I use Woodland Scenics Paints They are the best for dioramas and give a real natural look. They are the best for dioramas and give a real natural look.
I follow this process for painting the cork rubble. First I paint all of the cork with white. This sets down a nice base coat that you can paint over.
Second I dabble thin coats of varying shades of gray on the cork. It's starting to look like stone rubble now.
Finally I do something called washing. This is where you dilute black paint and brush it liberally onto the cork. The black will settle into the cracks, and continue washing with just water to remove the black from the high spots.
Touch up work
Now you can do the real fine detail work on the rubble. Some suggestions are to do very fine touch up painting with various colors like rust, gray, black or even green. The green is representative of mold. You can even attach small amounts of foliage to the rubble. It's as if you are aging it and over time stuff is starting to grow over it.
Here is another look at the almost completed rubble diorama. It just needs some touch up and grass bunches.
You should also put small bunches of grass or weeds in between various fragments of rubble. I have a tutorial on how to make great looking tufts of grass here
Going even further with improvised materials
Rubble doesn't consist of just stone. You can also add little pieces of wood that look like timber or you can paint toothpicks gray or black and stick them in the cork as if they were rebar. You can even use real wire for the rebar. When you stop and think about it rubble is just a big mess so don't be afraid to add all kinds of things. One of my favorite improvisations is using straws. When painted they make great looking pipes and the type of straw that has the flexible bend in it is the best because you can make various pipe shapes.
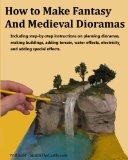
Check out my book on how to make fantasy and medieval dioramas. I put all my best techniques and tricks in this book!
How to make Fantasy and Medieval Dioramas
|