Some Useful Tools -
The tools you use can make a very big difference in how your model goes together and how it eventually looks, not to mention it can reduce the frustration level during the building. Here are some recommended tools that I use. Think creativelely when it comes to tools. I have improvised all kinds of different tools including small pieces of wire, cotton swabs and more. As you are working on your model you will come up with great ideas on tools that you could use or even make.
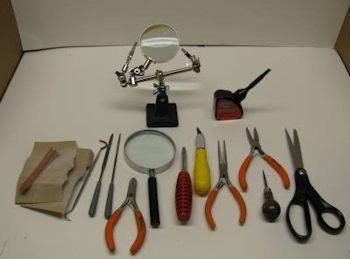
Here are some of the tools that I use when making models from left to right:
- Sand paper & Emory Boards
- Dental pick
- Micro files
- Side cutters
- Magnifying Glass
- Deburring tool (Red handle)
- Hobby Knife (Yellow handle)
- Needle nose pliers (Orange handle)
- Awl
- Scissors
- Shown also are a parts holder with magnifying glass and model cement
- Rubber Bands/Clothes pins (not shown)
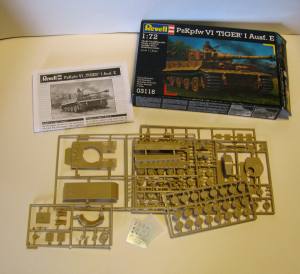
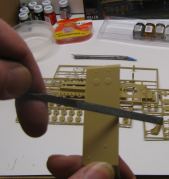
As with all plastic models. There are several things that come inside the box. You should inspect everything carefully to make sure nothing is missing. This model comes with several sprues with parts, an assembly procedure booklet and a small sheet of stickers (decals) that you will apply to the model when it is done.
You should inspect everything and make sure nothing is missing from the kit. You should also read over the whole assembly process. This is important because the assembly of parts can be affected by future parts. Gluing a part in place might need to be changed a little bit because of a part you will place in a later step.
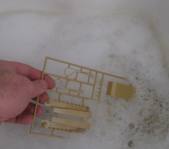
After inspecting and reading everything you should gently and carefully wash the plastic sprues in warm soapy water. Rinse them all off and let them air dry. This will make a difference in how the paint and decals adhere to the plastic.
It is a good idea to figure out your painting scheme before you build the model and to paint some of the smaller parts while they are still on the sprue. This will give you a much higher level of detail. And painting some parts are they are glue into the model can be very difficult. They can be difficult to reach with a brush or painting them can cause paint to run over into other parts. Once these parts are cut from the sprue you can touch them up a bit before gluing them into place.

I often use the paint from the cap. This is a nice way to get small amounts of paint.

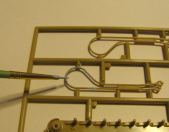
Once you are ready to start building the model you should cut the parts from the sprue with either side cutters or a hobby knife. (I prefer the hobby knife) This will help you keep the shapes exactly as they are intended without distortion or breakage.
Once the part is removed from the sprue you will see it has a small burr on it where it was attached. You should carefully file this down with a micro file or small piece of very fine sandpaper.
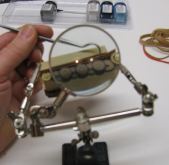
I really like the parts holder with magnifying glass. It holds the piece while you work on it. In this picture I am gluing the track to the tank. Having two free hands makes a big difference.
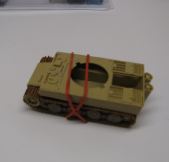
Plastic model cement really works well and it usually only takes 5-10 seconds of holding it before you can release it but sometimes using a rubber band (or clothes pins) to hold large parts together can really help.
MORE TIPS
- This sounds funny but you should keep your hands clean and wash them frequently while working on your plastic model. The oils from your fingers can affect the parts and particularly the paint on any parts.
-Dry fit pieces as often as possible before gluing them and take a look. Will this part be affected by future parts? Does it fit exactly as you think it will fit? Do you have the orientation correct? I have glued in way too many pieces only to realize I had it wrong and had to take it back out.
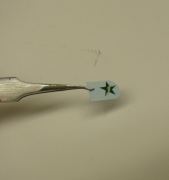
- Applying decals: This can be very tricky but follow the instructions that come with the model. Typically you cut out the decal and then soak it in water for 20 seconds then slide it right onto the model. I always use a pair of tweezers to hold the paper and a dental tool to gently slide the decal onto the model. Then I use a very small piece of paper towel to pat it dry. Decals can be difficult to move once they are in place so try to slide it right into its proper position.
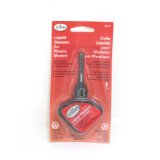 
If you can, get the Testors Model cement in the applicator tube. The applicator is a long slender neck that allows you to place very small amounts of glue in exacting positions. This is so much better than the standard tubes of cement. I highly recommend this. Quick Dry Cement w/Applicator, 1oz This glue will last a long time, very generous amount in the bottle.
PAINTING TIPS
Painting is something that can make or break your model. A good paint job makes all the difference in the world and a bad paint job can ruin a well built model. Here are some tips:
- Keep a wide variety of paintbrush sizes and use them all.
- Paint your strokes in one direction. It will dry with a better brushless look
- You can mix paints to get custom colors, just be sure to mix enough to complete the project because it can be almost impossible to remix another batch and match the color exactly.
- Paint the smaller or more difficult to reach parts while they are still on the sprue
- Consider priming the parts and model with a gray colored primer. This will make a significant difference in how the final paint takes to plastic and how the model ends up looking ( primer is particularly good when you will be painting light colors over dark plastic).
- Two Techniques for getting professional looking painting 1. use a technique called washing. This is where you let the paint dry then you wash on a very wet layer of black and swish it around with the brush. because it is so wet it settles down into the cracks and looks really good. 2. Dry brushing: This is where you put paint on your brush then wipe it off. This gives you a very dry brush, now brush this gently over the surface and over high spots on the model. It will leave small traces of the new color paint on the high surfaces. These two techniques take some practice but are worth it.
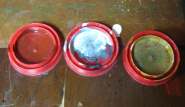
Custom Mixing your own colors: This is one of the best ways you can get your model or miniature to look very realistic. It takes a bit of practice to mix colors well but it is worth the time and effort. I used the tops of old milk jugs to mix my colors.
 Make a plastic model Huey Helicopter Make a plastic model Huey Helicopter
This is the Marine version of the famous Huey and it is complete with armaments. Fun and easy skill level 2 build. Make a Model Helicopter
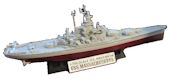
Make a Plastic Model Battleship (USS Massachusetts) This is a skill level two model at 1:700 Scale. Interesting model with a whole lot of very small pieces. This is because of the scale. I used a head-band magnifier for this project and it is a pretty straight forward build. Attach the deck to the hull then add all the various pieces to the deck. . Make a Plastic Model Battleship.
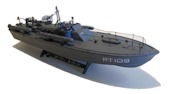
Make a Plastic Model PT Boat (PT-109)
Fun little project and easy to build. I take you through the steps of making this military torpedo boat. And the commander of this boat was John F. Kennedy. I tell you about the amazing story of this boat during WWII. Make PT-109
Make a Model Submarine 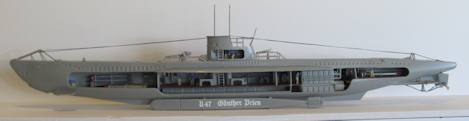
This is a wonderful little plastic model kit. I chose this one because it has the open side so you can see all the various stuff inside the sub. Fun skill level 4 which means it is a challenging build and I also have a video. Make a Model Submarine
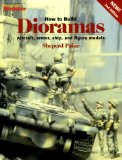 
How to Build Dioramas - Learn everything you need to know about making your dioramas look real! This fantastic revised edition will show you how with new projects, new photos, and expert tips. Includes painting, weathering, and detailing tips for figures, aircraft, vehicles, and more! 290+ photos with color throughout; 41 illus.; softcover.
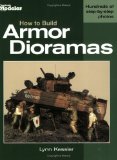 
How to Build Armor Dioramas - Award-winning modeler Lynn Kessler leads, photo by photo, through the steps of building detailed armor vehicles and displaying them in a realistic scene. Topics include beginning and advanced kit assembly, designing a diorama concept, modeling and painting figures, finishing details and more. Perfect for beginner to advanced modelers.
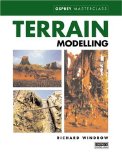 
Terrain Modelling (Modelling Masterclass) - This title helps modellers who wish to display the results of their efforts to the best advantage in a diorama. This book provides detailed information on how to create many different types of terrain; the paints, glues, tools and materials that will be of help to the modeller; and how these can be obtained both in Europe and the USA. Illustrated with some 200 photographs and written by a master of diorama modelling with a lifetime's experience, this book provides the essential and invaluable guide to the materials and techniques needed to create top quality terrain for anywhere from Ancient Rome to the Western Front.
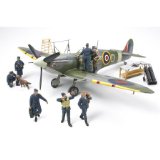 
Tamiya 1/48 Spitfire Mk.Vb - w/R.A.F. Crew (Limited Ed.) -
This is the 1/48 scale Supermarine Spitfire Mk.Vb / with 7 Royal Air Force Crew Figures from Tamiya. / Suitable for Modelers Age 10 and Older.
FEATURES: Includes 7 highly detailed ICM figures in various poses. Various accessories including work table and gas cylinder lines. / Detailed landing gear / Multi-part canopy may be posed open or closed / Highly detailed cockpit with accurate instrument panel, seat, control / stick, rudder pedals and sculpted pilot figure / Detailed instructions.
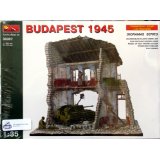
MiniArt Diorama Bases on Amazon - A company called MiniArt makes a lot of great looking diorama scenes and bases. And they are available on Amazon.com - A company called MiniArt makes a lot of great looking diorama scenes and bases. And they are available on Amazon.com

Tamiya Models and Kits - Amazon.com has lots of Tamiya kits ranging from tanks, figures, accessories, troops and buildings. |