Diorama Making Banner

Home

Home

Youtube graphic
I have a youtube channel with over 1000 Videos!


Become a Patron

Wills Pinterest !


Tutorials

Will's Big Dioramas

Fast Tutorials

Types of Dioramas

Diorama Themes

Time Periods

More

Tools/Supplies

More Stuff


Will
Hi, Thanks for visiting my website. My name is Will and if you have questions
or would like to
contribute projects or ideas you can contact me Will

The Halo Diorama

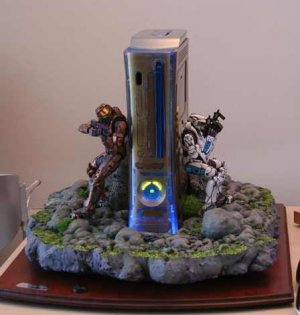
A Web visitor sent me some awesome pictures of a HALO diorama that surrounds an Xbox 360. Pretty nice diorama and a great way to enhance the enjoyment of the game. HALO is an extremely popular game and even though I don't play it I have friends who are fanatic about it. Anyway, the web visitor asked me for some tips and hints as to how he could make a similar kind of diorama.


So, if you want to do a diorama like this one I have some building suggestions that will help. Looks to me like this is a professional diorama done by an artist or artisan but I am sure you can get the same kind of look with just a few tools, techniques and tips.

First of all the base is a very nice piece of finished wood that has been stained and varnished, and the edge has been routered. That takes a bit of woodworking knowledge but I highly recommend that if you are going to make a diorama like this you really should put some time into the wooden base. It should be very solid and look great. And I bet you can find lots of pre-made and pre-routered wood pieces at one of those stores that sells unfinished wood products like bird houses, picnic tables and the like. I also think you might be able to get something suitable at a store that makes and sells trophies.

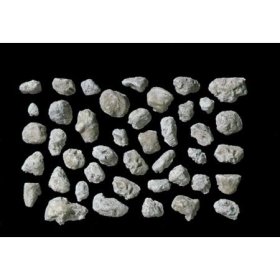
Next I wanted to point out the boulders in the picture. I mean the assorted collection of round rocks. These things look really fantastic and you can make these by casting Lightweight Hydrocal into rubber molds. Really easy process and I do have a tutorial on this and the rock mold is available on amazon.com Rock Mold, Boulders Roll over the pic for more info. You cast these rocks and then paint them up and they will be perfect for that rough battleground look you want for your diorama. You don't necessarily need to use hydrocal, you can use plaster of paris. Here is my tutorial on how to cast plaster stones for a diorama using rubber molds

The Rocky base of the diorama is the best looking part. It kind of looks like a slab of rough terrain that is floating on the wooden base. It is probably the biggest challenge yet well worth the effort of spending some time because it really sets the diorama apart and makes it look terrific. I have a recommended method of making this part. Normally, to get this great cliff edge look that is all around this base you would use something called woodland scenics foam which is sheets of foam that can be sculpted to get the cliff look. But The foam is not strong enough to support an XBox! At least I wouldn't put an XBox on it! So what we have to do is create a base inside a base. I will explain.

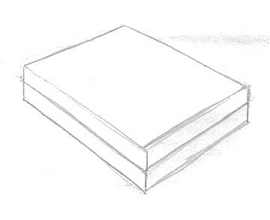
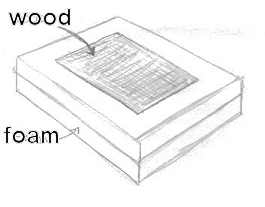
You get some Woodland Scenics Foam 1/2 Inch Sheet (4 Pieces) - ST1423 and you cut it into sheets about one foot by one foot then glue one sheet right on top of the other. This way you have a nice one inch thick piece. The picture on the left shows you what you end up with. You can change these dimensions as you see fit. Thicker and bigger would be even better.
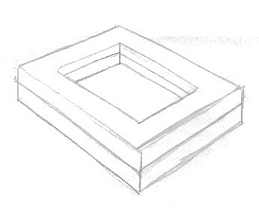
Now cut out the center section of the foam like the picture on the left. You end up with what looks like a picture frame made out of foam. Into this center section you glue a solid 1" thick piece of wood or plywood.
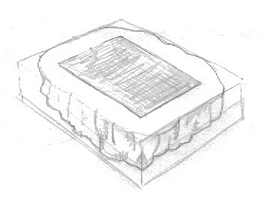
diorama wood and foam base You end up with this. You have a nice strong wooden base to support the xbox and you have a foam edge all the way around that you can sculpt to get the nice rocky cliff like look to your diorama.

Now this part is really fun! Sculpt away the edges of the foam so you get that cliff and rocky look. You can use hobby knives, regular knives or a Hot Wire Foam Cutter . Woodland Scenics also makes a specialized foam knife you might want to consider using Foam Knife.

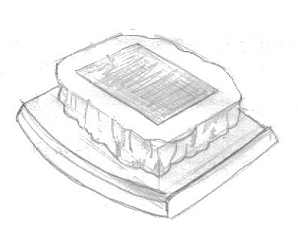
Now you glue this down to your wooden base.

Here is what the completed diorama base would look like. Now you are ready to start using the common terrain building techniques to make the diorama terrain. Here is where my tutorial begins on how to do the terrain.

Some thoughts about this foam base. Because the foam base is sitting directly on your wooden lower base it may be strong enough to support the xbox. I would recommend you get the sheets of foam and sit your xbox right on top of it so you can get a sense for how strong it is. It may be ok. But I would definitely lean very strongly toward making this solid wood insert. Would not be good if your xbox fell over or something.

From here the basic diorama techniques apply. You set in your plaster cloth or hydrocal level then build up from there by adding your cast rocks then start on the terrain features like grass, pebbles and trees.

One more recommendation: You are going to need to make a phony xbox out of cardboard so you can put it in place and build around it! Don't use your real console while you are making the diorama. Put the cardboard xbox on it and build around it! Then when you are all done and it is dry you can take it out and put the real xbox in.

Smaug and Bilbo Diorama

This is a spectacular diorama made by a web visitor (Giorgio). He shows us how he made the diorama. Oh and he hand sculpted the dragon too. He shows us step by step how he did that too. The Smaug Diorama