Note that the foam we use (Extruded Polystyrene) is sensitive to some types of chemicals. Spray paints will often melt this foam. So, use regular acrylic paints and be careful of what you use to seal and preserve the foam. If you are in doubt about a paint or sealant do a small test on a scrap piece of foam.
You can paint your dungeon walls a flat single color. And that's great. But let me show you a technique called dry brushing. This technique is particularly effective with any walls that you indented with a pattern.
Dry Brushing Paint the whole surface black. And be liberal with the paint. Get it into the indents. Then let it dry completely before moving on to step two.

Once it is dry we start with a new color. Use white or light grey for this.
Dab some white paint on a soft bristle brush then dab most of it off on a rag.
Then lightly and briskly brush over the surface of the wall. This leaves a small amount of white only on the high spots. the indents you made in the foam will not be affected.


It may take a little bit of practice to get this the way you want it. But, you should start out very lightly. You can always go over it multiple times to make it deeper and richer.
Dappling the Walls
Another good looking technique for painting the walls is dappling. This one is a bit different than dry brushing in that we do the two steps while the paint is still wet. We do not wait for the base black color to dry.
So, paint the wall black with a nice thick coat of paint. And while it is still wet you dabble on a lighter color and swirl it around. I used white for wall in this next picture. You can vary this a whole lot depending on the strokes pattern you make with the white and even the size and bristle texture of the brush you use.

One more thing to consider is the painting of the foamboard bases. You can leave your bases white but I like to paint them grey in color. For my dungeon this looks better. 
Sealing the Walls
You really should seal everything. This will strengthen and protect the walls. And they will maintain their color.
A product called Mod Podge works excellent for this.
Mod Podge comes in a lot of different types. I used Gloss lustre for a shiny surface. If you want a less shiny surface use a type called Matte.
Amazon has all the mod podges:
Matte Mod Podge
Gloss Mod Podge
Apply a nice thick coat. It starts out being white in color but when it dries it will be perfectly clear. So don't be bashful. Apply it nice and thick as a protectorant and sealant. This also gives you the benefit of spilling drinks on your table top dungeon and not having to worry about it getting ruined.

An alternative to Mod Podge - If you don't have any mod podge or can't get any you can make your own sealant by mixing 50/50 white glue with water and brushing that on. It works almost as well.
Okay! Your dungeon walls are complete! Have fun!! And send me a few pictures I would love to see your dungeon!!
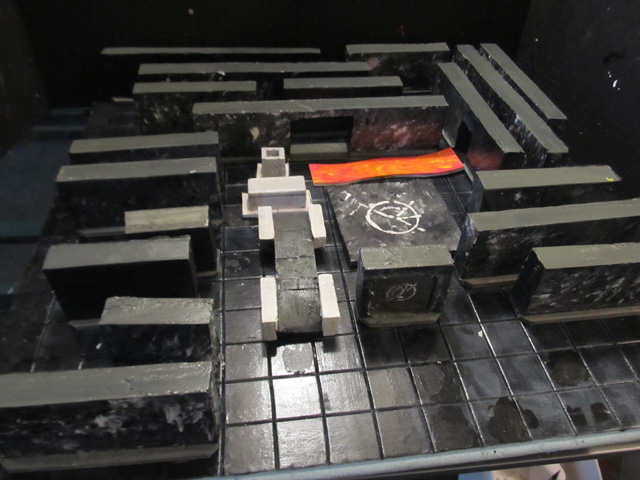
Here is a look at all the walls and accessories I made for my dungeon.
Want more?
I am currently working on a tutorial to make a Gothic Dungeon!! This tutorial also includes templates so you can easily make the gothic details for your dungeon.
 Make a Gothic Dungeon Make a Gothic Dungeon
|


