Hi, Thanks for visiting my website. My name is Will and if you have questions
or would like to
contribute projects or ideas you can contact me
How to Make a Traditional Kite - Including a video
This is a pretty traditional kite. We have all seen this kind. It is easy to make and you can probably do it in half an hour. It only takes a few materials and you can improvise and use a variety of things depending on what you have. I have used a plastic trash bag but you could use newspaper. I also have a video tutorial on how to make this kite at the bottom of this page.
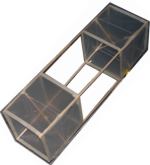
If you like kite making I also have a more challenging tutorial on how to make a box kite. It's a lot of fun and it really flies well even if it doesn't look like it will fly! Make a box Kite
OK, Let's Make This Kite
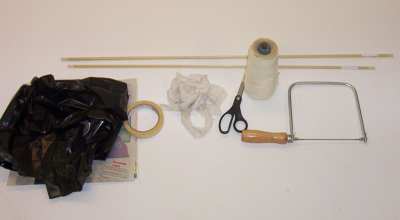
This picture shows the materials needed to make this kite.
A Plastic bag or newspapers
Two sticks 1/4" square is perfect, 1/4" round is good too One stick is 36 inches long and the second is 33 inches long
Masking tape
Scissors
String for flying and for building the kite
A little saw or small knife for notching the wood
some strips of cloth about 2" wide and a one foot long
That's everything, you don't need a lot of stuff to make this kite. Here are the instructions on how to do it.
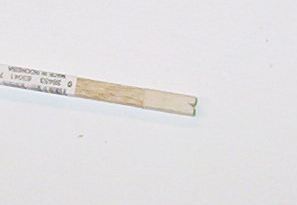
Take both your pieces of wood and wrap a layer of masking tape around each end like shown in this picture then use your saw or pocket knife to make a notch in the ends. This notch is for your string.
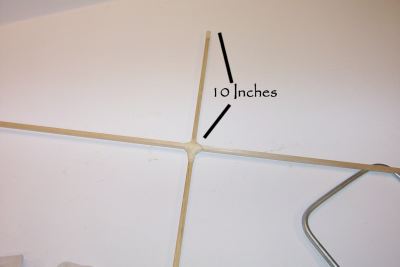
Lay the 36 inch piece vertical so it is up and down and measure ten inches from the top. At this ten inch point put your 33 inch piece of wood. Use string to tie them together tight and then wrap over the string with some tape so it is nice and strong.
Watch the orientation of the notches on the ends of the wood. You will see what I mean in the next step. So read the next step before you do this one.
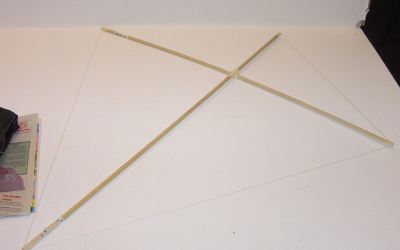
Now wrap a single layer of string all the way around the kite. It should go right into the notches. Start and end at the bottom of the kite. After you have wrapped it and tied it add pieces of tape over the notches so the string doesn't pop out with the force of the wind.
Pull the string reasonably tight before tying it. The cross bar should be a little bowed.
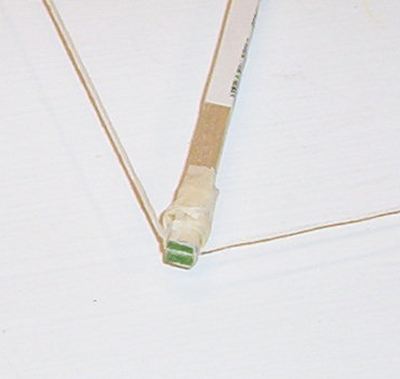
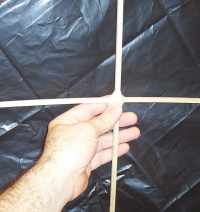
This closeup picture shows the string resting in the notch. You can see that if the notch were vertical you couldn't get the string in it. So when assembling the two pieces of wood into the cross shape you should make sure the notches are all running the same way so the string falls into them correctly.
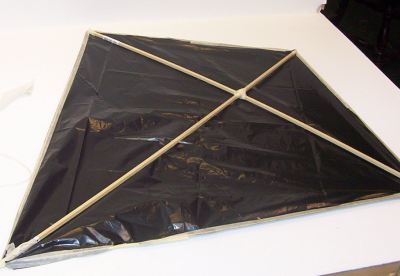
This picture is almost complete. I just need to put a couple of small pieces over the notch and string so the string doesn't pop out in the wind.
Now lay your frame right on the plastic and cut the plastic to about the same shape and size as the frame.
Using long pieces of masking tape fold the plastic over the string and tape it down. Make the plastic reasonably tight.
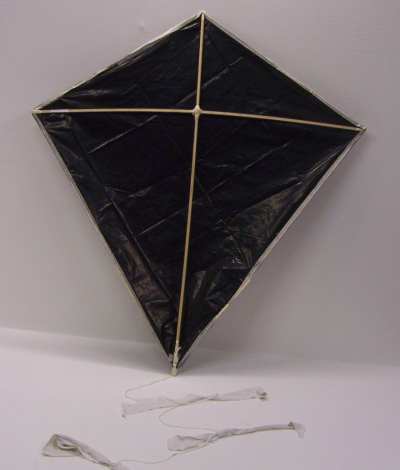
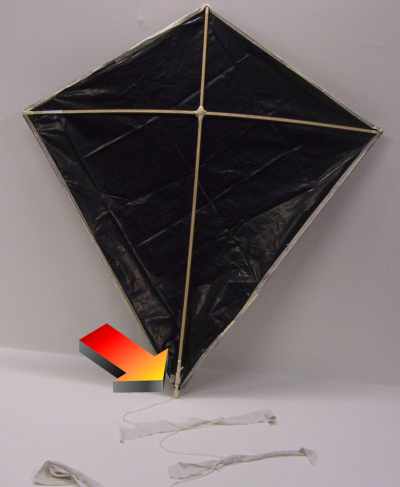
Cut yourself a piece of string about six feet in length and tie one end of it to the bottom of your kite. At intervals about a foot apart tie strips of cloth to the string.
When you go flying your kite bring yourself some extra string and some extra strips of cloth so you can add more cloth as needed to keep the kite flying nice and straight.
Now tie your kite string right here at the point where the two pieces of wood meet and you are ready to go! Have fun with your home made kite.