![]()
I have a youtube channel with over 1000 Project Videos!

Hi, Thanks for visiting my website. My name is Will and if you have questions
or would like to
contribute projects or ideas you can contact me 

![]()
I have a youtube channel with over 1000 Project Videos!

Hi, Thanks for visiting my website. My name is Will and if you have questions
or would like to
contribute projects or ideas you can contact me 
In this part of the tutorial we put the parts of the mace together.
|
Start by putting together the two spike assemblies. You glue two pieces together like this. And you do this twice, ending up with two spikes.
Set those spikes aside for now.
The four long and thin rectangular strips are bands that wrap around the handle of the mace. But foamboard strips do not wrap well around that diameter. It will crinkle and wrinkle. So cut them in half along the edge. This makes them thinner.
On one end of the dowel wrap and glue a band. Then glue the spike right onto the end.
Then glue on the four flanges. Put them right up against that band.
Now finish off the foamboard by adding the four remaining foam board parts. The arrows in this picture show you where to put them.
|

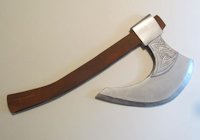
New: Make a strong Viking axe out of foamboard or cardboard
This is a fun and easy project. And you can handle it a lot because it is durable. I also show you a new technique for making the bevel on bladed weapons. How to Make a Viking Axe