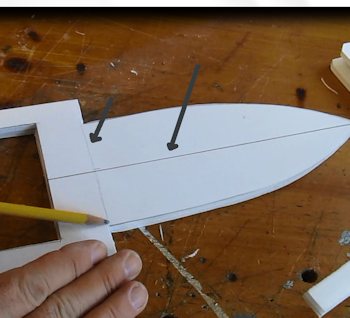
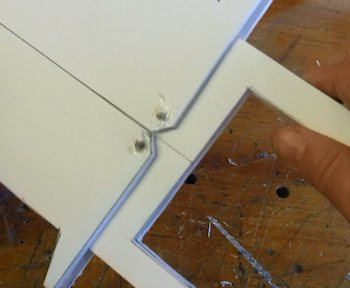
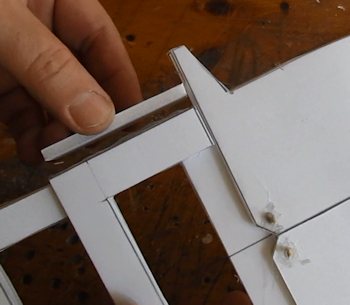
Now we are going to attach the sheathes to the blade section. We do this with a couple of toothpicks that work as hinges. Start out by drwing two lines on the katar blade section just like you see here. These are reference lines to help you put the sheath halves in the right spot.
Slide one of the sheath halves right over the blade into the position shown. Notice where it is located at the gray arrow. And see how it is right down the center line of the blade. This is the right spot for it.
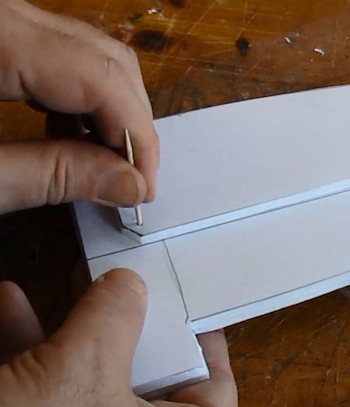
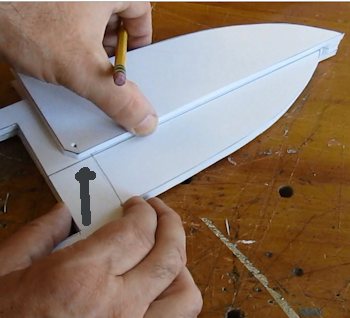
Now pierce right through the whole thing with a toothpick right in the location shown. If you have trouble pushing the toothpick through you can use some kind of a sharp tool to make the hole.

Now test it by hinging it. Is it nice and smooth? Have a reasonable range of motion like in the picture?
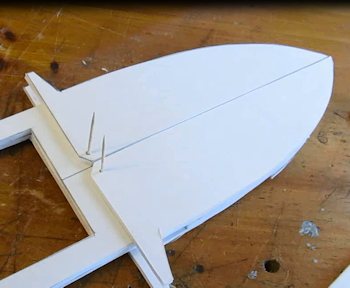 Now do the same thing with the other sheath assembly. It all should be nice and straight, line up nicely down the center line and it should all swing open freely. Now do the same thing with the other sheath assembly. It all should be nice and straight, line up nicely down the center line and it should all swing open freely.
Now put some glue or hot glue on both of those toothpicks and then trim them shorter with a pair of scissors. Flip the katar over and glue/trim the other ends too.
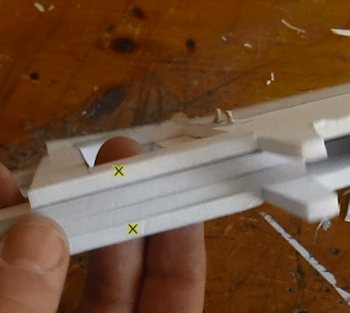
 Now let's add the sliding handle. This is what will push and pull the sheath open. There are a couple of important things to note. When gluing together this assembly you keep the handle flush up against the sheathes. the gray lines show this point. And, the sliding handle is a little bit wider than the handle of the dagger. This is very important. The yellow dots shows this. When gluing together be sure that the handle pieces stick out just a little bit on both the left and the right where the yellow dots are. Now let's add the sliding handle. This is what will push and pull the sheath open. There are a couple of important things to note. When gluing together this assembly you keep the handle flush up against the sheathes. the gray lines show this point. And, the sliding handle is a little bit wider than the handle of the dagger. This is very important. The yellow dots shows this. When gluing together be sure that the handle pieces stick out just a little bit on both the left and the right where the yellow dots are.
We call this piece here the "C" shaped piece. There are two of them.
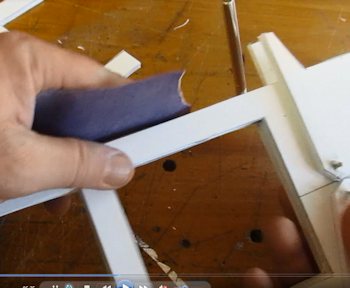
This step is optional but will help. You can sand smooth the sides of the katar handle like this. It will insure the handle slides smoothly back and forth.
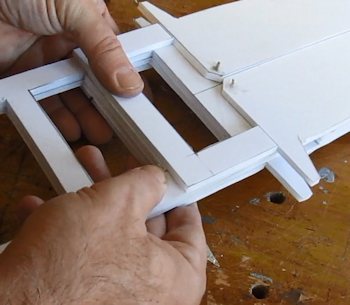
So, Put a "C" shaped piece underneath the katar. Then put two spacers, then put a final "C"shaped piece right on top.
This picture shows the only area that gets glue. These center sections on all the layers.
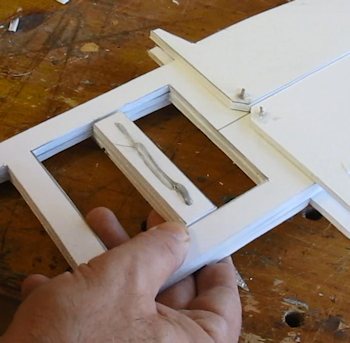
Now glue a spacer onto the sides of the handle assembly. It is the same size as the C shaped handle. Note: Only put glue on the C shaped pieces. Do not get any glue on the handle of the katar. If you get glue on it the handle won't slide!
 This picture shows which pieces get glue. Ony the outer "C" Shaped pieces get glue when putting the spacers on. This picture shows which pieces get glue. Ony the outer "C" Shaped pieces get glue when putting the spacers on.
 Let's Continue with the tutorial Let's Continue with the tutorial
 Make an Indian Sikh Dagger Make an Indian Sikh Dagger
I bought a dagger while on a trip to India. It is quite beautiful. So I thought it would be fun to make one out of foamboard. I give you the template and the ornamental work which makes it very easy for you to make. Make an Indian Sikh dagger.

Whetstone Assassin Katar 440 Stainless Steel w/ Sheath 17.3

Do you like making projects and exploring a variety of hobbies?
Sign up for my free newsletter. I give you regular updates on hobbies and projects you can make. it is totally free and I don't share your email with anybody. |