I also have two video tutorials on how to make this chest piece. So if you want to watch the videos you can see them on my webpage here: Video Tutorials on how to make the Spartan 300 Chest Piece
This tutorial is part of my complete series of Spartan Armor and weapons and the series includes all of the following projects. For some of them, as needed, I have included a template that you can print up and use.
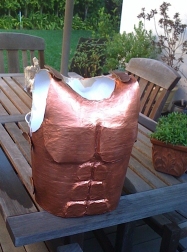
Can you make this Spartan chest piece? You sure can! This picture shows a chest piece that was made by Scott P. and his son. It came out fantastic and it is a great example of how my tutorial can help you make one too! My thanks to Scott for submitting this pic.
Spartan Weapons and Armor - This is a series of cardboard and Paper Mache projects that I have been doing. So far I have everything made except for the chest piece. That will be coming soon. Here are the pieces:
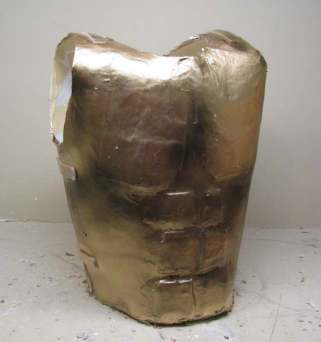
Here is the completed project.
Let's Begin Making this Armor
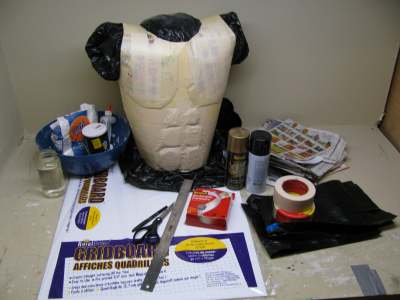
What you will need to make this:
- Lots of newspaper
- 1 full roll of wide masking tape 3 or 4 inches wide
- two plastic trash bags
- Paint ( I used gold and black)
- 2 Sheets of Posterboard (I used sheets 22x28)
- Scissors
- Pencil
- Ruler
- Several strips of velcro to attach the front and back together ( you can use other materials and I will show you more)
Additionally If you want to paper mache the Chest piece to make it stronger and look better:
- Water
- Flour
- Mixing bowl
- Table Salt
- Lots of white glue (optional - this makes a stronger paper mache)
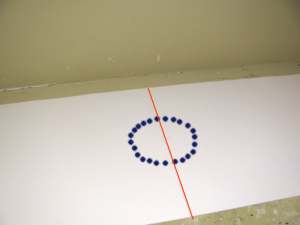
Lay two sheets of posteboard end to end flat on a table. And tape them together. Now cut an eight inch circle right in the middle and centered on the taped seam between the two. The orange line is the taped edges where the two sheets meet and the blue dots are the eight inch circle.
Cut this circle right out.

Put your head right through the hole and wear the two sheets of poster board! One sheet hangs in front of you and the other sheet in back.
While you are wearing it mark the posterboards with pencil so you can cut out the shoulder holes. It should look like the picture on the left once you have the shoulders cut out.
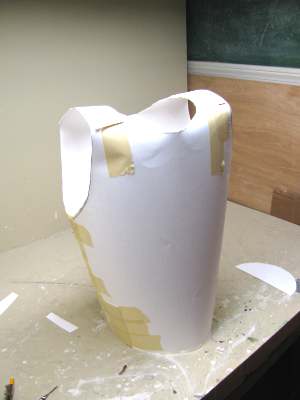
Try it on again and make marks so you can trim the sides to the right size. Once you get it right you can cut it then tape it together like shown in this picture. Don't hesitate to just cut a little bit, tape it a little and look at it. Then cut it some more until you get the right size. You will also trim several inches off the bottom all the way around so it is not too long.
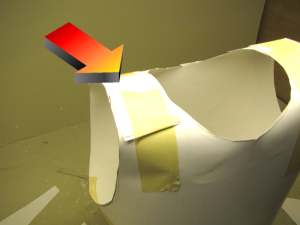
See how the shoulders have a nice rounded shape? You can get this shape by doubling up a piece of posterboard and taping it down to the shoulders.
Do the same thing along the sides of the body where the ribs are if you need to shape that out a little bit.
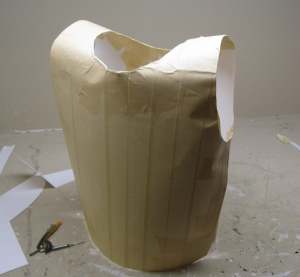
You can tinker with it to get it a nice shape. And when you are done apply a layer of masking tape over the whole outside of it.
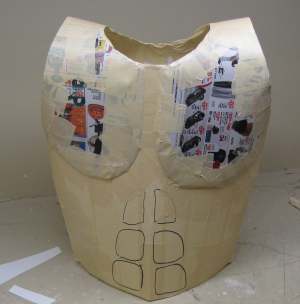
Now you can draw lines on the armor for the musculature. Then using newspaper and pieces of cardboard build up the shape of the muscles.
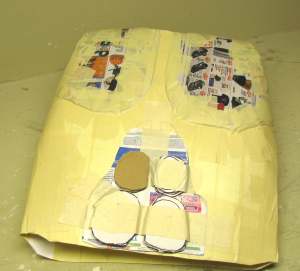
This picture shows some of the cardboard musculature. Once you have this done then you can tape right over it again.
You can finish up by painting it.
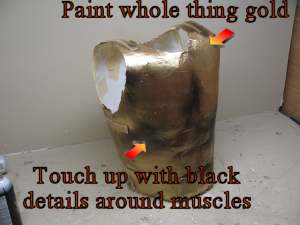
The painting scheme
 If you want to paper mache it and make it stronger and better looking then continue on with the tutorial If you want to paper mache it and make it stronger and better looking then continue on with the tutorial |


