Typically its good to add a little more water as you see fit. You then apply this dough to the diorama shell and let it dry. With this method you can also bypass the whole frame method that I showed on the previous page. Just make sure you put a plastic bag over your bottle so it willl be easy to remove.
You can also add some paint or food coloring to the dough if you want it to have a nice volcano like color. I prefer to keep it the natural color so I can paint it later.
Method 2: Paper Mache
You can use paper mache for your volcano. Just make up a batch of paper mache mix and then use the paper towel method that I will show you in this tutorial.
Paper mache is easy to make. It is just two parts water with two parts of flour - add in a tablespoon of salt which acts as a preservative. And mix it to get a nice gluey consistency. You would then soak paper towels in it and apply them to the shell to get a nice volcano look. There are also recipes for heating up the mixture as you make it.
Method 3: Plaster of Paris
This is the method I am using for this tutorial because I have some plaster of paris on hand (it cost me 2.49 for a big bucket so its pretty cheap. You simply mix the plaster of paris as recommended on the container then soak strips of paper towels in it and apply to the volcano you are making. (note, that if you are a hobbyist you can also use something called lightweight Hydrocal. It is the best. very light and very strong)
Making The Volcano Shell
Before you mix your plaster of paris make sure you have everything ready. Cut up a dozen or so strips of paper towels ahead of time. The plaster dries fast and you don't want it to wait while you cut the paper towels. I mixed up two cups of Plaster of Paris and stirred in 1 Cup of water then I dipped the paper towels in and applied them one at a time to the shell. Here is what it looks like as finished:
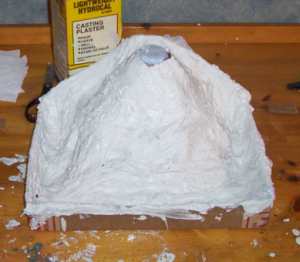 This is the completed shell. It looks great and notice how I ran the plaster right over all the edges in back and around the lip of the box. This will help keep it water proof and clean. Of course I didn't cover over the top of the bottle. You can if you want. You would just have to cut this top off later, after it dries. Now set it aside to dry and then we can paint it. This is the completed shell. It looks great and notice how I ran the plaster right over all the edges in back and around the lip of the box. This will help keep it water proof and clean. Of course I didn't cover over the top of the bottle. You can if you want. You would just have to cut this top off later, after it dries. Now set it aside to dry and then we can paint it.
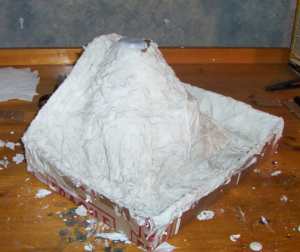
Here is another view of the volcano I made. So you can get a good sense of how it is made. Make sure you run the plaster sheets over all the edges so it works as a nice seal and a tray for the magma!
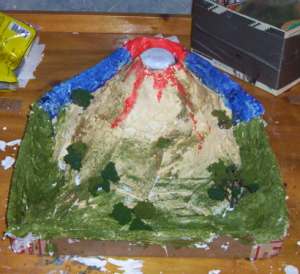
The volcano is painted! Take your time and exercisse some artistic skills. Make sure you paint some red around the mouth of the volcano (This is called the crater) and run some red lines down the side. It makes a good effect. I also added some little details like small trees and grass. These little details are diorama techniques and I have lots of diorama tutorials on my site if you like to make them. Diorama Tutorials .
Now you can remove the bottle and the bag. And you can make up a diagram to put on the back of the volcano.
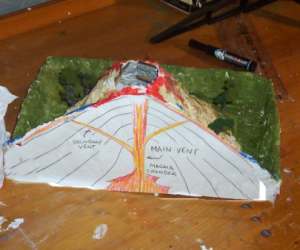
The diagram on the back is optional but it makes a nice learning tool to show how a volcano works. I have a version here that you can print up and use if you need it. Cut away some of the plaster of paris if you need to. Then just glue your diagram to the volcano.
Back of the volcano diagram
Now for the Ingredients for Making this Volcano Erupt
- Take the bottle out of the volcano and fill it almost full with water
- put 4 or 5 drops of detergent right into the water
- Add Two Tablespoons of Baking Soda to the water
- Put the Volcano over the bottle so it is in place and ready to go
- Pour some vinegar right into the volcano bottle and watch it Erupt!!
 This tutorial on how to make a volcano is also done in a video if you want to watch it This tutorial on how to make a volcano is also done in a video if you want to watch it
I also have a series of tutorials on how to make things. They are called the How to Make a.... tutorials and you can see the list of them here. How to make a.....
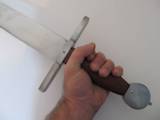
How to Make a Real Sword - I take you through the whole process of making a sword. And this one is a good sized sword! Really beefy and feels good in the hands. How to Make a sword
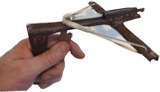 Make a Mini Crossbow Make a Mini Crossbow
This is a powerful little crossbow that fires straws! Easy to make and whole lot of fun. Make a mini crossbow
|