 |
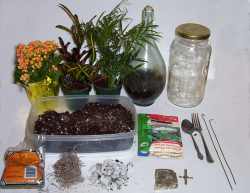
Materials for your Bottle Terrarium -
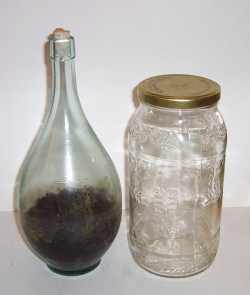
- Bottle
- small plants - optional
- Seeds - optional (shown in a seed bag)
- Potting Soil - in plastic tray
- Spaghnum Moss or spanish moss
- Small pebbles for drainage
- Activated charcoal - from pet supply shop
- Tools - spoon/fork etc.
- Coat hanger cut into strips to be used as tools for thin neck bottle terrarium. You can reach into the bottle with these coat hanger tools.
- Accessories for decoration - I have a stone and a sword.
|
| |
|

About the Plants for this terrarium - You have to of course choose small plants, and the plants in the picture look rather large but this close-up shows that I have chosen plants that can be taken apart at the root. I will separate the different stalks and only place some in the bottle. I have also chosen plants with thin leaves and a nice Croton with red stripes on its leaves. This will add a nice splash of color to the terrarium.
About the theme of your terrarium - A theme is always a nice touch that makes your terrarium much more interesting. For this project I have created a "Sword in the Stone" theme. I have chosen a nice granite rock and I whittled a small sword out of wood. I will glue the sword into the stone and then place it in the terrarium. It will create a scene as if it is just waiting for King Arthur to find it.
About the Arrangement of your Bottle Terrarium - You might want to draw some sketches of how it will look so you can tinker with the arrangement without having the plants already in the bottle. This is particularly important if you are using a small opening terrarium like a wine bottle.
Suggestion: Get a pot about the same diameter as your bottle and arrange all your plants and elements right in it. When you find an arrangement you like you can then transfer the items one at a time into the bottle thus re-creating the scene as you designed it. .
 |
The Procedure for making your terrarium. The illustration on the left shows what goes in the bottle from bottom to top. Here is the order you put the materials in.
- Pebbles - 1-2 inches; this is for drainage
- 1 inch of activated charcoal - in a closed environment this will help to filter the environment and keep it clean. This is optional but will keep your terrarium healthy longer if you can do it.
- 1 inch of spaghnum or spanish moss - this will separate your soil from the water accumulating down in the pebbles. It will prevent root rot and keep the soil healthy
- Soil - Several inches - judge this by how the bottle looks. Filling the bottle so the bottom third is full of soil usually looks about right. Slowly add soil until it looks appealing.
- Add your seeds then your plants and finally add a little spaghnum or spanish moss for looks. (moss is optional)
- Finally add your details like my sword in the stone
- Before closing it up water it so it is moist
|
| |
|
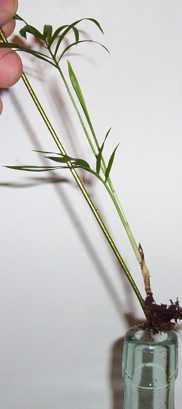
If you are going to be placing plants into your terrarium here is a tip. The picture shown here is of the hanger tool placing the plant into the bottle. The hanger has a loop at the bottom to support the soil and roots. Make a hole in your soil inside the bottle then lower the plant right into it. Notice how the thin leaves of the plant will fold nicely right into the mouth of the bottle. This technique takes a little practice and you will find yourself using two hanger tools at the same time. Once you have the plant in place use the tool to gently shovel soil around it then tamp it down firmly. Make sure the hole you make for the plant is nice and deep. You don't want the plant falling over.
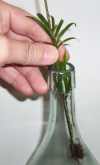
Here is the plant as it is going in.
For my bottle terrariums I use both plants and seeds. This way it is immediately ready to show off yet over time it will grow and change.
Caring for Your Terrarium - A bottle Terrarium is a closed environment and it can be sensitive to water and to light so once it is first made you will need to monitor it closely for the first few days. If it gets too much sunlight it can get too hot inside and bake your plants. Pay particular attention to the moisture inside. It should form a nice layer of dew along the top of the bottle. This will slowly rain down back on the plants. If it is too wet inside leave the top open for a day to dry some of it out. If the moisture is right you won't need to water it but maybe once a month (depending on how many plants there are and how much water they need).
A note about fertilizing your bottle terrarium - You shouldn't add any liquid or solid fertilizers to your terrarium. What you want is very slow or no growth from your plants. They are almost in a state of suspended animation. If they are fertilized they could very quickly grow too large and fill up your bottle.
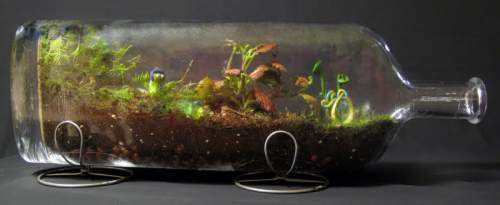
Here is a unique Bottle Terrarium by a guest artist (Thyrza) You can see more of her work and how she uses Polymer Clay in her terrariums here: Thyrza's Terrariums
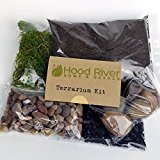
Premium Kit for Small Terrarium (Succulent, Cactus, and Fairy Garden)
Perfect kit for a first time terrarium gardener or to give as a gift. Provides the exact amount of the specific "ingredients" necessary to build a thriving small terrarium. Will work for closed terrariums, open terrariums, fairy gardens, as well as with succulents and cactii. Kit includes terrarium potting soil, activated charcoal, two different sizes of semi-polished river rocks, shag moss, and complete but easy to follow step-by-step instructions. The ingredients supplied are in the following approximate amounts: 9 oz. soil; 8 oz. small river rocks; 8 oz. larger river rocks; 1 oz. activated charcoal; 1 oz. sheet moss. Great for anyone wanting to set up a terrarium without having to go and find all the different pieces separately. Please note that the kit does NOT include a container or plants. Please also note that this kit is for a SMALL terrarium. We recommend using a mason jar if you are making a closed terrarium or a container with a 4 - 6" diameter if you are making a succulent or cactus terrarium.
|
![]()
