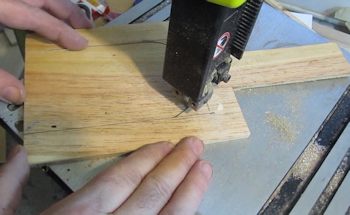
Cut out the various pieces. I am using 1/4 inch thick wood. Plywood is preferable for the base and the hand held unit. This is because it is strong. For the internal pieces I used quarter inch thick poplar.
There is a total of eleven pieces in this project.
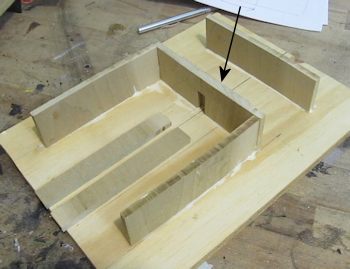
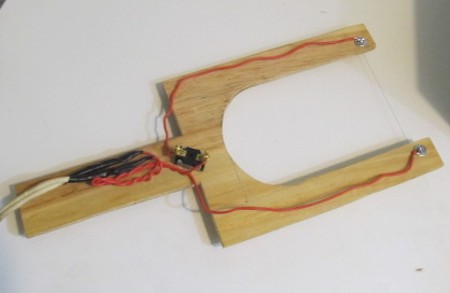
Glue the seven pieces onto the base plate. Note that you can't see one of the pieces in the picture. The arrow shows you where that piece goes. It is a stop for the hand held unit. When you slide the hand held into place it inserts into the keyhole and is stopped by that piece.
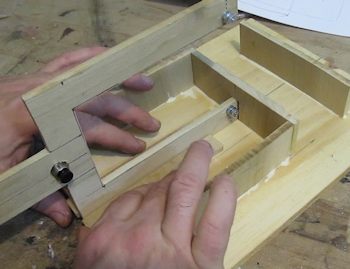
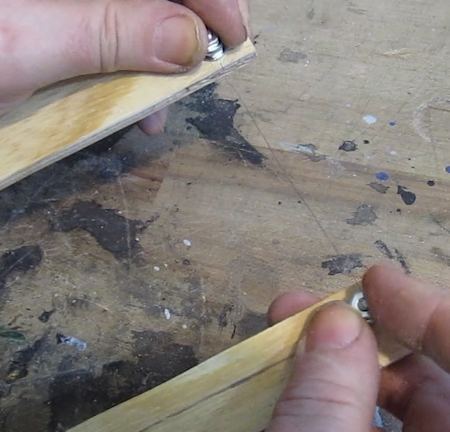
And when gluing in the two guide pieces install the handle piece. Adjust those guide pieces so the handle piece slides smoothly and snugly. Before we glue on the top board we should make the handle piece. We will use it as a guide to installing the top board.
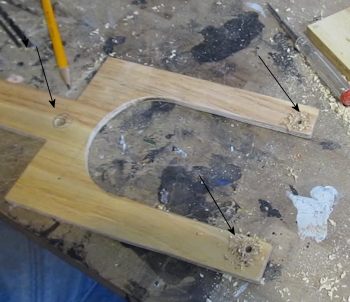
Drill three holes in the handle unit. Two holes are clearance holes for your 6-32 bolts. The third hole is a thru hole for your push button switch. The size of these holes will vary depending on the screw size and the switch size.
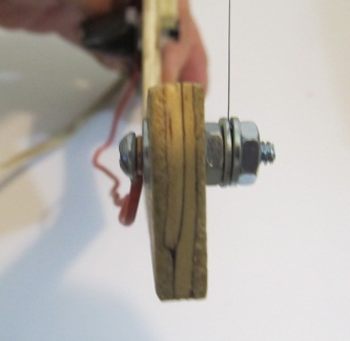
Next install the two bolt assemblies. From left to right:
Bolt, wire, washer, wood unit, washer, nut, washer, hot wire, washer, nut
Next let's wire it up. The wiring is extremely simple. The hot wire is connected to the power supply and there is a switch in between.

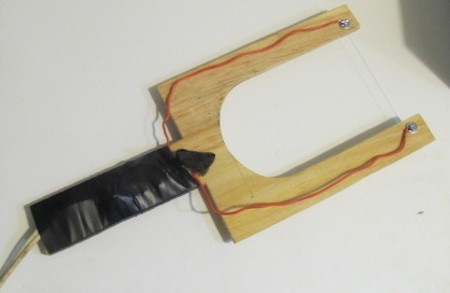
There you go. It is wired up.
Then tape over the handle and the switch.
Next install your nichrome wire. Each end of it goes between two washers. Make it taut but not overly taut! There is a bit of a feel to that. And you will get a better sense of how taut is good once you start using it. Too loose and it bows a lot making a sloppy cut. Too tight and it is prone to snapping when heated.
Now that the handle piece is fully assembled you can use it as a guide for gluing on the top surface plate. Be cautious of the nichrome wire. Don't get it caught on anything. 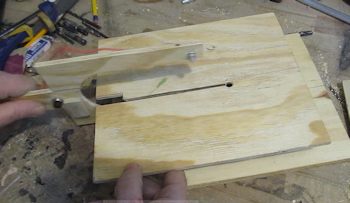
And don't forget to glue the spacer block on to the hand held unit. It is important because it keeps the handle snug and tight in the unit. 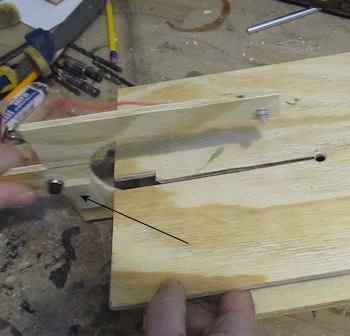
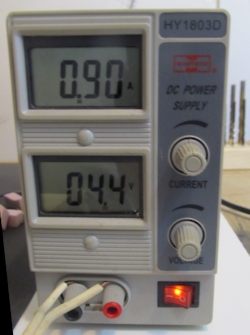
Connect it to your power supply and test it. You can adjust the current as needed to get a smooth and easy cut. 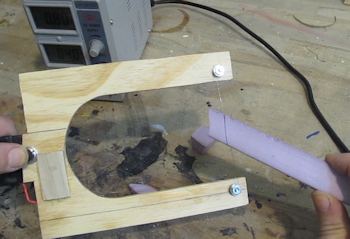
For me with this four inch nichrome length a good setting is .90 amps at 4.4 volts. Ths is a good setting for cutting various types of foam. For cutting simple styrofoam we can bring this down a bit to .90 amps at 3.9 volts.
And that's it! You have made a hot wire foam cutter that works both as a hand-held unit and as a table-top unit. 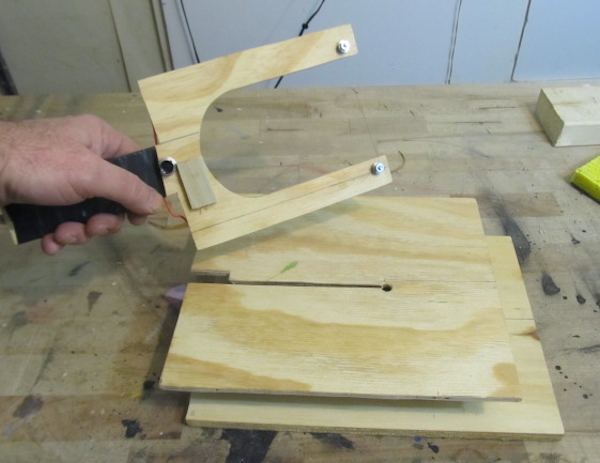
OTHER PROJECTS YOU MIGHT LIKE
 Make a Light Box Make a Light Box
A light box is a wonderful little thing. You can use it for tracing, drawing, and even reading x-rays. But they are very expensive to purchase. I have a nice tutorial here that shows you how to make a great one very cheap. It uses a string of LED's as the light source. How to make a light box
 How to Make Paper! How to Make Paper!
I been putting this project off for a long time because I thought it would be challenging. Wow I was wrong. Paper making is so easy to do! And it comes out great. I love this and you are going to love it too! The possibilities are endless for scrolls, origami, fine writing and so much more. How to Make Paper
 How to make a Medieval Scroll! How to make a Medieval Scroll!
Fun and easy little project and I have already received a bunch of pictures from people who have made these! How to make a medieval scroll |