- 1. Find a mug.
I found a nice looking mug at a thrift store nearby and had another go at a dragonskin mug. It had a
broken handle that looked like it had been hot-glued back on, but I figured it would hold (and I'd be
reinforcing it plenty with pistachio shells, hot glue, and polyurethane).
- I used a ceramic mug as the base for its food safe properties.
- Pick a good looking mug or use ceramic paints that you kiln treat before adding any hot glue. You won’t
be able to paint the interior or lip of the mug once you start.

2. Start the first layer of shells.
- These shells should have a fairly high amount of glue as they won’t have
layers underneath themselves for support.
- Make sure the shell tips lie so your mug doesn’t wobble.

3. Build up layer after layer of shells.
- Use each layers shell tips to cover the top gaps of the previous layer.
- Keep the layers level.
- Use just enough glue to attach its blunt end to the mug and to the edges
of where it touches the shells on the layer below it.

4. Continue layering and begin enclosing the handle.
- The handle goes up in layers, but is a little trickier due to its shape.
- Make sure to get lots of glue on these shells, the sharp curves leave
them exposed to more wear and tear.
- Too much hot glue can run, meaning you’ll have to go and cut or scrape
it off before you paint.

5. Pick your final layer height and cap off the dragon scales.
- You want to leave plenty of room on the lip of the mug to drink from without
rubbing any paint off.
- I chose to top mine off with gems, so these also added to the distance from the top.

6. Base coat everything that doesn’t touch liquids.
- The lip and interior would need to be sealed otherwise, and sealing is a pain
that I couldn’t get to work correctly in my other attempts.
- Make sure to hold it upside-down to get some of the inner crevices.

7. Choose your colors and paint.
- I chose a green/black dragon motif.
- Start with very dark and work in lighter and lighter dry brushing of lighter
and lighter colors.
- Alternatively, you can get away with a dark wash, a base color, and a light
dry brushing.

For added acidic effect, I lightly splattered the scales and hit the tips with a neon green.

8. Finally I painted up the gems.
- I used this gem painting tutorial:
http://www.necrotales.com/necroTutorials/tut_gemstonesf.php
- It uses a layering techniques of using the base color, modified with
decreasing amounts of black to create a gemstone effect.
  
 9. Finishing up. 9. Finishing up.
- I tried to use a 3D enamel paint to edge the gems, but after it dried it wasn’t
noticeably different. Good thing I got it on clearance.
- Then I hit all the painted parts with two coats of water based polyurethane to seal them against damage and make them waterproof.
- Note, it still is not oven, microwave, or dishwasher safe. Don’t ruin your mug like I ruined an older attempt by putting it in any of these.
 Make a Diorama in a Dragon Egg Make a Diorama in a Dragon Egg
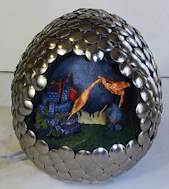
This is a creative and different project. You carve an egg out of foam and build a diorama inside it. Then you cover the egg with something for dragonscales. You can use embroidery tacks, pistachio shells or macaroni shells. Make a Diorama in a Dragon Egg
 Medieval Dragon Skeleton Ossuary Goblet Wine Chalice Medieval Dragon Skeleton Ossuary Goblet Wine Chalice
- Ossuary style drinking goblet
- 7 1/2 in. Tall, 2 3/4 in. Diameter Base
- Cold Cast Resin/Stainless Steel Liner
- This Collectibles makes a great gift for any Skull lover and adds a whimsical touch to your Decor. We have a very limited supply of these, so don't miss out

Do you like making projects and exploring a variety of hobbies?
Sign up for my free newsletter. I give you regular updates on hobbies and projects you can make. it is totally free and I don't share your email with anybody. |
![]()


![]()

