![]()
I have a youtube channel with over 1000 Project Videos!

![]()

![]()

Hi, Thanks for visiting my website. My name is Will and if you have questions
or would like to
contribute projects or ideas you can contact me 

![]()
I have a youtube channel with over 1000 Project Videos!
![]()
![]()
Hi, Thanks for visiting my website. My name is Will and if you have questions
or would like to
contribute projects or ideas you can contact me
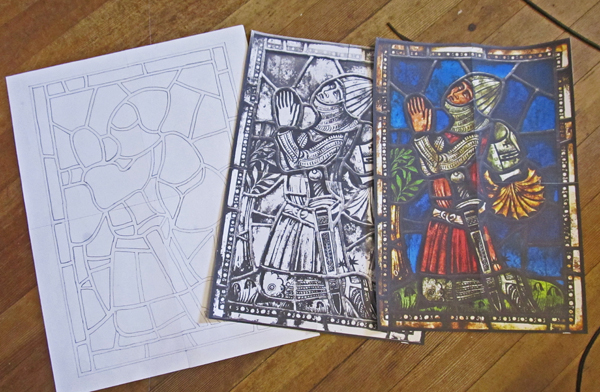
This is the design I have for our project. It is an actual one hundred year old window and I am going to replicate it.
|
If you are a beginner or amateur I have some advice for you. This window has about 70 separate glass pieces. And it poses some challenges.
As a beginner I recommend you go with a simpler design, that has fewer pieces, mostly large pieces and ideally no curved pieces or large pieces that have gentle curves. Sharp curves are difficult to cut for beginners.
Here is the practice window that I made before starting the big window. There are several things you can note here:
So, if you have an ambitious window project to make I recommend you first make a smaller and easier one just like I did. It will improve your skills and help you work out issues and challenges. Your final project will benefit greatly from it.
|