Let's build it
Here is the most important part of the assembly. This shows how the sword is made and how it works.
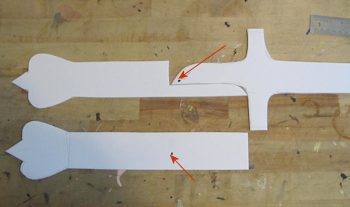
At the top you see two parts, a handle part and a blade part. These make up the very center of the sword. That black dot is the hinge point for the blade.
The third piece you see in the picture is a covering piece for the handle. You cut out four of these. Two go on top of the assembly and two go below it. So you end up with a handle that is five sheets of foamboard thick.
Notice the dots on each piece. They match. That is the pivot point. We put a small dowel through that (or a long screw) and the sword blade can pivot on it.

Note from Will about using wood. I used wood in a couple of places on this project for strength. I don't think the foam board would be strong enough to tolerate the torquing motion of the motor and the levers.

And, on the outside of the handle we also put one end of our mechanical mechanism on that exact pivot dowel.
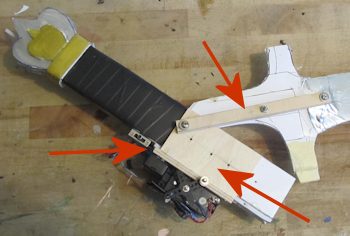
So now we put glue together those five layers of the handle and insert the sword blade into it.
And I glued two pieces of wood to the handle. Once piece on that side that we see. And another piece on the bottom where the motor is mounted.
Then we run a narrow piece of wood from the pivot point to the blade as you see here.
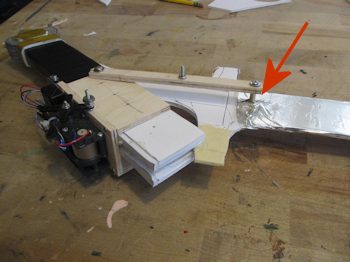
Secure one end of that narrow wooden arm to the sword blade. I cut a hole in the sword, glued in a dowel. And it is a standoff which means it has to stick out from the blade far enough for the arm to clear the handle when you move the blade into the closed position.
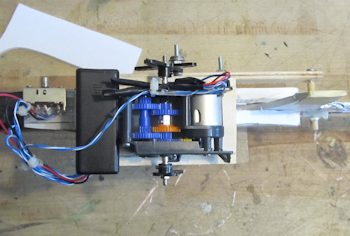
I don't have any instructions for this but the motor is pretty easy. It comes in a kit that you build. I set it up for about two revolutions per second. Then I glued a wooden board to the bottom of the sword and screwed that motor down to it.
Notice two that I added a little battery box (2 AA batteries) Thats the black box. And a switch on the far left of the picture.
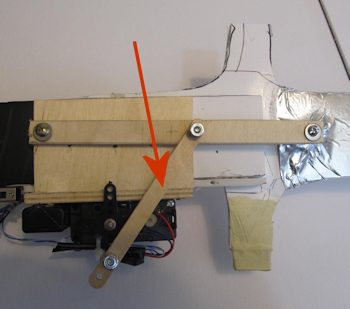
Now we add the final arm to the sword. This one goes from the motor to our long arm.
The length of this arm and where it is attached to the longer arm is critical. You have to experiment a bit with this to get a smooth motion of the blade and of the right amount of swing.
Moving the attach point to the left will cause a longer swing to the blade and moving the pivot point to the right will cause a smaller swing of the blade.

Once you got the mechanism working correctly you can go ahead and decorate the sword as you want.
Because the blade is only one sheet of foamboard thick it is prone to warping if you paint it. So don't paint it! I used a spray adhesive then applied aluminum foil to it.
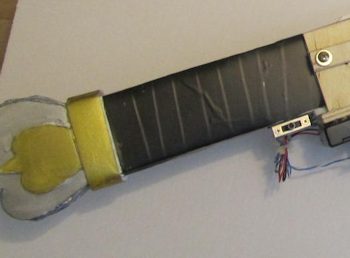
Then I added some details to the handle and pommel. The handle is electrical tape and the pommel is painted silver and gold with a few extra ornamental pieces of foamboard added for look.
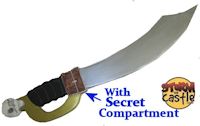
Make a Pirate Cutlass
This is a fun sword project that also has a secret treasure chest compartment where you can store your pirate treasure. I give you the template which makes it very easy for you to make. Make a Pirate Cutlass

The Electric Mace
This is another fun automatic weapon project. With this one the head of the mace has spikes that go in and out. Good thing that knights from the past didn't have double A batteries :) Learn more about The Electric Mace

Do you like making projects and exploring a variety of hobbies?
Sign up for my free newsletter. I give you regular updates on hobbies and projects you can make. it is totally free and I don't share your email with anybody. |


