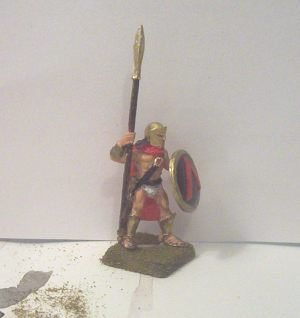
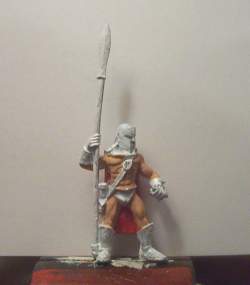
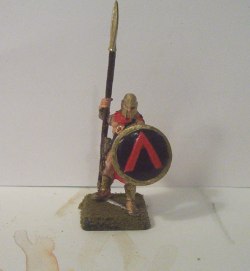
Here is a picture of the finished miniature. I have also added texture for the base so it matches the 300 Diorama.
Step One: Materials and Workspace - I have taken a picture of my workspace to give you ideas and to show you some of the tools I recommend for painting miniatures.
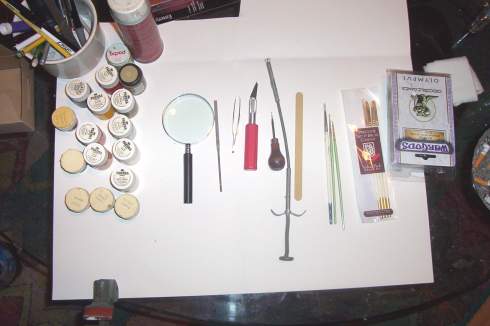
Some Notes about the Workspace: Give yourself plenty of room and lay down some type of material to protect the surface you are working on. I use posterboard, it works well, is durable and paint won't leech through to the desktop. You should also think about lighting. The workspace should be very well lit, because you are working with miniatures! I work in a well lit room but I still place a table lamp on the desk near my workspace to get the area really bright.
Tools & Materials:
I recommend quite a few different tools and I say you can never have enough tools. Most of my tools are used in the preparatory phase before I actually start painting. I recommend a small vise so you can clamp your miniature securely down, I also recommend a magnifying glass, x-acto knife, emory boards (for sanding down burrs), microfiles, an awl, and tweezers. A pin vise or three pronged parts grabber would be great if you have one.
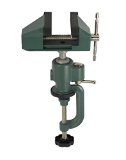
3" Universal Table Vise
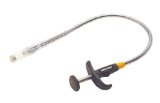
Claw Pick-Up Tool
Paints: If you are just learning how to paint miniatures I have a webpage with kits that teach you, sets of paints and books. If you are looking for a starter pack of paints Games Workshop Paint Setis a good place to start.
About Painting: I use a wide selection of paints and when you are buying paints you can be assured that the little jugs will last a very very long time. I have jugs that I have been using for many years. You just don't need much paint to do a miniature. So to keep them in good shape always wipe them off and seal them up when done. I always use a primer when painting miniatures so I recommend you do this too.
Miniature Painting Guide:
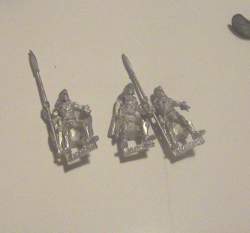
Step 1: Inspect your miniatures looking for burrs or pieces of unwanted metal. Remove any of this excess with a knife, file or small pair of snippers. Look for any problems with your miniature and correct as needed. Take note of any parts that look like they will be difficult to paint and formulate a plan for how you are going to paint it.
Step 2: Priming: Prime the whole miniature with a white or gray primer. Put this coat on very evenly and very thin. You don't want the primer to cover up any of the really fine details.
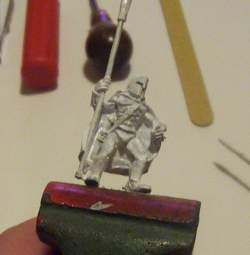
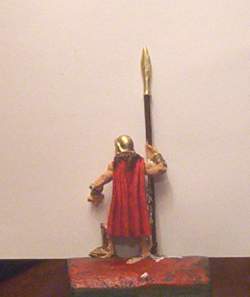
Step 3: Do your painting by starting from the innermost sections of the miniature. Think of it kind of like layers of clothes. Paint the inner (deepest layers) first. In the picture at left you can see that the red cape is done. After the cape I have done the flesh tones of his body. After this I will go to the gauntles, boots and waist cloth, Then I will do his helmet etc... The band across his chest will be last because it is the outermost section.
Step 4: Do some washing with watered down Ink or watered down black paint. This washing technique forces dark colors down into the cracks and crevices of the miniature and it looks fantastic. It will bring out the musculature and the detail in armor.
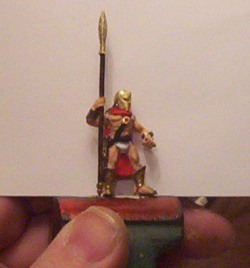
This picture shows you how the washing has settled a darker color into the folds of the spartans cape.
Step 5: Do highlighting and darklighting - Using the same color add some white then touch up high points. Lets take a leg as an example. The leg of your mini is flesh colored. You would take some flesh color paint and add a little bit of white to it then dab a small amount of this lightened color onto the high points of the leg. And by high points I don't mean up near his waist I mean the points that extend furthest out like the flat part of the quadracep. Now do this in selected spots on the mini and do any detail touch up work as needed.
You can seel the highlighting on the Spartans Thighs, Chest and Helmet.
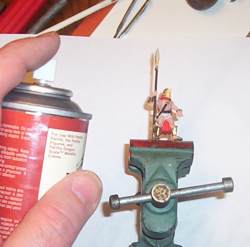
Step 6: Apply a spray on sealer to the mini. This will preserve it and its colors for many years. I use a matte sealer for realism. If you are doing a miniature with scales or slime like a lizard or dragon you might want to use a glossy sealer because it will lend a shine to the miniature.
Step 7 : Assemble any parts together for the completed model. And attach to base if necessary.
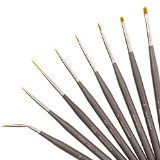
Professional 8-Detail Brush Set by KeypCreative - Thick-Handled Artist Brushes For Miniatures, Modelers, Hobbyists - Perfect For Fine Detailing - Ideal For Use With Acrylic, Watercolor & Oil Paint
- GET A COMPLETE SET OF 8 PROFESSIONAL DETAIL BRUSHES: Here's your chance to gain a set of 8, high-quality brushes to help you complete all your arts and crafts projects! This set is ideal for miniature enthusiasts and modelers, as it helps you add the most subtle detailing in all your paintings!
- THICK HANDLED BRUSHES FOR COMFORTABLE PAINTING: Any detailing requires hours of meticulous work over your next masterpiece! Knowing how tired you must feel having handled poor quality, non-ergonomically designed brushes, KeypCreative has made the most artist-friendly brush set, to help you fully immerse yourself in the creative process, free of distracting pain!
- IDEAL FOR THE MOST DEMANDING OF ART PROJECTS: Featuring 5 Round Brushes, 2 Flat Artist Brushes for Fine Details and 1 Bent Brush for Tricky Corners, there's nothing keeping you from filling out the entirety of your works' surfaces and wowing everyone with your eye for detail!
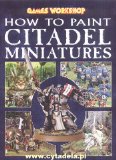
How to Paint Citadel Miniatures
Fully illustrated throughout with examples from the Warhammer, Warhammer 40,000 and The Lord of The Rings ranges, How To Paint Citadel Miniatures clearly explains how to assemble and paint your models for gaming and display using the Citadel Colour range. Whatever your level of experience, this is the indispensable guide for anyone wanting to learn more about painting miniatures. Also featured is the work of many gamers and painters, including avid army collectors, display artists and members of the renowned Games Workshop 'Eavy Metal team.
|