<aking Miniatures Banner

Home

Home

Youtube graphic
I have a youtube channel with over 1000 Videos!


Become a Patron

Wills Pinterest !


Painting Tutorials

Sculplting Miniatures

More Tutorials

Supplies

Short Tutorials

Subjects


Will
Hi, Thanks for visiting my website. My name is Will and if you have questions
or would like to
contribute projects or ideas you can contact me Will

How to Sculpt a Miniature Treasure Chest


If you want to learn how to sculpt miniatures for your dioramas, for wargaming or just for your enjoyment this tutorial is a great place to start. I show you how to sculpt a miniature treasure chest Do you have miniature dungeon adventurers? Well, what good is a dungeon adventure if there is no treasure chest? So, this is a good tutorial to learn and the treasure chests that you make will be quite useful in your gaming or in your collection. This tutorial also comes with a video you can find at the bottom of page 2.

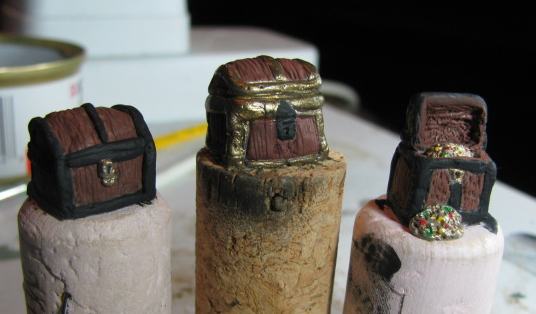
In this tutorial I make three different treasure chests and show you some of the common techniques for sculpting that will make it easy. Here is a picture that shows you what I make in this tutorial.


The three treasure chests


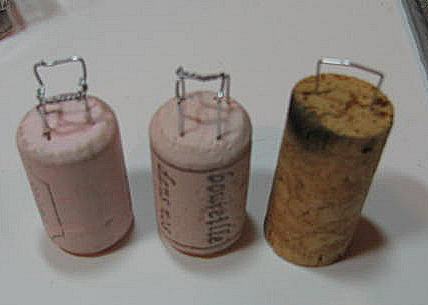
I recommend you make a wire armature for the treasure chest. It isn't absolutely necessary but it will make it a lot easier for you to sculpt the chest. When you are working on the clay it will have the tendency to distort and move around. With a wire armature it will move around less and distort much less. The armature helps it keep its shape. The picture above shows three different armatures for three chests that I make in this tutorial. The first armature is the most complex and it includes a section of wire to support the open lid of the treasure chest. The second armature is just a box shape and will be for a closed shape. And the third armature is the simplest. It is pretty much the shape of a staple. This third shape is still pretty good and will help you with the sculpting. (If you want to learn how to make armatures I have a complete tutorial that shows you how.)

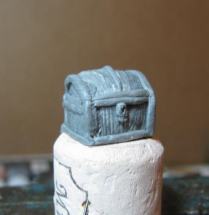
I like to work on a wine cork. It is really convenient and you can comfortably hold the miniature while you are working on it and rotate or move it to any angle desired.

Wire armatures


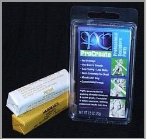
Product Used: I used a sculpting putty called ProCreate. You can also use GreenStuff (Games Workshop Green Stuff Modelling Puttyor Super Sculpey Firm (Super Sculpey FIRM Gray- One Pound. You can use just about any modeling clay or two part clay that will harden. I prefer the ProCreate because I find it easiest to work with. If expense is a factor you can get the Super Sculpey firm. It costs a lot less but the downfall is that it doesn't air dry. You have to bake it in an oven to harden it.

ProCreate

Procreate Putty 2.5 Oz.


Rough out the shape

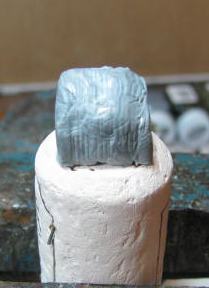
Mix up your putty and apply it to the armature so it is in the shape of a treasure chest. You have lots of ways you can do this and I have a rectangular chest with a rounded top.


Begin the sculpting

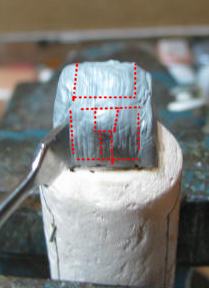
Now use a tool to start sculpting out the shapes. What you are doing is keeping the metal bands of the treasure chest as high points and depressing in the wooden parts of the chest. The red lines give you an idea of how the bands are shaped around the chest. You are pushing in all the wooden parts.


Metal Bands are complete

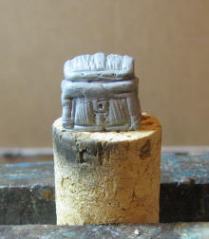
Ok, you can see that the metal bands are taking pretty good shape.


Scribe the Wood texture

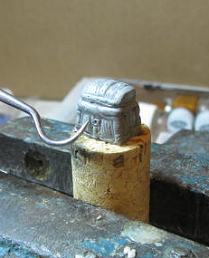
Next Scribe the wooden texture on the wooden sections of the chest. You can do this with a sharp object or you can use a bladed object to simply push down thin lines.


Alternative banding method

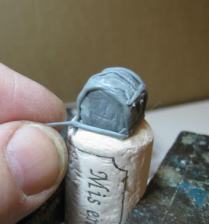
There is another way to create the metal bands on the treasure chest. You can roll out very thin pieces of putty and apply them as bands on the chest. This method will make the chest look better but it is more of a challenge. You particularly have to get the bands to be very uniform in size and shape. Try this method on your second chest.

Once they are applied you flatten them with the side of a tool so they are like flat metal bands.

Band method 2

This picture shows the second treasure chest using the rolled out bands method.


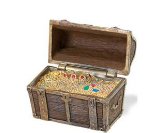
NextContinue with tutorial - Next I show you how to make a treasure chest with the lid open and how to add piles of gold. Then we get a look at all three of our completed chests


RESOURCES


Treasure chests

Fenryll Miniatures: Chests & Treasures (acc.)


Miniature treasure chest

Safari 851829 Treasure Chest Miniature- Pack of 6


Green Stuff

Green Stuff (6in Strip) RPR 75006Modelling putty


Book: babes, beasts and brawn in sculpture

Babes, Beasts, and Brawn: Sculpture of the Fantastic

Babes, Beasts, and Brawn: Sculpture of the Fantastic is a definitive look into the creation of these powerhouse playthings, with hundreds of stunning color photographs and fascinating insights into Kiwus' creative process. Beyond the building of plastic toys, Kiwus has created some of the most stunning and in-demand limited-edition cast sculptures of comics and fantasy figures of all stripes, including three-dimensional representations of the paintings of Frank Frazetta and miniature renditions of the Queen of Pin-Ups, Bettie Page. Also included is an in-depth how-to section, where Kiwus chronicles his process step-by-step to aid aspiring professionals.


Sculpting Fairies Gnomes & Trolls

Fairies, Gnomes & Trolls: Create a Fantasy World in Polymer Clay