Return to the Paper Neuschwanstein Castle plans here -
Thursday March 22
Well with a lot of stuff going on in my life I have been a little slack this week and only managed to get the Knights Quarters and Tower and the Kings Quarters done.
BUT the good news is that the gatehouse, servant's quarters and tower and the courtyard wall went into the kiln for bisk firing last night. They will be fired during the week and will hopefully have some pics from the kiln later. I have been experimenting with glazes and colours for this exercise and will have some samples out of a glaze firing hopefully next week so I can decide what colour/glaze to use for the castle.
Anyway here goes what's been on the messy bench.....
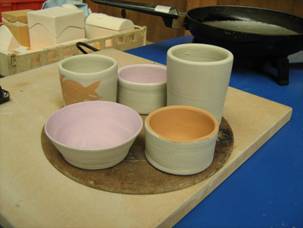
These are some test post for colours that I threw on the wheel.
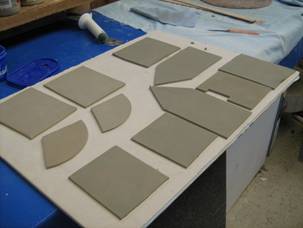
Here are the bits cut out for the Knights Quarters and 2 new towers for the front. I am not happy with the originals so will try again....
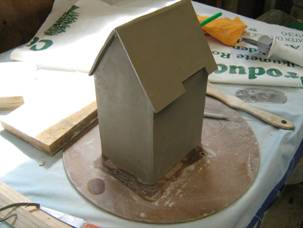
Here is the completed Knights Quarters.
These are starting to get quite large and it is going to be interesting to see if I can continue to create these out of 4mm clay slabs or have to go up to 5mm.
The interesting thing is that I have to be very patient and do the construction at exactly the right time to get the slabs so that they don't sag and yet are still able to be worked!
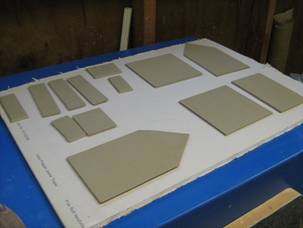
Here are the bits to construct the Knights Tower, and the Kings Quarters.
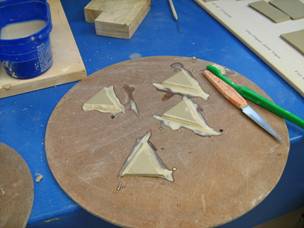
Here are the roof pieces for the Knights Tower scored and ready to assemble
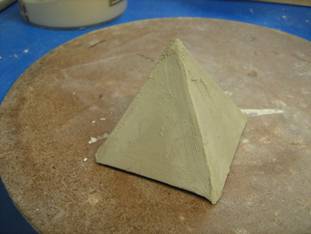
Here is the tower roof together, once it hardens more I will burnish it and smooth it out.
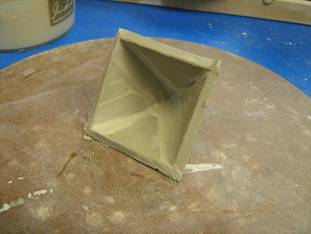
Here is the roof on its side so you can see inside, I give the joins a good brush with slurry on the inside to fill any gaps.
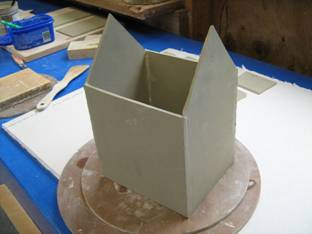
Here is the start of the Kings Quarters going together....
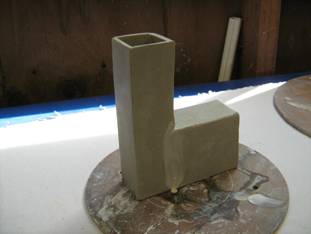
Here is the Knights Tower. I have made a bit of an error on this one hence the join between the tower and the room. If this doesn't fire properly I will remake this with the sides in one piece not two.
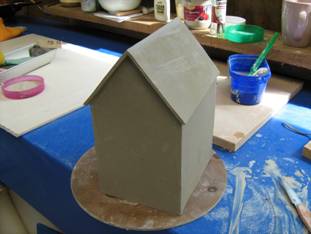
Here is the Kings Quarters with roof on.
Doesn't look too big until.....

So here we have the weeks work, 1 x Kings Quarters, 1 x Knights Quarters and 1 x Knights Tower.
The really good thing now is that I have found a neighbour just up the road who has a kiln and is going to sell me cheap firing space with her stuff so I won't have to wait for weeks to get these bits fired!!
Keep happy and hope everyone is having fun! Frederick.
 Continue on to Part 5 Continue on to Part 5
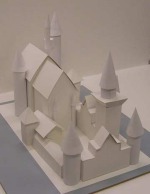
Want to Make this castle out of paper?
This is nice paper project where I give you all the plans, You print them up and put them together , Not too hard and looks great - Paper Neuschwanstein Castle
 The Great Clay Adventure: Creative Handbuilding Projects For Young Artists The Great Clay Adventure: Creative Handbuilding Projects For Young Artists
Encourage elementary and middle school-age kids to build their clay-sculpting skills at home with these lessons and projects designed for use in the classroom. They'll model a pinch pot, coil animals, fossils, vases, masks, and tiles that they can embellish with rubber stamps. Best of all, these projects will foster children's confidence in their abilities and stimulate new ideas.
Handbuilt Pottery Techniques Revealed: The secrets of handbuilding shown in unique cutaway photography Here are directions for many creative, fun-to-do pottery projects potters can follow to produce handsome finished objects without need of a potter's wheel. The author instructs in coil, slab, mold, and pinch techniques to produce pots, bowls, vases, tiles, and other decorative pieces. She also advises on acquiring basic tools, mixing and preparing clay, and using coloring agents. Newcomers to pottery crafting will especially appreciate her tips for making projects easier to accomplish, such as use of a hairdryer at regular intervals for drying out too-wet clay, and easy methods for keeping clay soft and pliable. Step-by-step color photos with detailed captions guide handcrafters through each project from start to finish. Many photos are of the cutaway type to show correct hand positions for controlling the clay, both inside and outside the form. Here's the book that takes the mystery out of handbuilding in clay, demonstrating each step in the pottery-making process. More than 400 color photos.
Hand Building Techniques (Ceramics Class)
|