Hi, Thanks for visiting my website. My name is Will and if you have questions
or would like to
contribute projects or ideas you can contact me
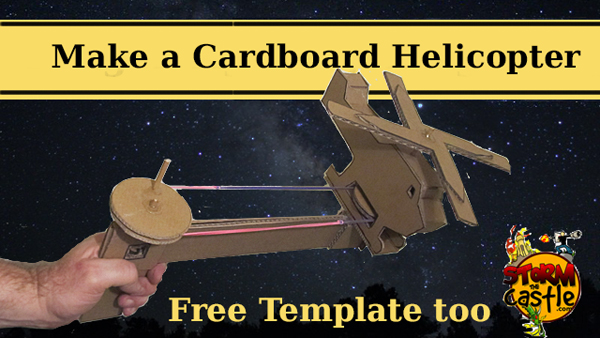
Make a Cardboard Helicopter
This is a fun and creative project. And the blades of the helicopter really spin. I show you how to do it. And I give you the template. Right here - Pages 2,3,and 4
There is a definite inspiration for this particular toy project creation.
I remember when I was a kid I spotted a toy sticking out of a neighbors trash barrel. I plucked it out and took it home. It was broken but with a little bit of effort I managed to fix it.
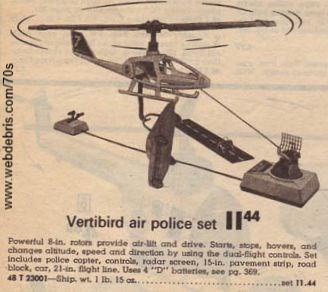
That toy was called the Mattel Vertibird. It was a helicopter that spins around and flies on a wire.
Well, this project is an homage to that wonderful toy from the 70's.
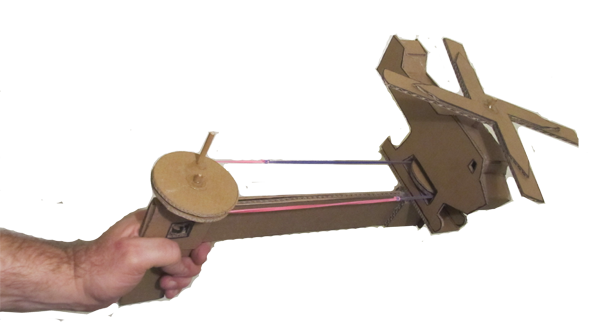
Watch this 12 Second video showing our cardboard helicopter in action:
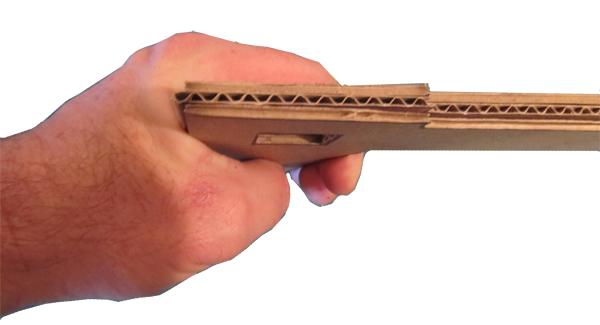
This is a cool little project. And the helicopter blades really spin. We put it on the end of a handle that we make so you can fly it around.
If you have completed the other projects from this you have gained some skill in working with cardboard and you are ready to tackle this more advanced project. It isn't box shaped. For this one you take apart a box and use the cardboard to make the helicopter.
Tools and Materials
1 medium sized cardboard box � roughly 16 inches or larger
Or several smaller boxes
several rubber bands
3/16 wooden dowel (appx. 12�)
Knife for cutting cardboard
Glue or hot glue
We make the helicopter first. Then we make the handle unit. And we finish it off by connecting the two together.
You can cut out the pages and cut the shapes, using them to make your helicopter. Or you can use tracing paper to trace out the patterns then transfer the patterns to cardboard.
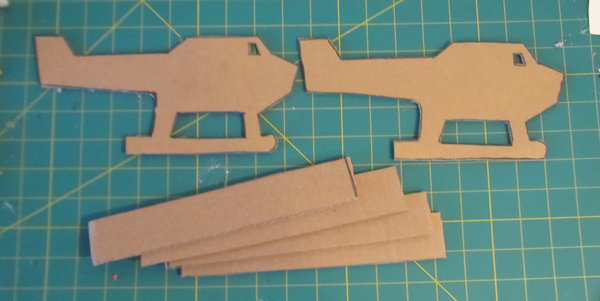
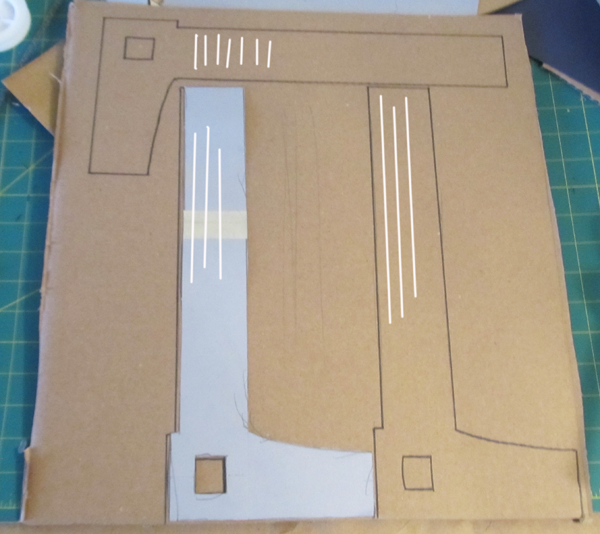
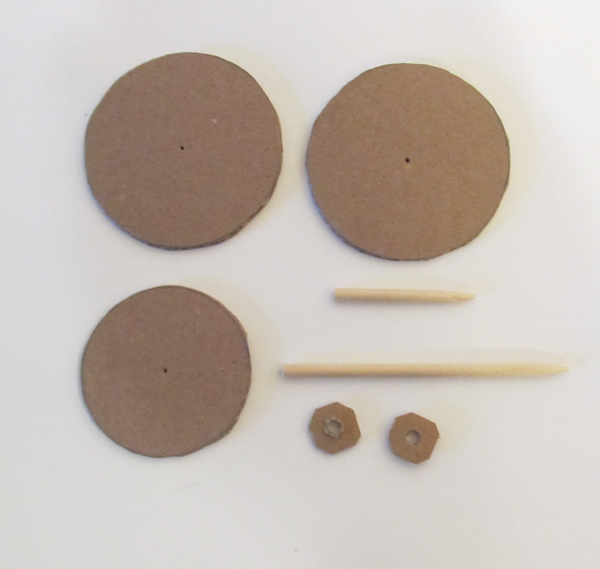
Use the template to cut out of cardboard two helicopter pieces and about 30 inches of 1 ½ strips.
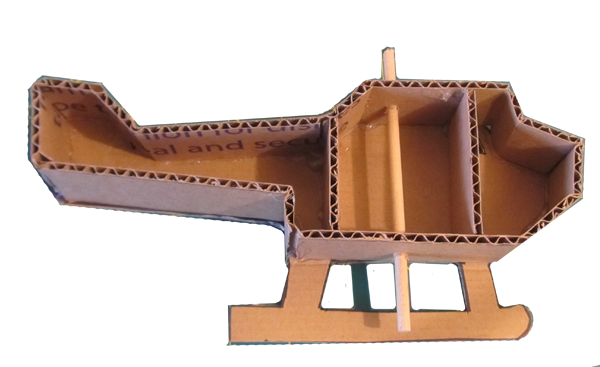
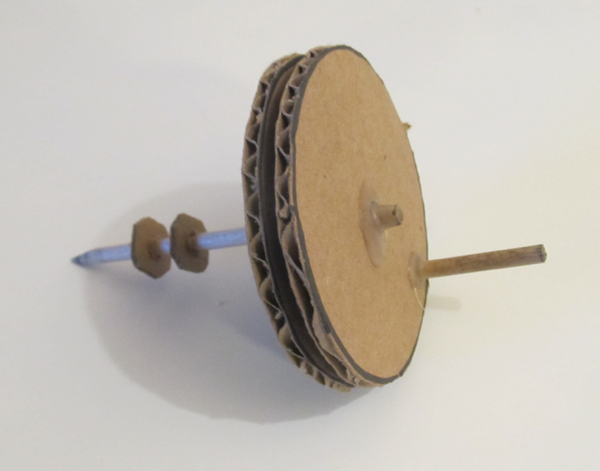
Use one helicopter side and add the inch and a half strips all the way around. Add the two vertical strips in the center. And push the five inch dowel all the way through like this. Don't apply any glue to the dowel. It should spin freely.
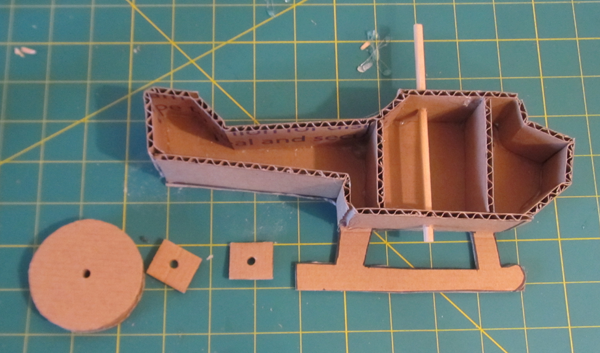
Next we finish the helicopter by making the pulley and adding the two cardboard locking nuts.
The pulley is a sandwich of three disks.
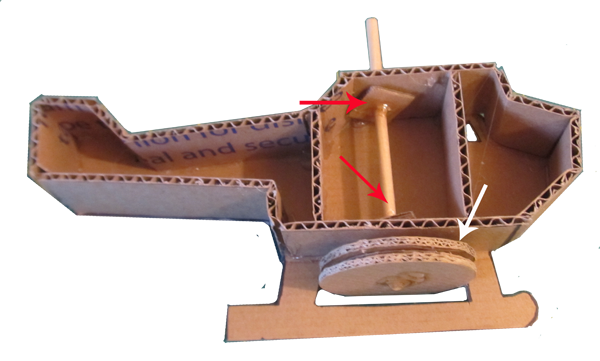
Add and glue the two locking washers (red arrows) then add the pulley (white arrow). Glue them all in place being careful that the dowel still spins freely
Finish the helicopter by gluing on the top layer.
Now let's make the handle piece.
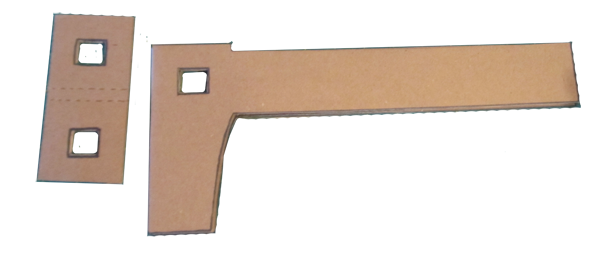
Put together the template and trace it onto cardboard.
Make three of them.
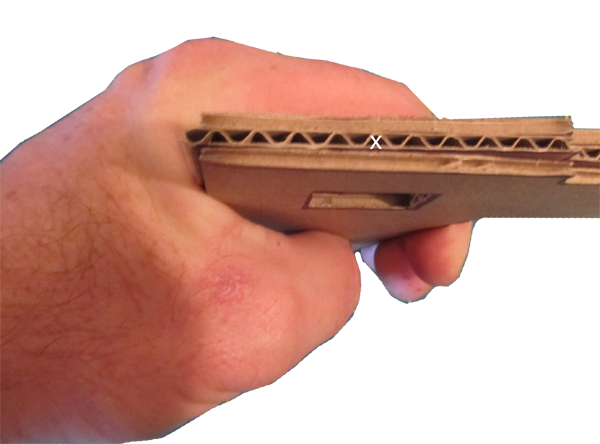
The direction of the corrugations is important. Make one with the corrugations going one way (up and down). And make two with the corrugations going the length of the handle. The white lines on the picture show the direction of the corrugations.
Be sure to cut out the squares over the handle grip.
Then glue the three pieces together. Put the one with the short corrugations in the center of the stack.
See how the corrugations show in the stack of three? This is important. The dowel for the hand crank will be pierced right into one of the corrugation flutes.
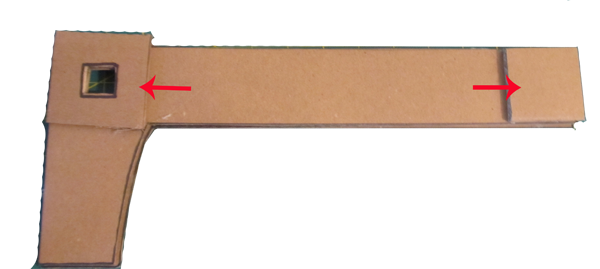
Cut out the handle fold-over piece.
And glue it over the handle. Insure the square holes line up correctly.
Then glue the four helicopter base pieces to the other end. Two on one side and two on the other side.
Now build the hand crank assembly.
First make the pulley using the two large disks with the smaller disk in the middle. Glue it to the large dowel. Then glue on the 2 inch handle.
Pierce this through the top of the handle.
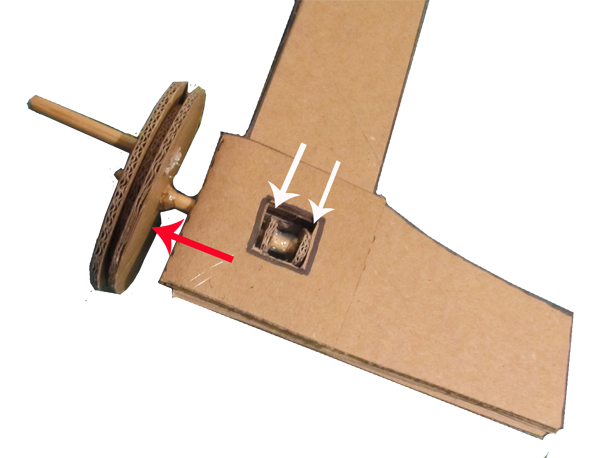
You have added the overwrap piece so you can't see this but the dowel will pierce and sit cleanly in one of the flutes of the center layer of cardboard. This will give it strength and this is why we made the triple stack of cardboard exactly this way.
Once you have everything in place you can apply glue to the cardboard locking nuts (shown with white arrows). Be careful with the glue. It only adheres the nuts to the dowel. The whole assembly should rotate free.
Tie together several rubber bands so they snugly span around both pulleys.