Next I made some cardboard mockups in various sizes. This is to get a sense for the size I will carve the ship. With these mockups we can see how it will fit in the bottle and how to place it.
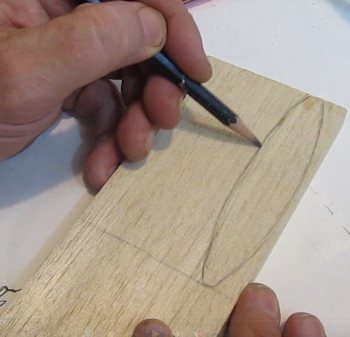
Next I sketched out the ship on a piece of balsa wood.
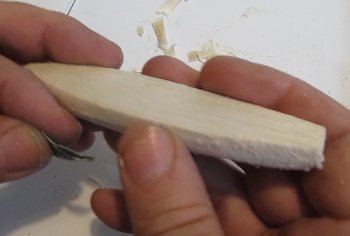
Then carved and sanded the hull into shape.
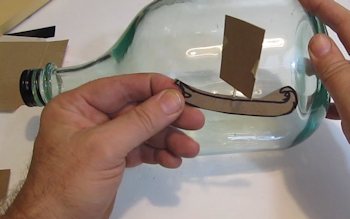
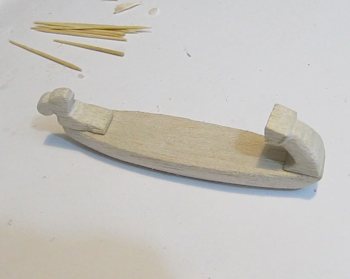
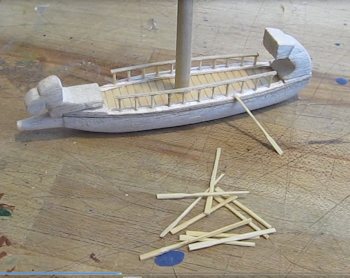
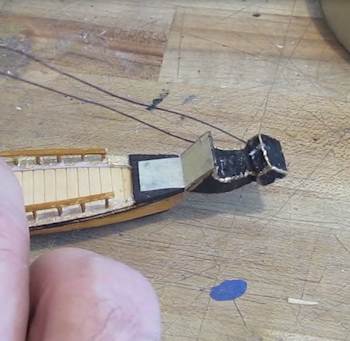
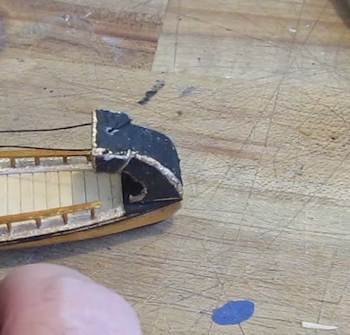
Then added details including rails, deck and the front pieces. The mast is only temporary. The tail piece is not glued on. We have to hinge it so it will fit through the neck of the bottle. Let's take a look at that.
The railings are toothpicks that I sanded and trimmed then inserted. The oars are also toothpicks.
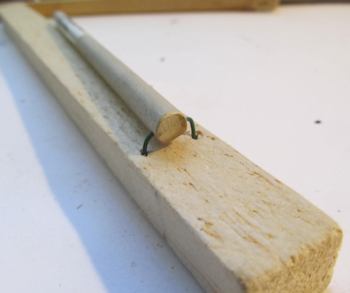
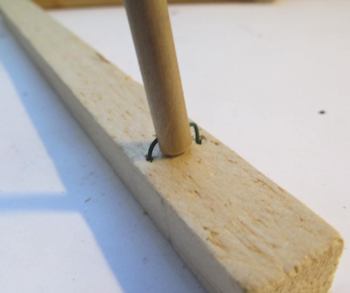
These next two pictures show how to add the tail piece. It is hinged with a small piece of tape. And strings are connected to it. This way it can be inserted into the bottle and the strings are pulled and the tail piece is brought into the upright position.
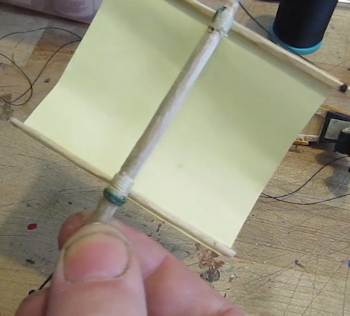
I carved the mast out of a wooden dowel. It is stronger than balsa wood. That horizontal bar across the top has a pivot. So it can swing down parallel to the mast. This way it can be folded and slid into the bottle. I wrapped the mast in a few spots with string so it would look more nautical.
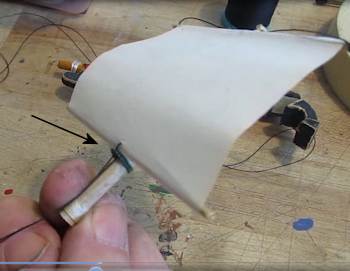
Lets take a look at the front of the mast and sail. The string is attached to the sail and is fed through a little hoop on the mast. Once the ship is inserted in the bottle the string is pulled. This opens the sail, straightens the horizontal beam and pulls the mast into the upright position.
Here is how to mount the mast to the deck of the ship. I drilled a hole in the bottom of the mast and ran a wire through it. Then I drilled two holes in the deck of the ship and ran the wire into them. Now the mast can be hinged into the upright position.
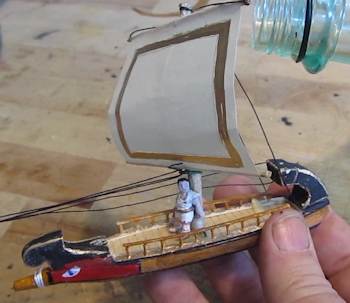
Ok, this picture is from further in the assembly but it shows you how everything works after the ship is installed into the ship. The strings are pulled and the mast raises, the sail opens and the tail piece is raised into place.
Thats it. The ship is assembled, painted, and strung.
 Let's continue with the tutorial and take a look at the sculpted miniatures. Let's continue with the tutorial and take a look at the sculpted miniatures.
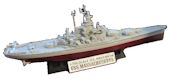 Make a Plastic Model Battleship (USS Massachusetts) Make a Plastic Model Battleship (USS Massachusetts)
This is a skill level two model at 1:700 Scale. Interesting model with a whole lot of very small pieces. This is because of the scale. I used a head-band magnifier for this project and it is a pretty straight forward build. Attach the deck to the hull then add all the various pieces to the deck. . Make a Plastic Model Battleship.

Do you like making projects and exploring a variety of hobbies?
Sign up for my free newsletter. I give you regular updates on hobbies and projects you can make. it is totally free and I don't share your email with anybody.
|


