What we will be doing here is making the sword blade into this kind of shape. This makes it look realistic and give it a whole lot of strength.
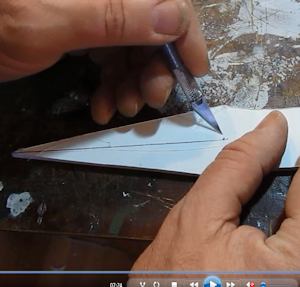
Draw a line going right down the center of those four sword pieces. Only on the blade sections. Not the handle sections. Then cut through that line with a sharp knife.
But, you only cut through the top layer of paper and some of the foam. Do not cut all the way through everything.
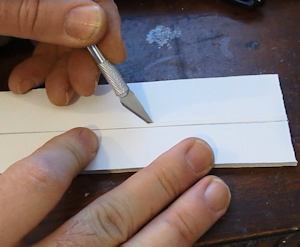
Then cut a line both to the left and right of that first line you cut. These two lines are cut at a 45 degree angle. In effect what you are doing is cutting a long notch right out of the center of the sword blades.
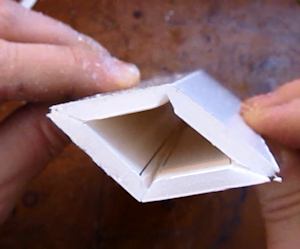
This is what you end up with.
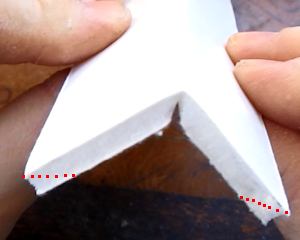
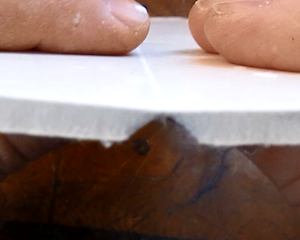
So now it can be folded like this to form the shape of the sword. The only thing remaining is to trim down the ends at the red dotted lines. This is so the two sword halves will sit flat against each other.
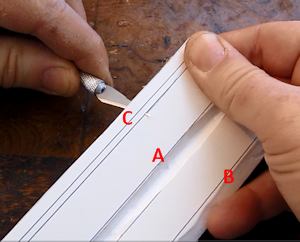
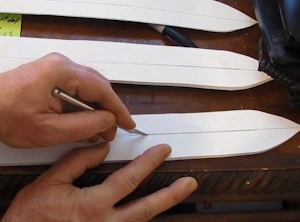
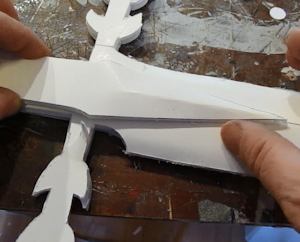
This picture shows you the whole process really well. At "A" the center notch has been cut. At "B" the edge has been cut and I am in the process of cutting away the edge at "C".
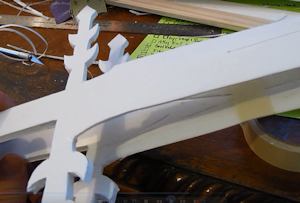
Once you have done all the notching and cutting you can bend those pieces to a bit of an angle and glue them all together. There are four in total that make up this assembly.
Gluing the sword blade pieces together.
Now we do a similar process with the handle pieces. There are two of these. Just in the end section where the triangle point is you do this. Cut a slot down the middle, just cutting through the top layer of paper and some of the foam. Then make your two angle cuts to form the notch.

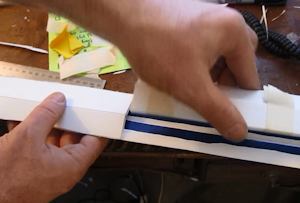
Then you can crease those two pieces just like you did with the blade pieces. The red line shows where the crease is.
Then go ahead and glue those pieces on. One on top as seen in the picture and one underneath.
 Ok! The hard part is done. Let's continue working on the sword by doing the handle and pommel Ok! The hard part is done. Let's continue working on the sword by doing the handle and pommel

Lord of the Rings - The Return of The King - Morgul Lord Witch King with Mace-Weilding Action
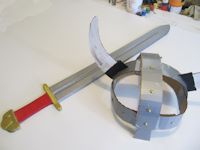
Make a Viking Sword and Helmet
This is an easy project that you can make. And you only need a few supplies. I even give you the template for the sword. How to Make a Viking Sword and Helmet
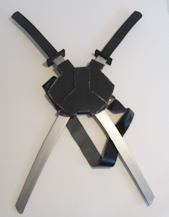
Make Deadpool's Katanas and the Holster
You can have swords, and wear them, just like Deadpool does. And for fun I also give you the template so you can make a miniature set like I made for the dragonslayer. Make Deadpool's Katana and holster
Make the Kirkhammer from Bloodborne
This is a big hammer and it really works like the trick hammer. We also make the sword that goes in and out of the handle. Make the Kirkhammer

Do you like making projects and exploring a variety of hobbies?
Sign up for my free newsletter. I give you regular updates on hobbies and projects you can make. it is totally free and I don't share your email with anybody. |


