<aking Miniatures Banner

Home

Home

Youtube graphic
I have a youtube channel with over 1000 Videos!


Become a Patron

Wills Pinterest !


Painting Tutorials

Sculplting Miniatures

More Tutorials

Supplies

Short Tutorials

Subjects


Will
Hi, Thanks for visiting my website. My name is Will and if you have questions
or would like to
contribute projects or ideas you can contact me Will

Sculpting Jack and the Giant


These two figures are for a diorama called "Jack and the Beanstalk. It is a bio diorama in that it has a living component. The beanstalk is a real beanstalk that I have grown and placed right into the diorama.

If you are interested in learning how I made this diorama you can see it here: Jack and the Beanstalk diorama This tutorial is about how I sculpted the two main figures.


For Jack I used a product called Green stuff because he is very small and you can get real good detail using green stuff. The giant is significantly bigger so I needed a lot more clay. I used super sculpey for this. It is easy to work and is less expensive.

If you want to learn how to sculpt miniatures I have a whole series of video tutorials that you can follow along with. I take you through all the steps from beginning to end. How to sculpt fantasy miniatures

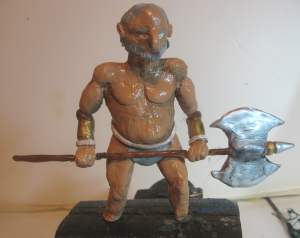
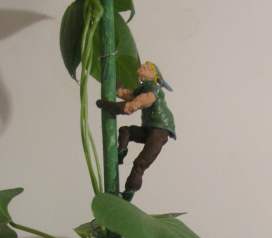
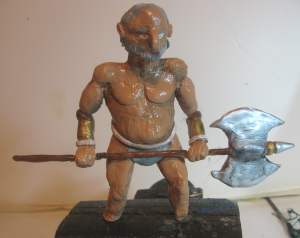
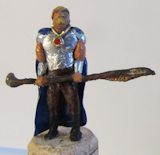
Here is a look at the finished sculptures

Giant    Jack

Scale and size are of course important with miniatures and especially when they will be displayed together. The Jack miniature is two inches tall and the Giant is six inches tall. And of course Jack is slender while the Giant is rather husky. This also demonstrates use of different modeling clays and green stuff was perfect for Jack while Super Sculpey was perfect for the Giant.


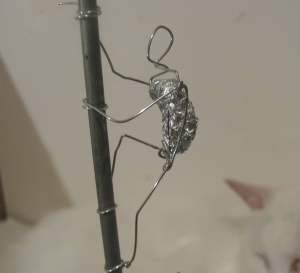
The wire armature jack

As with just about all minature projects you should start with a wire sculpture. I attached a rod into a vise then I formed the shape of jack right on the rod. This way I could sculpt it then remove it and place it onto the beanstalk of the diorama. Remember that the wire frame gives the sculpture strength and gives you the gestures and shapes of the mini.

I also use a little bit of crumpled aluminum foil to fill out the torso a bit. This saves on the modeling clay.


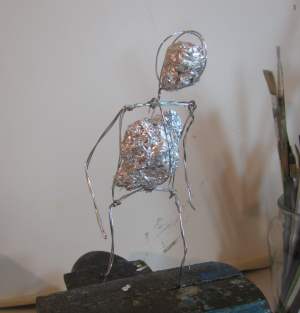
Fill the armature with foil

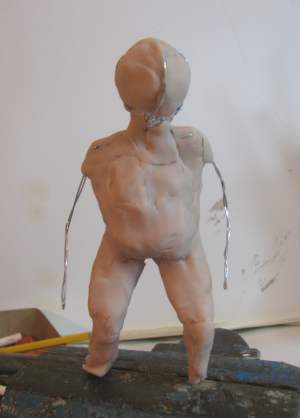
Same thing with the wire frame of the giant. Experiment and get the gestures right. You can see by the tilt of his head that he is looking down through the hole in the clouds where the beanstalk comes up.


The Sculpting Putty


Super Sculpey Polymer Clay - Semi-Transparent Beige-Pink - 1lb.

For the Giant I used Super Sculpey (the normal type, not the super sculpey firm) You knead it nice and soft then sculpt with it. It never air hardens which means you have lots of time to work on it. You bake it in the oven when it's done and it hardens. You can also harden it with a hair dryer which is what I did for this giant.


Filling the giant with sculpey

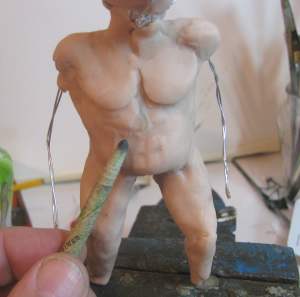
The General process that I use regardless of the type of clay is to fill out the general shape of the torso and legs first. I just want to get it to look roughly like the body shape paying close attention to musculature.


SHaping details on the figure

Then I will sculpt out most of the details on the torso and legs. I typically like to work on the torso and legs before I put the arms on because once they are on they tend to get in the way. I can't reach the inner parts of the torso very well. This will vary from sculpture to sculpture but it's a pretty good rule of thumb.


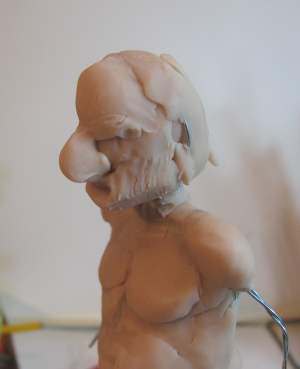
Details on head and face

Then I work on the details of the head and face.


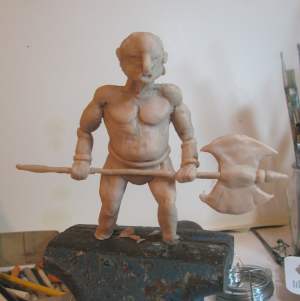
The sculpting is done

Finally I attach the arms. I use the same process as in the torso. First I just add some clay and get the approximate muscle shape then I work on the details of the arms. The weapon here was an after thought but it came out great. I made a wire frame for it then soldered it right to the hand armatures before I added the hands.


The Giant is done

Finally I paint then use a spray sealer to keep the colors crisp. This is a bit shiny because the spray sealer is still wet. I typically follow a painting process that is similar to the sculpting process - I work on the torso and legs first then do the head and finally the arms and weapon. This reduces errors or rubbing paint around where I don't want it.

Note that there are no feet on this giant because he is standing in a layer of clouds - You won't see feet anyway so there is no need to make them!!

This was just an overview tutorial of how I made these miniatures and I do have a very extensive set of video tutorials that show you this whole process step by step with a variety of clays: How to sculpt fantasy miniatures


Miniature Battle Mage

How to Sculpt a Miniature

In this tutorial I show you step by step how to sculpt a neat little fantasy miniature. I make a battlemage. I show you everything including the armature and the materials to use. How to Sculpt a Miniature BattleMage


Sign up for my newsletter!

Do you like making projects and exploring a variety of hobbies?

Sign up for my free newsletter. I give you regular updates on hobbies and projects you can make. it is totally free and I don't share your email with anybody.