In this tutorial I show you everything you need and everything you need to know. If you have simple miniature objects that you need to cast you can do this in a one part mold and I do have a tutorial on that process here: Casting Miniatures in a one part mold.

Dwarf original and cast duplicates
An Overview of the process:
What you do is embed a miniature halfway into a lump of clay and put a box around it. Then you pour in the rubber and let it harden. Flip the box over, remove all the clay and then pour in the other half of the mold. Once that solidifies you have both halves of your mold.
About the Two Part Mold
This is the typical way that you are going to make copies of your minature figures.. Something that looks like this:
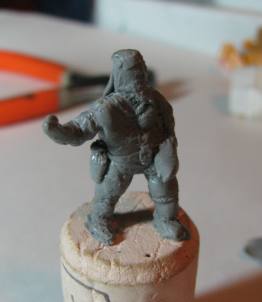
If you have checked out my tutorial on one part molds you know that this dwarf wouldn't be good for that type of mold because once it is encased in the rubber you wouldn't be able to get it out. That is why we use a two part mold. We can put the mold halves together and pour in the plastic to make the miniature. And once the plastic is dried we can separate the two halves and get the miniature out.
The tools and Materials Needed:
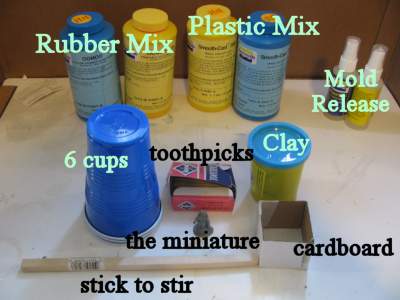
- the two part rubber compound (This makes the mold)
- the two part plastic compound (This makes the miniature duplicate)
- 6 disposable cups for mixing
- Mold release (optional but recommended) It insures you part comes out of the mold easily
- Some clay, any type will be ok I prefer a clay called Plastilina, it is firm yet soft enough to take the mini
- Some small pieces of cardboard
- Toothpicks
- A stick to stir with or a plastic spoon
- The miniature that you will be duplicating
- Not shown: 2-4 small spherical objects like bb's , or marbles; Or you can make these out of procreate or greenstuff (any type of clay that will harden) I will show you more about this. Or you can forego this and use the end of a paintbrush.
Let's Begin
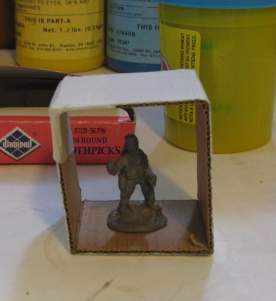
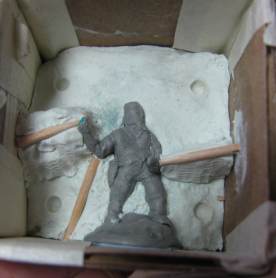
Cut and shape the cardboard so it forms the four walls of a box like this. Make sure you have a good half inch around the whole miniature including front and back.
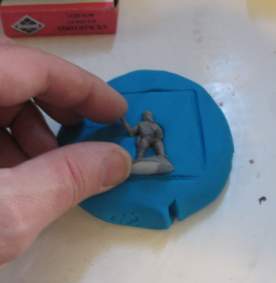
Press out a thick pancake of the clay and press the minature into it. Press the miniature so about half of it is embedded into the clay. You want the clay to be nice and thick and the minature should be at least a half inch off the surface of the table once it is pressed in. Ideally the clay is thick enough so the cardboard will sink about half way into it.
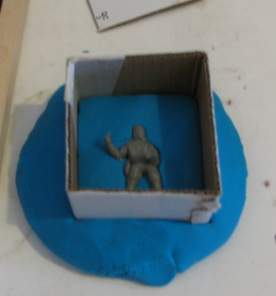
Now press the four sided box into the clay. Put it so the base of the miniature is right up against the cardboard and center the figure left to right. Press the box all the way down to the surface of the table. Right through all the clay. Ideally half the height of the cardboard will be pressed into the clay.
You can remove the outside portion of clay if you want to.
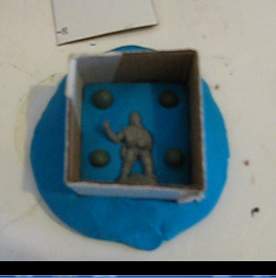
Now you need a few little spheres. They can be bb's, small marbles or like what i am using they can be small round spheres that are made out of sculpting clay (hardened). I made these out of green stuff then let it harden.
Press them about half way into the clay.
These are important because they will help keep your mold exactly straight and even when you are casting the mini.
Now let's take a look at this miniature and place the toothpicks.

I am going to place a toothpick in this setup. And this is for a good reason I will explain. Your miniature should have at least one toothpick and usually two is pretty good.
I have rotated this so you can understand how to place the toothpick.
In the current picture orientation the black arrow shows you how when you are casting the actual miniature you are going to pour the plastic in. The plastic will flow down into the mini.
But the red and orange arrow shows how the arm changes the direction of the mini. the elbow part goes back up to vertical and then the arm continues back down.
This could cause a problem. The plastic probably won't flow into this end of the arm. So, you place a toothpick in a way that will leave a breathing channel. This breathing channel will allow the air to escape from the arm and allow the plastic to flow into it. On your miniature you might have to do one for each arm or for other parts of the mini that stick out from the main body.
This toothpick, when removed will form an open channel that air can escape out of. It will also partially fill up with plastic. But that is ok. This excess plastic is called a sprue and once the miniature is removed from the mold you just cut this excess plastic off with a hobby knife.
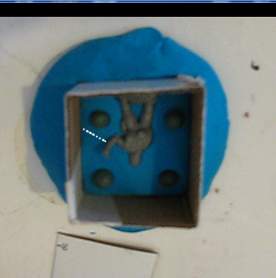
The white dotted line shows where I have placed my toothpick. Just depress it half way into the clay just like you did with the little spheres.
The direction of the toothpick should point roughly up so the plastic doesnt just run out.
And be sure one end is right up against the mini and the other end is right up against the wall of the cardboard box.
Generally the more vertical the toothpick the better. The clay sphere was in my way so this was the best I could get it.
Alternative technique
There is an alternative method (which is easier) to making the register marks in the clay. Rather than making the little clay spheres or using marbles/bb's you can just use the blunt end of a paintbrush to form craters in the clay. This works just as well.
This picture shows a more advanced method of getting a good miniature mold. You can see that the clay is built up in a couple of different points and I have added more toothpicks. I will talk more about this in the advanced section of this tutorial.
 Ok, we are ready to start casting the mold Ok, we are ready to start casting the mold
RESOURCES AND MATERIALS

Smooth-On Oomoo 30 Silicone - 2.8 lbs, Oomoo 30 Silicone
This is the stuff that you mix together and pour. It forms the rubber mold. I use this material in this tutorial on how to cast a miniature

Smooth-On Smooth-Cast 300 - Smooth-Cast 300
This is the plastic you cast into the rubber mold.
This company also sells a complete kit that gives you the rubber mix, the plastic mix and other things.
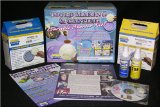
Moldmaking & Casting Pourable Starter Kit- Mold rubber can be used to capture exact detail from any model. This starter kit will allow you to make a rubber mold of a small, simple 2 or 3 dimensional model using silicone rubber. Then pour our fast cast plastic to make one or more reproductions of the original. If you are an absolute beginner to casting then you might want to consider getting this kit. It has everything you need to get started including the casting materials and mold making materials. I have this kit and I use it for some of my tutorials. It actually will save you money because it gives you reasonable quantities of the varous needed things. You would pay more if you try to buy things separately. It also comes with a DVD that shows you exactly how to do everything.
|