Diorama Making Banner

Home

Home

Youtube graphic
I have a youtube channel with over 1000 Videos!


Become a Patron

Wills Pinterest !


Tutorials

Will's Big Dioramas

Fast Tutorials

Types of Dioramas

Diorama Themes

Time Periods

More

Tools/Supplies

More Stuff


Will
Hi, Thanks for visiting my website. My name is Will and if you have questions
or would like to
contribute projects or ideas you can contact me Will

Make a Game of Thrones Diorama
Part 4: Making the Landscape and Terrain

In this part of the tutorial we make the base and landscape of the diorama. We use standard diorama making techniques for creating landscape.

Part 1 (the beginning) of this tutorial is here including the video


drawng the details on the base

Now we take a look at the drawings we made. We use these drawings as a reference for developing the landscape of the diorama. Draw right on the foam where the various buildings, structures, hills, paths and details are going to go.

make the hills

Our diorama doesn't have any sharp or prominent details. it is mostly flat with a few hills. So we build up those hills like shown here. Those are strips of cereal box cardboard taped down to the surface of the diorama. Underneath those strips is crumpled balls of newspaper so they retain their hilly shape.

Wire form

You can even use something called wireform. Which is a hobby material similar to window screening. But it can be shaped in any way you like and it retains it's form. You can shape hills with it and tape those hills down to the diorama.


Plaster cloth

Next we are going to create a layer over the whole diorama. This will be the ground so to speak.

We do this with a product called plaster cloth. Which is a cloth embedded with plaster. The same stuff that is used to make a cast if you have a broken arm. It is easy to use and dries into a hard shell.

You can do this same thing with paper mache if you prefer. It is quick and cheap.

Making Paper Mache: Cut strips of newspaper approximately 2-4 inches wide. Mix two cups of water with two cups of regular flour and add 1 tablespoon of salt. Stir that up until nice and smooth. Now you can dip the strips in it, wipe off the excess and use that instead of plaster cloth.


Woodland Scenics Plaster Cloth, 10sf


Applying Plaster Cloth

Now you wet the plaster cloth, wipe off the excess and cover the whole top surface of the diorama with it. Overlap all those strips. each strip should overlap other strips.


The terrain base is done

And that's it. The surface of the diorama is covered in plaster cloth (or paper mache) and it looks great. The big thing about this is that you have an actual landscape not just a flat surface. The slight hills make a big difference in how it looks.

Couple of tips: While this plaster is wet you can actually dip your fingers in water and smooth it out some more. Or use a sponge. And, once it has dried you can sand it. It is very durable. And at any point after it has dried you can even apply a second coat to make it even stronger.

Also! This stuff is pretty durable, you can cut portions out with a knife if you need to. This includes cutting hills down or even completely out so you can re make them.


Paint the base colors

Now we paint it. The majority of this scene is snow so most of it gets a couple of coats of white. But, the path and the area of the castle grounds is a dirt color so we paint all that in too along with the path.

You can do multiple coats. But we are actually going to cover all of this with various terrain materials so you don't have to be really detailed with this. You should just make sure that all the raw materials of the diorama are covered by paint.

Let's add some terrain textures

Add terrain textures

Now we add some terrain textures to the scene. For the path we can add the woodland scenics turf. Or you can use pencil shavings like the picture here shows.

And for the majority of the snow covered diorama you can sprinkle on Woodland Scenics snow or you can use baby powder like I show in my make your own snow tutorial.

Note: To adhere the textures to the diorama you have a couple of options. You can use a spray on adhesive or you can make a solution of white glue mixed 50/50 with water and brush that on then sprinkle on the textures.


NextLet's continue on with the tutorial and make the trees


Will's Book on Diorama Making

Will's Book

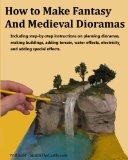
How to Make Fantasy and Medieval Dioramas

This books shows you how to make fantasy and medieval dioramas using many commonly available tools and materials. There are over 100 pictures and illustrations showing you how to make great dioramas in fantasy and medieval styles. Chapters include basics, water effects, terrain tips and special effects like electricity and small motors. Tutorials include how to use foam, plaster of paris and paper mache to make great looking dioramas.