How to Make a World War 2 Diorama - Part 6 Making Mud and Building Rubble
In this part of the tutorial I show you how to make realistic mud and realistic rubble and add them to your diorama. This is really not that hard and I will give you several different options and some advice on scratching up some materials cheaply. Mud is a very important part of many World War dioramas and lots of people send me email asking me how to do it.
To make realistic mud you only need two things. First off you need some brown acrylic paint, almost any shade of brown will do and this shade will of course depend on the scene of your diorama. It should closely match any surrounding dirt terrarin. Secondly you need some kind of a product that will give the colored paint some body and allow you to shape it a bit. I have three different products that you can use to do this.
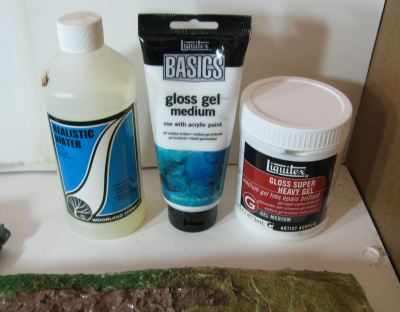
The picture above shows these three products. You don't need all of them. You only need one and here are some of the specifics of each one.
The first product on the left is called Realistic Water ( Realistic Water, 16 fl oz ) This is a liquid material that has almost the consistency of honey, but is easier to pour. You can simply add a small amount of paint or dye to this and pour it right into the muddy areas of your diorama. This is the easiest mud making method. But you have to watch this stuff if you want to add some shape to the mud. Let's say you want to add tank or tire tracks to the mud. You have to give this several hours so it gets tacky then add the textures.
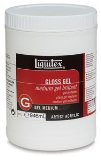
The second product (this is my preferred method) is something called Gloss Gel Medium ( Liquitex Gel Mediums ). This is an artist product and you can get it online or at stores that have supplies for artists such as Michaels or AC Moore. It is a thick liquid kind of like a melted marshmallow. It dries transparent and you just add some coloring to it and brush it onto the diorama where you want to mud to go. The thing about this product is that it has a lot of height to it. You can build it up and brush it into shapes without having to wait for it to start drying. In effect you can paint it into rough three dimensional shapes so there are patterns and imprints in the mud.
The thrid product is Gloss Super Heavy Gel and it is very similar to the medium Gel except that it is very heavy and you can build it up into shapes that are quite significant.
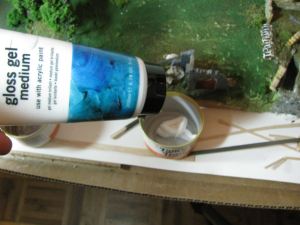
Whichever product you decide to use put some in a small container.
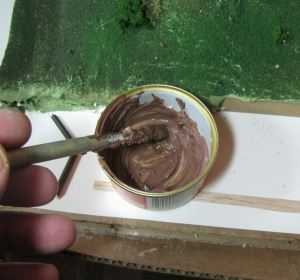
Mix it with a small amout of paint or dye. You can tinker with this but go easy because the paint goes a very long way.
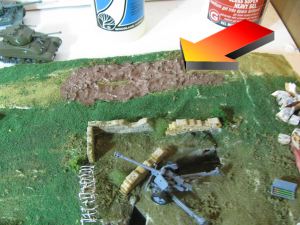
Apply it to the diorama and start brushing it into shape. Remember that mud settles into the low parts of terrain so put it in low parts of your diorama.
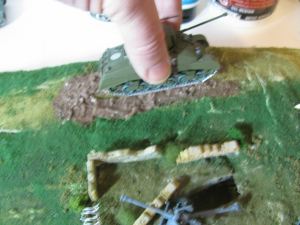
Once it starts to get tacky you can use your tank to imprint track marks in it. You also might want to use a little bit of it to apply mud to the side of the tank. This way the color of the mud on the tank matches the color of the mud.
![]() Let's Continue on to the Rubble Making
Let's Continue on to the Rubble Making
RESOURCES
Realistic Water, 16 fl oz - No mixing required. It is ready to pour.
Liquitex Gel Mediums - 32 oz, Gel Medium, Gloss
You might also want to try:
- A heavy-bodies, moldable product that will hold it's shape
- Use to create pond ripples, waterfalls or rapidly moving water
- Dries clear in about 24 hours
- 8 fluid ounces
Water Effects models waterfalls, rapids, or churning water. No mixing required. Pour directly from bottle. Water Effects dries clear and is non-toxic. Flexible, therefore easy to model and is water-soluble for easy clean up.
- Index
- What is a diorama?
- A short history of Dioramas
- Diorama Books
- Painting Miniatures
- Diorama Ideas
- Diorama Examples
- Diorama Making for the artist
- Diorama Making supplies & Tools
- Dioramas by Web Visitors
- Printable diorama box
- Diorama Images
- Diorama Making Videos
- Diorama words, terms and definitions
- Waterfalls and water in dioramas
- Dioramas Made by Charles
- Dioramas Made by Joseph
- Dioramas made by Marshall
Will's Big Diorama Projects
- The Wall Diorama
- Storm The Castle Diorama
- The Medieval Village
- The 300 Diorama - Battle of Thermopylae
Types of Dioramas to Make
- Paper Dioramas (Tatebanko)
- WW2/Fantasy
- Action Figure Diorama (IronMan)
- Egyptian Diorama
- Military Dioramas
- Jack and the Beanstalk
- The Secret Grotto Diorama
- Make a waterfall diorama
- How to make a waterfall
- Rock Climbing diorama
- How to make a Paper Mache Diorama
- Diorama inside a lightbulb
- Insect Maker Diorama
- Mississippi River with Indians
- Really creative shoebox diorama
- Dinosaur Diorama
- Make a secret diorama
- Wildlife Diorama (African Oasis)
- Firefly Diorama with real blinking lights
- Rainforest Diorama
- Ocean Diorama
- Shadowbox diorama
- Make a shoebox diorama
- Massive Castle Diorama
- Diorama Examples
- Polymer Clay
- The Battle of Thermopylae Spartan Warrior Diorama - A tutorial
- HALO Diorama
- Wizards Tower Foam Diorama
- Cemetary Diorama
- Trench Warfare
- Simple Nature Diorama
- Water Woman Diorama
- WW1 Diorama submitted by a web visitor
- Christmas Holy Land Diorama submitted by a web visitor
- New and easy Rainforest diorama
- New Section: Making WW2 Dioramas and Miniatures
- Castle Siege Diorama project
- Easy water scene diorama making
- Roman Bath
- Colonial Times Diorama
- Desert Diorama
- Tree diorama that changes over time
- Make a Triarama
- Bridge with Dragon
- 3 Succubi Fantasy Diorama
STORES
- Woodland Scenics Terrain Materials
- Revell Model Kits
- Tamiya military Models
- Woodland Scenics Turf and terrain Materials
- Diorama Making Books
- Diorama Kits
- Scene-A-Rama diorama Kits
- Plastic Scale Dinosaur Diorama Kits
- Harry Potter Dioramas
- Diorama Foam
- Conflix Medieval Buildings for Dioramas and wargaming
- Tatebanko Paper Dioramas
- Woodland Scenics Grand Valley
- Woodland Scenics rolled Grass -(RG)
- Diorama Accessories
Plastic Models
- Tiger Tank 1/72 Scale
- Sherman Tank 1/72 Scale
- How to make plastic models: Tips, Tricks and techniques
- Painting Miniature German Soldiers (1/72 Scale)
- Painting Miniature American Soldiers (1/72 Scale)
Check out the Diorama and Miniature store
*Short Diorama Tutorials*
- Pencil shavings into terrain textures
- Use Plexiglas to make bodies of water
- How to make bricks
- Make Water Effects
- How to make a waterfall
- How to make snow for your diorama
- How to Make realistic tufts of grass
- How to make trenches
- Terrain making with foamcoat
- Creative terrain shell making
- How to make Miniature Trees
- How to Make rubber rock and wall molds
- Motorize a drawbridge on your diorama
- Using foam to make a diorama
- How to make good looking rubble using cork
- Creative Shoebox Diorama Ideas for School
- A foam based diorama with water from start to finish
- Some great WW2 diorama trench making tips with video
- How to make plastic models- Tips tricks and techniques
- A look at some diorama buildings
- How to make barbed wire
- How to make mud in a diorama
- Diorama Tip - plastic models and resins
OTHER PROJECTS
Make a cardboard Samurai Sword
Make a Cardboard Medieval Shield
How to make a fantasy shadowbox
---------
All Materials, unless otherwise stated are Copyright©2001-2015
Kalif Publishing and StormtheCastle.com

Hi, Thanks for visiting my website. My name is Will and if you have questions
or would like to
contribute you can
---------


