We will make the whole diorama first then we will move on to how to do the waterfall and water effects. If all you need to learn is how to make the waterfall I have that tutorial right here
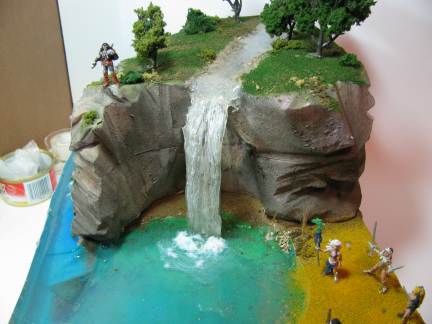
First let's get a look at the completed diorama so you can get a sense for what we are making. As in all dioramas It's a great idea if you can tell a story. This is a very basic thing that takes a scene to new heights. A diorama is a moment frozen in time and hopefully there is a little story that will add something interesting the viewer will either understand what has happened or what will soon happen.
For this diorama the story is a typical swords and sorcery story. We have an adventurer who is walking through the woods and he stumbles on a secret little grotto... and of course there are some beautiful warrior women in bikinis and they will soon be taking a swim. So, that's the story.
Let's Get started!
As with all diorama making you should always start out with some sketching so you can get a feel for what it will look like. You should do side view sketchings and you should also do a blueprint style sketch that shows how things are laid out on the board.

this is a blueprint style drawing it simply shows where things will roughly be laid out on the board. The water, the mountain, the waterfall etc.
You can use this to transfer the pattern right to the board you select.
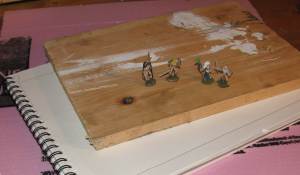
This picture shows the figures, the board, the drawing and the foam I am using to make the diorama.
The foam is called foamular and it is a 2 inch thick insulating foam sold in home improvement stores and hardware stores. You can also get sheets of suitable foam in hobby shops and craft shops. It typically comes in white.
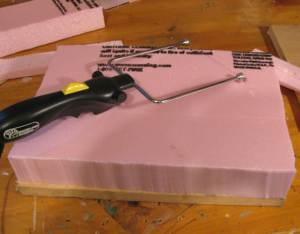
I glue one sheet of foam directly to the board and this is the base of the diorama. The black handled tool is called a hot wire foam cutter. It is very convenient for cutting and shaping the foam. You can buy these for about thirty dollars. But it is not mandatory. You can slice and shape the foam any way you want, with small knives, a jigsaw, hacksaw or xacto knives.
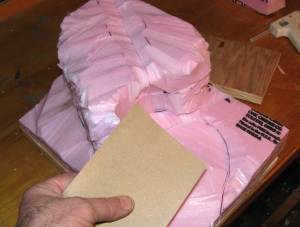
Glue layers of the foam on top of the base and shape the layers with hot wire cutter, knives, sand paper etc. Get it to the landscape you are looking for.
You can use any glue to attach them together or you can use a hot glue gun (which is preferred because it dries in seconds.)
Once you have the rough shapes of the terrain done you move on to the smaller details. Use smaller tools to carve small details. I carved a river down the middle of the top section and a smoothed out most of the ridges you can see. But I left a lot of the ridges along the side of the big cliff.
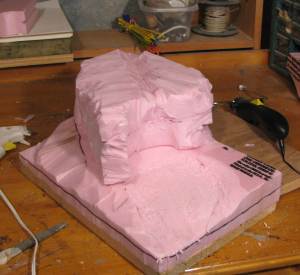
The terrain carving is just about complete in this picture. Notice How I made the bowl shape for the grotto pond of water?
 Let's continue on with this diorama and do the painting and prepare it for the water effects Let's continue on with this diorama and do the painting and prepare it for the water effects
SUPPLIES
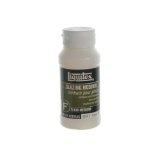 
Liquitex Glazing Medium 118ml (4 oz)
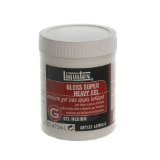 
Liquitex Gloss Super Heavy Gel Medium 473ml (16 oz)
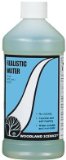 
Realistic Water, 16 fl oz
This is the water product that I use to make the surface water of the pond and the river. It is pretty nice stuff and very easy to use. You just pour it in and let it dry. No mixing required. But, you can only pour it to about 1/4 inch thick. Then let it dry and pour another layer. You can speed up the drying process with a fan.
 
Water Effects, 8 fl oz
- A heavy-bodies, moldable product that will hold it's shape
- Use to create pond ripples, waterfalls or rapidly moving water
- Dries clear in about 24 hours
- 8 fluid ounces
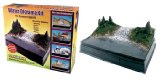 
Scene-A-Rama Water Diorama Kit
Use this kit to create water areas for your diorama. It includes everything you need to make waterfalls, ponds, rivers, rapids, oceans, waves, or anywhere water is your main focus.
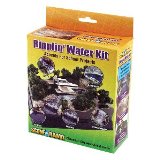 
Scene-A-Rama Ripplin' Water Kit
Use this kit to add realistic-looking water areas like waterfalls, rapids, splashes, waves, rivers, lakes, ponds, streams, beaches and pools... any still or moving water!
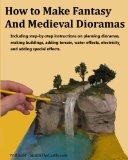
Check out my book on how to make fantasy and medieval dioramas. I put all my best techniques and tricks in this book!
How to make Fantasy and Medieval Dioramas
Products and Resources
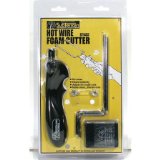 
Hot Wire Foam Cutter
Realistic Water, 16 fl oz
This is the water product that I use to make the surface water of the pond and the river. It is pretty nice stuff and very easy to use. You just pour it in and let it dry. No mixing required. But, you can only pour it to about 1/4 inch thick. Then let it dry and pour another layer. You can speed up the drying process with a fan.
Water Effects, 8 fl oz
- A heavy-bodies, moldable product that will hold it's shape
- Use to create pond ripples, waterfalls or rapidly moving water
- Dries clear in about 24 hours
- 8 fluid ounces
Scene-A-Rama Water Diorama Kit
Use this kit to create water areas for your diorama. It includes everything you need to make waterfalls, ponds, rivers, rapids, oceans, waves, or anywhere water is your main focus.
Scene-A-Rama Ripplin' Water Kit
Use this kit to add realistic-looking water areas like waterfalls, rapids, splashes, waves, rivers, lakes, ponds, streams, beaches and pools... any still or moving water!
|