This picture shows the terrain after it is completed. This is what we do in this part of the tutorial.
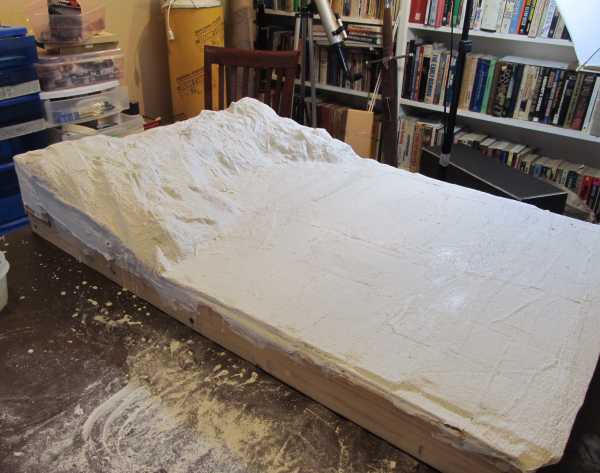 ' '
Now lets make this terrain structure.
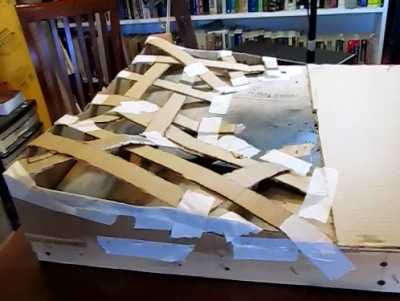
You should do some drawings of your terrain first so you get a sense of how it will be laid out. Where will the flat parts be and the hilly parts be? Will there be any cliffs or slopes?
Once you know how this will be laid out then you use strips of cardboard to create an armature. This reflects the terrain you want. In this diorama there is just one end that is hilly. The rest is flat. So I built the cardboard frame just on that end.
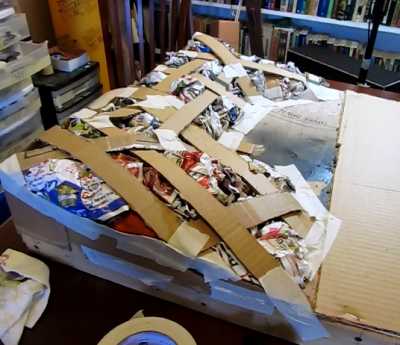
Be sure to interlock the various strips of cardboard. Once you have it looking the way you want you go ahead and stuff that all with crumpled newspaper.
This will have an effect on the look of the final terrain and you want to stuff it all pretty tight for strength. It will hold up the shell while it is drying.
There are several ways you can plaster the terrain. You can use plaster of paris and soak strips of paper towel in it. I have a tutorial with video on how to do that (right here). But in this tutorial I am going to show you the easiest, cleanest and best way to do it.
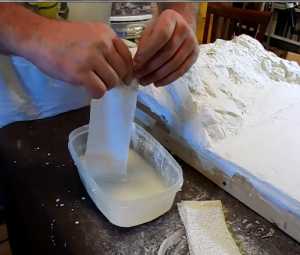
You use a product called plaster cloth. It is strips of cloth with plaster embedded in it. You cut a piece, soak it quickly in water, wipe off the excess and apply it to your terrain.
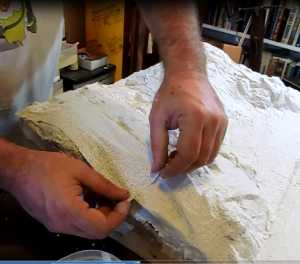
When you apply it to the terrain be sure to overlap the strips. This will give the hardened shell some strength. Typically it is the rule of 1/3rds where 1/3rd of a strip overlaps another strip.
Once this terrain dries you can stilll work on it by cutting it, drilling it or adding more plaster cloth.
You can even add more cardboard strips and do some more on the terrain.
Okay! Let's return to the main page for this diorama
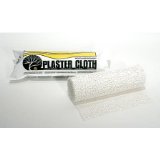
Plaster Cloth, 10sf
Here is plaster cloth that I have used many times. It is made by Woodland Scenics. They are the premiere scenery and terrain company. This is the exact stuff that I use in this tutorial. The link will take you to amazon.com where you can buy it. And you can often find it at arts and crafts stores like Michaels or AC Moore.
The Three different materials for casting the diorama terrain shell
The basic premise for making this shell is to place strips and pieces of material right on the frame you built. The strips are soaked in some kind of material that will harden and there are three materials that I commonly use for this process. Let's take a look at the materials.
The first material is Plaster Cloth

Plaster Cloth This is the best option if you want strength, ease of use and speed. The cloth is already embedded with plaster so all you do is soak it in water for a minute then apply it right to your diorama. One bag (shown here) will do 10 square feet of diorama which is plenty to do the whole diorama in this project. This is also very fast because there is no mixing or fuss with plaster. If you want the easiest way to go then get some of this product This is the best option if you want strength, ease of use and speed. The cloth is already embedded with plaster so all you do is soak it in water for a minute then apply it right to your diorama. One bag (shown here) will do 10 square feet of diorama which is plenty to do the whole diorama in this project. This is also very fast because there is no mixing or fuss with plaster. If you want the easiest way to go then get some of this product 
The second material is Lightweight Hydrocal
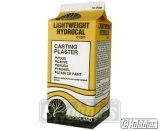
Lightweight Hydrocal
This is my preferred method because it makes the absolute best terrain and is very easy to work with. Can be carved, painted, sculpted and just worked with. It also has the smoothest look when dried  To use this material you mix hydrocal with water in a container then you soak strips of paper towel in it and appy the strips to your diorama. The downfall of Hydrocal is that it dries very fast so you can only mix a small amount at a time before you have to clean up and make another batch. To do a diorama of the size I am doing here takes about 8-10 small batches of hydrocal. This single carton has more than enough in it. To use this material you mix hydrocal with water in a container then you soak strips of paper towel in it and appy the strips to your diorama. The downfall of Hydrocal is that it dries very fast so you can only mix a small amount at a time before you have to clean up and make another batch. To do a diorama of the size I am doing here takes about 8-10 small batches of hydrocal. This single carton has more than enough in it.
PLASTER OF PARIS 5 LB.
Plaster of paris is very similiar to hydrocal but with a couple of differences. It is less expensive which is a plus and it dries a tad bit slower which gives you more time to work with it. But it is caustic and you need to take reasonable precautions not to get it on your skin. Wear long sleeves and gloves and follow all safety instructions  Otherwise it is fine and gives a nice shell on your terrain. You do it the same way as hydrocal: Mix it with water then soak paper towel strips in it and appy to diorama. Otherwise it is fine and gives a nice shell on your terrain. You do it the same way as hydrocal: Mix it with water then soak paper towel strips in it and appy to diorama.
Okay, we can now move on to the next tutorial in this series where I will show you how to paint and texture the terrain. I also have a video below that shows the plastering process.
Check out my book on how to make fantasy and medieval dioramas. I put all my best techniques and tricks in this book!
How to make Fantasy and Medieval Dioramas

Do you like making projects and exploring a variety of hobbies?
Sign up for my free newsletter. I give you regular updates on hobbies and projects you can make. it is totally free and I don't share your email with anybody.
|
![]()


 '
'


