One of the challenges with this project is aging the bus. But it is so worth the effort. Marc shows us how he did this.

Marc has also made a military diorama right inside a helmet. Cool project. You can check that out here.
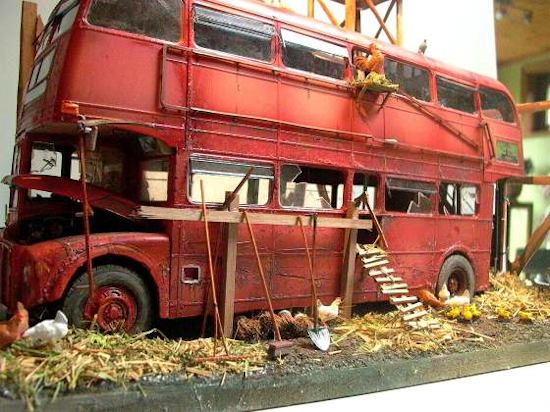
Here is an overview of some of the techniques that Mark covers in this tutorial.
- Weathering by applying the " SALT - TECHNIQUE"
The reason to start such a project is very simple.
Namely: Weathering and aging techniques .
I asked myself .... the techniques described in various forums and literature on the
defenses of military models same techniques I could apply in civil projects .
Adjust - - The offer in the world of military modeling techniques to defend to
modify - camouflage - to " improve ... " --- then I have the English terminology
( Wheat honor - chipping ..... modulation techniques ... etc ... ) are omitted , .... is gigantic .
So much so that you no longer threatens the forest to see the trees .... But , and that is certainly said
be ... also very interesting .
( The commercial aspect of it left aside ... )
Let me try this but .....
Ok ... Looking for a suitable project . You see a lot of vehicles on the road with us that are full of dust and mud , mainly large yard trucks and cars ..... This is perhaps an idea. The ordinary car qualifies .... Many cars ( also later cars) with quite a lot of rust and damage.
There should also be able to sit in something .... But my inspiration is almost immediately flared up at the launch of " The London Bus " ( a few years ago ) .
A diorama in which a Retro London Bus is incorporated and in which I could enjoy myself 100 %
in the defenses - rust and give a new life to a static model . The shiny bright red color of these new buses was a real challenge to go this ' Wheat honor " - defenses .
And I combined the bus model with miniature chickens and pigeons. It is something like Old McDonald would have!
A bit of historyof the bus- facts and figures :
• Production started in 1956 ( my birth ! ! )
• Two types of engines : - 9.8 l 6 cyl engine leyland
- 9.6 l Scania engine 6 cyl .
• There are about 2,000 of which about 1,000 remain
• Originally , they had to go 17 years
But some even more than they did about 50 years .
• 88 seats . Multiple pitches
• Steel construction although later aluminum parts
were added. ( in the frame)
A. materials
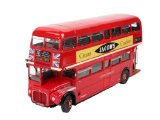
- Kit REVELL The london bus
Scale 1/24
Two possible versions can be made . One with the original leyland engine but without the big
flashy billboards on the side of Jacobs .
The second is for me less interesting version . Scania engine but with the Jacobs advertising.
The Leyland version lent themselves perfectly to add "wheat honor " .... Next time I let me however
inspire you to defend . large decorative patches
Here is the kit, available on Amazon.com Revell of Germany 1/24 London Bus
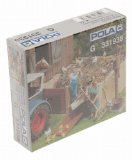
Pola 331938 16 Hens and Chickens
POLA - Figures 1/22 , 5 Kiekens 19 , - €
There are a total of 15 chickens in the box
-2 Roosters crowing
-7 Hens 1 with chicks
-6 chicks
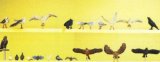 PREISER 10169 PIGEONS CROWS & BIRDS OF PREY HO SCALE MODEL TRAIN FIGURES PR10169 PREISER 10169 PIGEONS CROWS & BIRDS OF PREY HO SCALE MODEL TRAIN FIGURES PR10169
- Preiser 1/25 Elastolin Duifkes
6 pigeons painted for 15 , - € Ditto in finishing
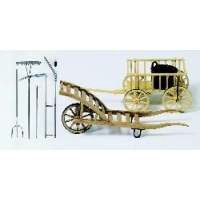
- Preiser 1/25 handcarts and materials
Amazon doesn't currently have this hand cart kit but it does have lots of wonderful miniatures by Preiser: Preiser HO Figures on Amazon
- Surface - diorama :
MDF - board of 22 thick
- Straw - made of dried grass and shredded raffia
surpluses of wooden lattekes and small wood stove plankskes
- B.Bouwverslag
Once that had gotten the idea form in my head I knew what I was going places and where it had
come - I meticulously planned the different steps .
The implantation of the pigeon on the roof was a must for me .
This would all give a vivid impression .
It was in other words not just a static model, but there would be a certain dynamic
should radiate from .
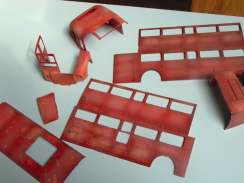
It goes without saying that I started the London bus .
It must be a REVELL model released .
Please Difficulty 5 . Ie ... it it si not the easiest . Highest difficulty .... You need to use 4 or 5
hands to hold everything together while.
1.Check out the assembly instructions for the bus. They are very clear.
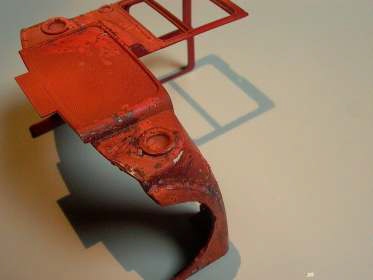
2.Making Dents and Scratches
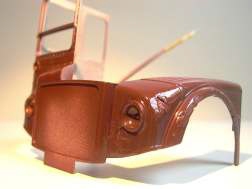
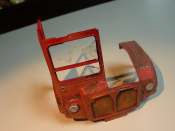
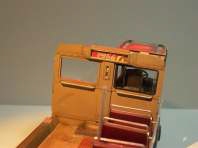
The final result is determined by what you have in your head . What it looks like is determined from the beginning . The bus was scratched in some places and full of bumps and dents . So I started digging the untreated plastic to " damage " as if there was a car along scratched . with this issue a beautifully finished and extremely detailed you paste and paint at the same time. Along the lights a few dings and dents . Applied with a sharp knife (Sometimes it hurts to ruin a beautifully made sprue) I had already decided at this time to show the coach from the left.
In other words , to put the bus on the diorama so that the left side would be the most visible . Here it is suggested that the bus has a traffic accident had a condition involving another vehicle that scratched it along the side in an accident.
Scrapes applied with a heated screwdriver to depth to understand the damage The place where the chicken is sitting I cut out thanks to a dremel with a jigsaw blade. Also that place is chosen on the basis of predefined my earlier ideas.
3.Primer
Everything is added in layers. The first layer is a primer because we plan to to apply ifferent layers of paint for the weathering process . Eventually there will be as many as 7 applied layers. Therefore, this bonding layer very important.
The primer is a grey vallejo. Various colors for base layer may Really. Very good quality. Ultrafine grain paint , so every detail suits While well covered by the primer .
Applied with paint gun ( airbrush popularly ) Due to the fact that in the plastic we have deeply scratched
in order to make the damage is the fact necessary to impose a fine layer The cleaning of the airbrush is a breeze with the supplied airbrush - Cleaningset ( also Vallejo ) . If not available ... a good soap solution
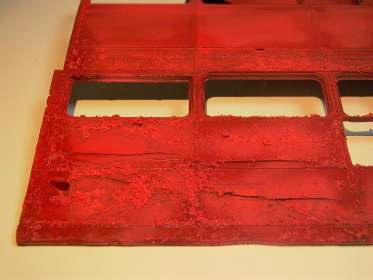
4. the rust layer
In order to get the final impression rusted , it is necessary to first make a dark brown rust layer.
The whole body of the bus get sprayed Aqua hobby ( Gunze ) H 17. This is how a matte brown rust color should be. Glossy paint is great but it was not so important for this purpose. In principal, this would be a dark brown - chocolate -like color should be in a matte implementation . Well .... the entire series arro ... Naturally single and only those places where the paint would be . That is where the damage applied been. Have taken the shine off by brushing with light a matt varnish from Vallejo .
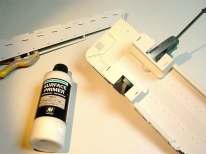
5 . Salt - technique
And it is this typical technique I wanted to practice with this project . I have already tried various techniques to wheat honor , including the advanced spray technique But without satisfactory results .
Of course the saying applies here again . Practice makes perfect . But guess what . Not every hairspray is
same and you never know when you have a good aerosol hairspray . (some expensive brands are bad - and the cheapest hairsprays are sometimes the best) Therefore Gimenez now a small bottle marketed by AK interactive the perfect mix for the application of this technique would have . Therefore, dear friends, I do not ..... Pepper Duration and still get nowhere ... It's too commercial be to ' t .... create scarcity in order to justify a high price is not for me . So I think the salt technique an ideal solution for earlier democratic set modellers like me. It's cheap . Salt is not too expensive . And it is always and everywhere at hand .
Easy to stock . it is not bad and it does not stink. Only advantages . It is with this technique ( and I think the only technique ) that lets you create a relief at the same time and also broken edges of paint incremented
begins to manifest
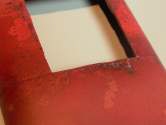
OK ... so I take a little salt in a bowl and mix with a little water until It is homogeneous like porridge . Closer to dry than wet. It must retain the granular structure. This mixture is then applied to the model with a spatula , or just with the fingers. Please note . Only where rust accumulation for the paint to provide a body . Check out your neighbors rusty car to get a real feel for how rust builds up on vehicles. . These wet salt grains remain very good stick on the brown sprayed layer .
Let this dry thoroughly . Once dry they get a very solid and hard structure .
6. the paintwork

And then .... the first layer ' ferari - red '
Due to the fact that the color of the bus , there ' is faded out to see, I had gradually the various
custom color coats.
- 1st coat of paint : Tamiya X -7 . Ganzend red.
Over sprayed on the dry salt grain structure .
I have made sure that the corners and edges ( edges of windows ) were well injected . 6T.t.z a
little more paint because that is the least visible aging .
On the picture you can see that the first " red X 7 glossy lacquer is sprayed so that they do not fully well
have to cover . This is also the preferred technique for airbrushing .
Namely spray several layers in succession .
E , n as said following this, a second coat of X -7 but only in the corners and edges .
- 2 paint layer :
The two layer is sprayed with Tamiya XF -7
Same ferari red color but custom finish.
Very lightly spray on large surfaces . Still continue to air and only give you the paint as to
treat parts originate .
( This is airbrush technique , refer to other articles )
This was followed by a "touch of yellow" as it is called .
namely the XF -7 mixed with a little XF -3 (yellow mat ) . This red paint colors tend to
store with aging and matter are . slightly orange from
And again colored a slightly smaller proportion of the ' faces ' here .
Mixing ratio about 1:4
Once sufficiently dried ( pretty quickly - two hours )
then followed by three layers, with the red - yellow mixture (1:4)
always was diluted with a little Matt White ( XF -2 tamiya .
At various places several layers are applied.
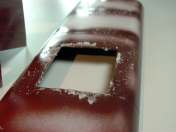
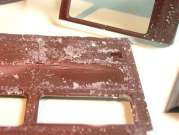
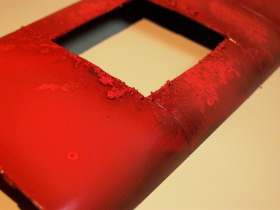
7.Strategic Removal of some of the salt grains
|
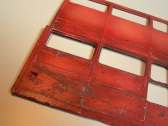
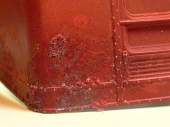
The dried salt has now been sitting for a few days and has been painted over several times . I was very curious about the result when I would scrape . Where the rust is backed up and blow formed under the paint of the bodywork.
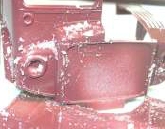
( see photo ) The transition from the curved body to the wheel coverings is still with salt filled .... and that's not staying . Where the salt is brushed and scraped the bottom layer is painted brown appear Grains of salt are removed with a hard brush and rag . In some places I had very hard rubbing and brushing . Salt can damn well get cooked right in. On the left are a few pictures of the final result . The grains have been scratched the bottom brown
( Actually dark brown ) see rust layer (see a few steps above ) and very rarely is there one metal shine forth scrubbing. deeper one bit Where the salt grains stick and broken off from the other grains you get the suggestion of an inflated rust spot ...... And this , dear friends is what I ultimately wanted to achieve QED ( Quod erat demonstrandum ) The damaged bus (the scratched and dented left front) is now good. The rust brown in color is particularly successful and my various coatings have complemented each other very well . I was and still am a happy man . |
8. finishing the inside
During this body work , I did not sit still and the inside of the bus further finished course .
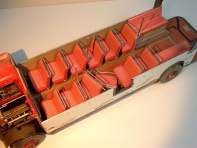
9.Accessories
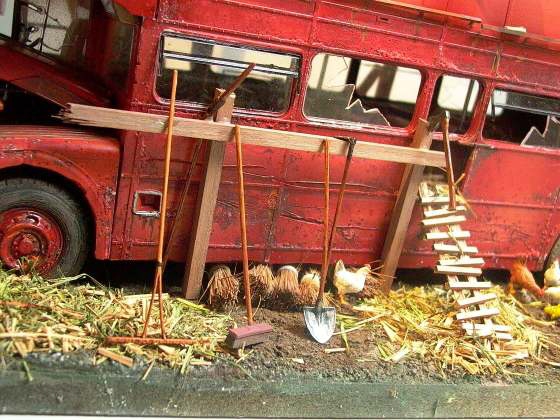
The rest of the equipment is made . Great to put together. The Preiser chickens , pigeons and handcarts are very well detailed and finished .
10.Diorama and surface.
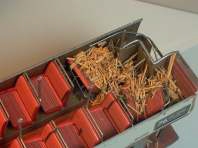
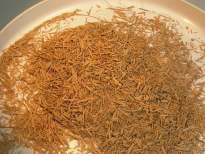
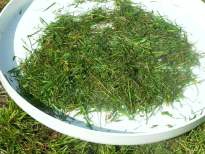 Hay and straw is made of a mixture of raffia (a kind of flax rope ), and dried grass. This gave me the good relationship to scale and place Hay and straw is made of a mixture of raffia (a kind of flax rope ), and dried grass. This gave me the good relationship to scale and place
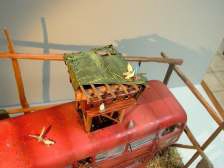 And my 1/24 project The ladder for the chicken and the contours of the barn are simply leftovers of firewood and model wood ship model . And my 1/24 project The ladder for the chicken and the contours of the barn are simply leftovers of firewood and model wood ship model .
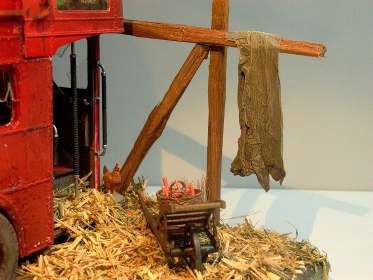
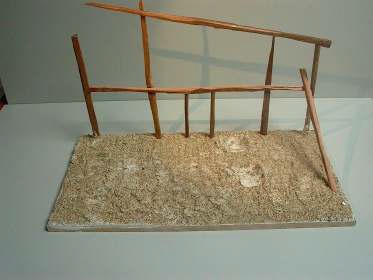
The loft is covered with a cloth , made of cleenex paper soaked in glue (ratio 1/1 glue - water) The carrots and fries of the farmer in the basket on the cart itself modulated with putty of Tamiya The shelf where the bus will be located on a MDF plate of 40/20 cm .
There are two holes drilled to glue with wood glue . The two extreme poles of the barn Then I have a wood screw drilled approximately every 5 cm . The reason for this is that the plaster better adhesion would have on the smooth surface of the MDF board . The rest is just and paste work just to be able to make an old dilapidated barn . Suggestion After the plaster ( Polyfila ) is arranged , I sprinkled the entire surface with a very fine mixture to bring to the surface a bit. structure.
Photoof the overall project .
Have fun ...... Marc Verhamme

Do you like making projects and exploring a variety of hobbies?
Sign up for my free newsletter. I give you regular updates on hobbies and projects you can make. it is totally free and I don't share your email with anybody. |